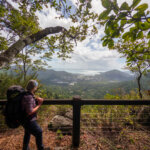
The Grampians (Gariwerd National Park) is to Melbournians, what the Blue Mountains is to Sydney-siders: about 2 hours away and bursting with natural beauty and opportunities for adventure. The 164 km Grampians Peaks Trail showcases the best the area has to offer. It starts from Mount Zero Picnic Area in the north and traverses a dramatic dragon’s-back series of ridgelines to finish at Dunkeld in the south.
During the development of the track I was curious to visit and answer some of the big questions people had about this ‘new’ route. Sure, it is new to many hikers today, but look into the past and you’ll see that keen bushwalkers have been using many sections (especially the tracks in the South) for decades. Dig a little deeper and you’ll see timeless connections the Jadawadjali and Djab Wurrung peoples have had to this Country for thousands of years.
Officially opened in November 2021, after these old tracks and routes were connected with extensive new track work, campgrounds and award-winning shelters, the Grampians Peaks Trail (GPT) sets out to be one of Australia’s best-known multi-day hikes and bushwalks.
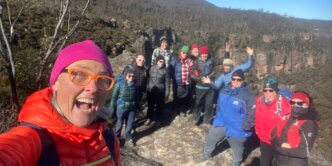
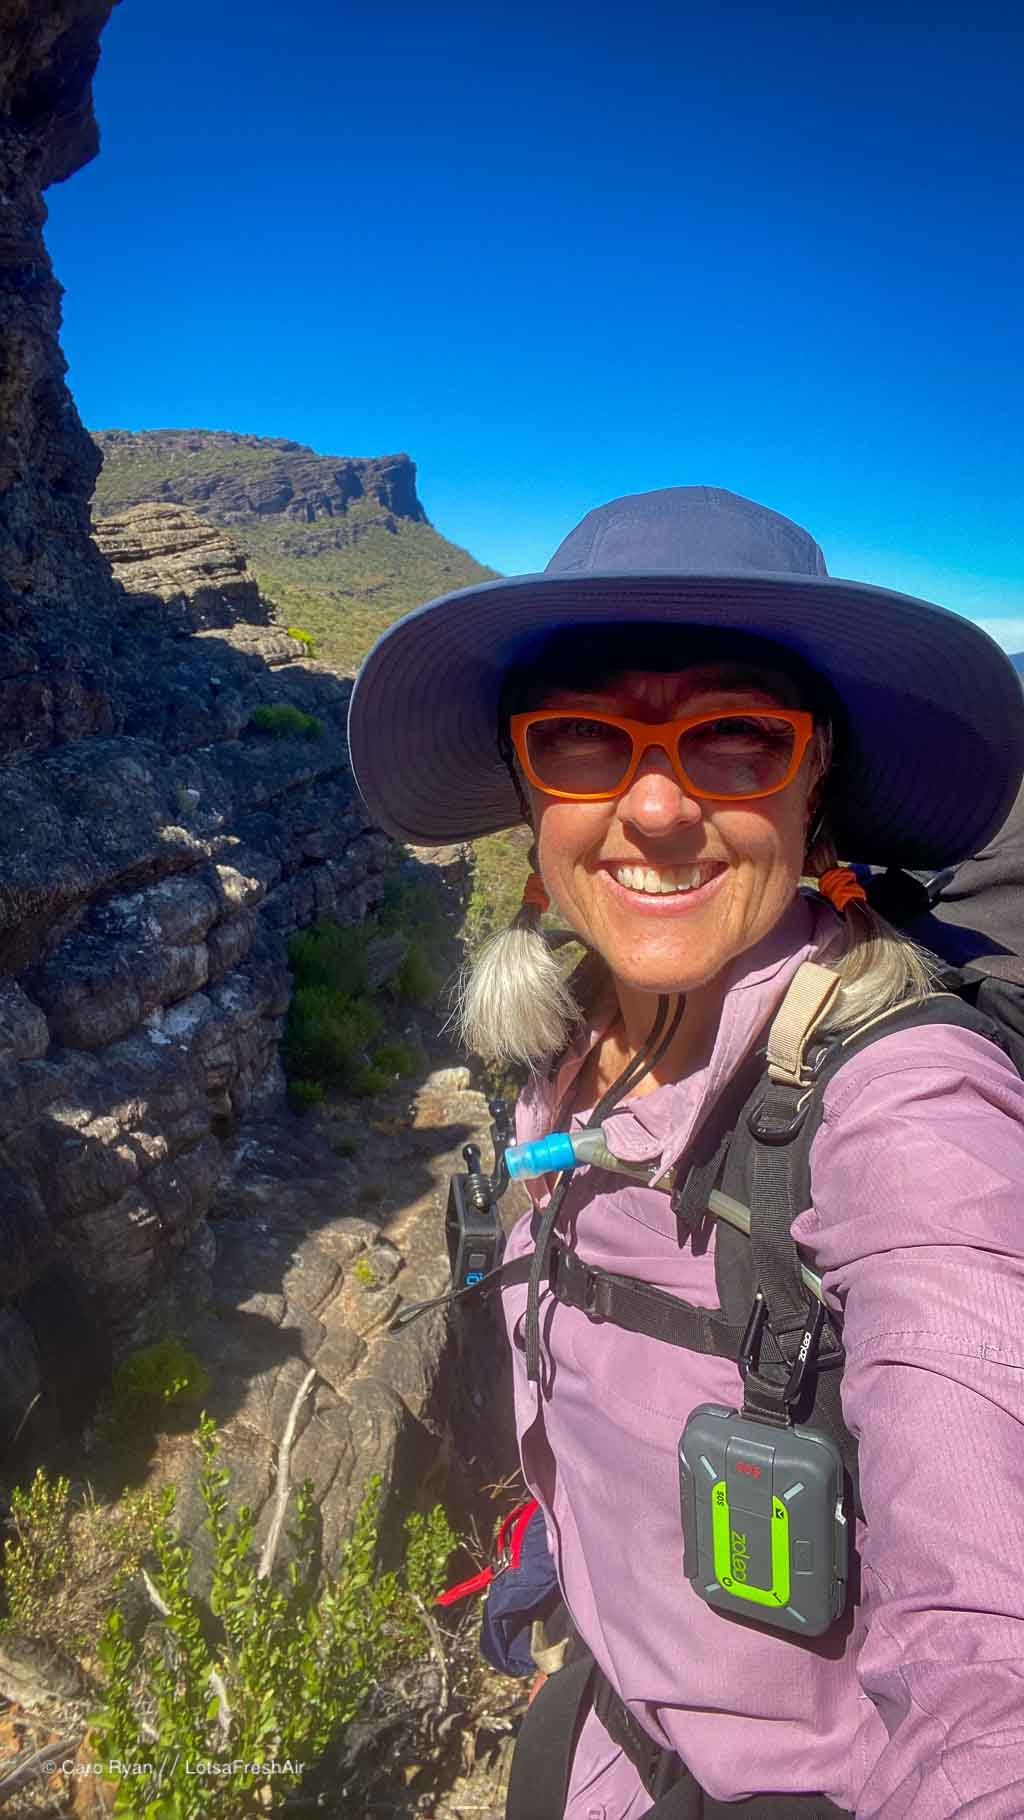
Keen to satisfy my curiosity (and love of a good adventure), I walked the full 164 km solo in March 2023 and used the suggested Parks Victoria itinerary of 13 days as my framework***.
I captured my journey in loads of different ways to help others understand what the track is all about and how best to prepare. You can check it all out on YouTube and Insta Stories, however this ultimate GPT article is hub of all the info.
- Grampians Peaks Trail YouTube Playlist
- Insta Stories
- Downloadables
- Where is the Grampians Peaks Trail?
- Track grading
- Getting to the Grampians Peaks Trail
- Best time of year
- What gear to take
- Nearest Town and Trail Hub - Halls Gap
- Where to Stay Halls Gap and Dunkeld
- How fit do you need to be?
- Food for the GPT
- Water
- Trail Accommodation
- Guided Tours on the Grampians Peaks Trail
- Grampians Peaks Trail on a budget
- Communications
- Taking care of the GPT
- Maps of the Grampians Peaks Trail
- Trail Sections
Grampians Peaks Trail YouTube Playlist
Insta Stories
Downloadables
Where is the Grampians Peaks Trail?
250 km northwest of Melbourne, the Grampians Peaks Trail traverses dramatic north-south ridgelines through the heart of Gariwerd National Park. It’s a track bursting with jaw-dropping vistas and natural wonders, perfect for adventurers seeking a multi-day hiking experience or folk looking for bite-sized day walk chunks.

It’s a challenging 164 km multiday bushwalk split into 3 sections: North, Central and South, and can be completed as a single thru-hike (usually over 11-13 days), or broken into shorter sections.
I headed out in March 2023 to experience the track for myself and see if it lived up to expectations: it did and I’ll definitely be back!
Track grading
How hard is the Grampians Peaks Trail?
Before setting foot on the GPT, it’s crucial to understand its challenges. The trail is no walk in the park – quite literally. Sections range from grade 4 to grade 5 in difficulty so proper preparation is key to an amazing experience.
The feedback from rangers, experienced locals and guides, is that many people attempt the full track and underestimate some of the physical challenges it presents. Teamed with overestimating their own capabilities and fitness it means that quite a few people find themselves in too deep and need to pull out.
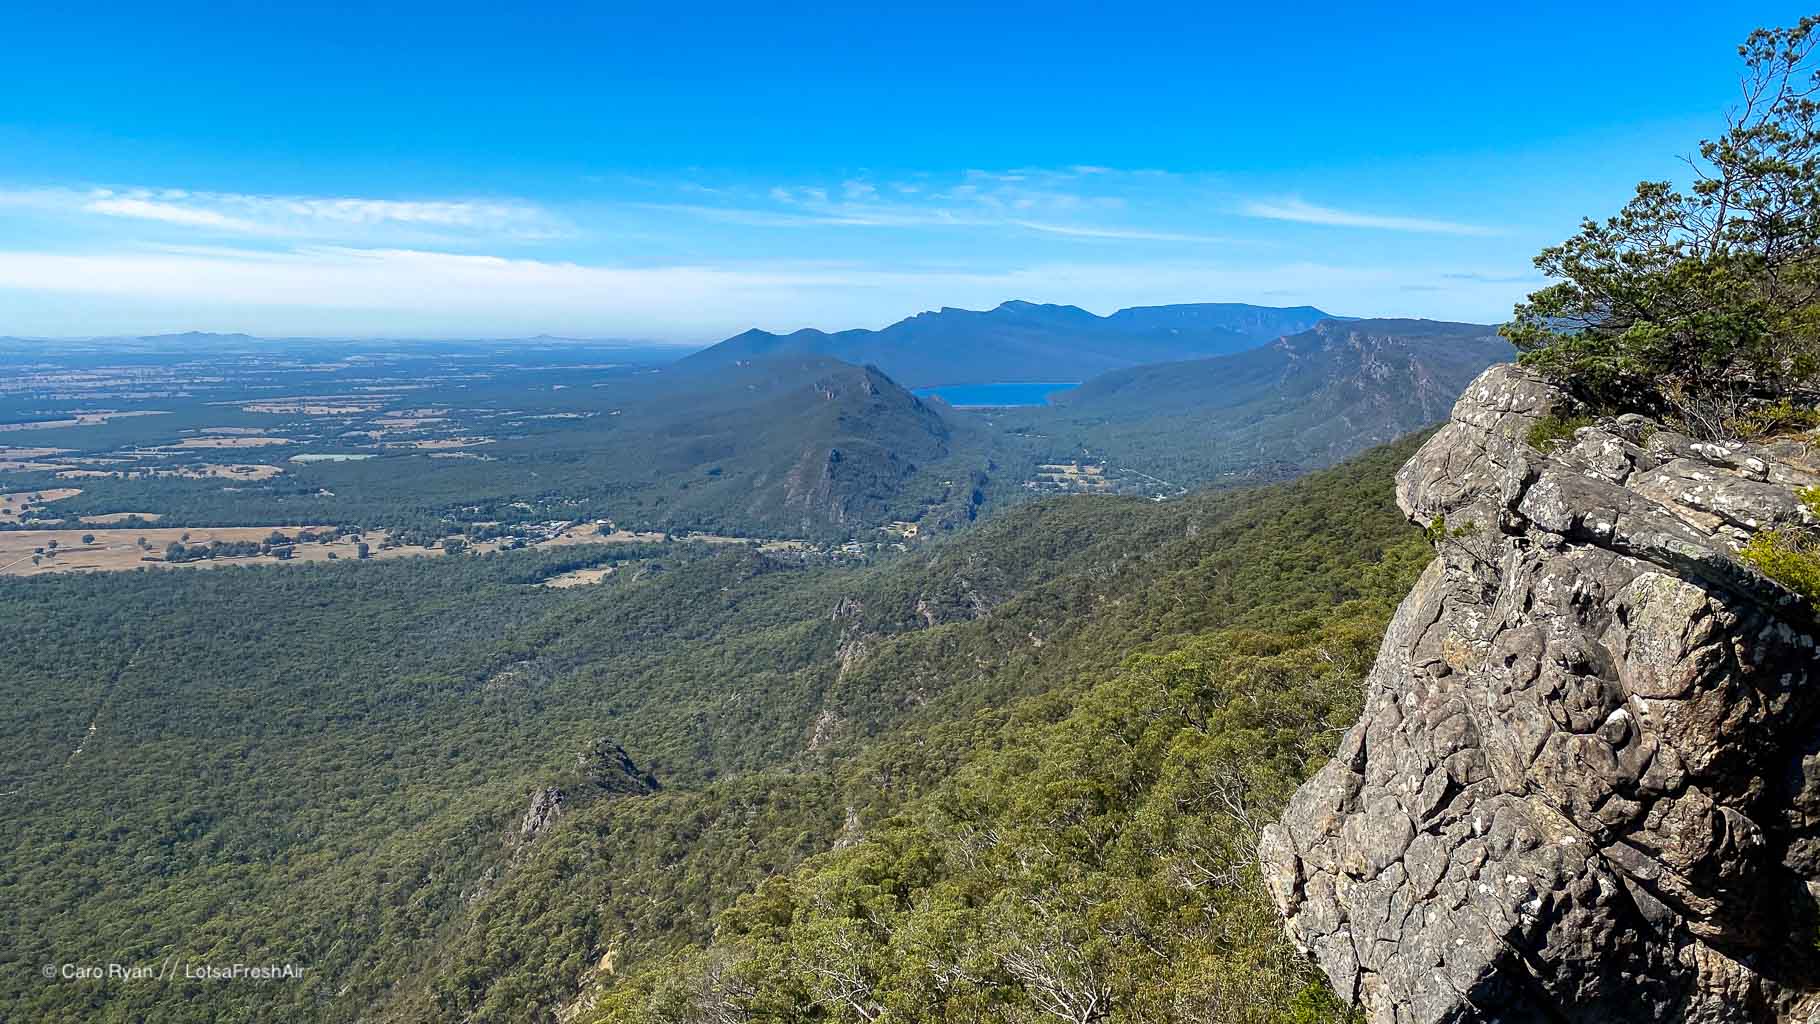
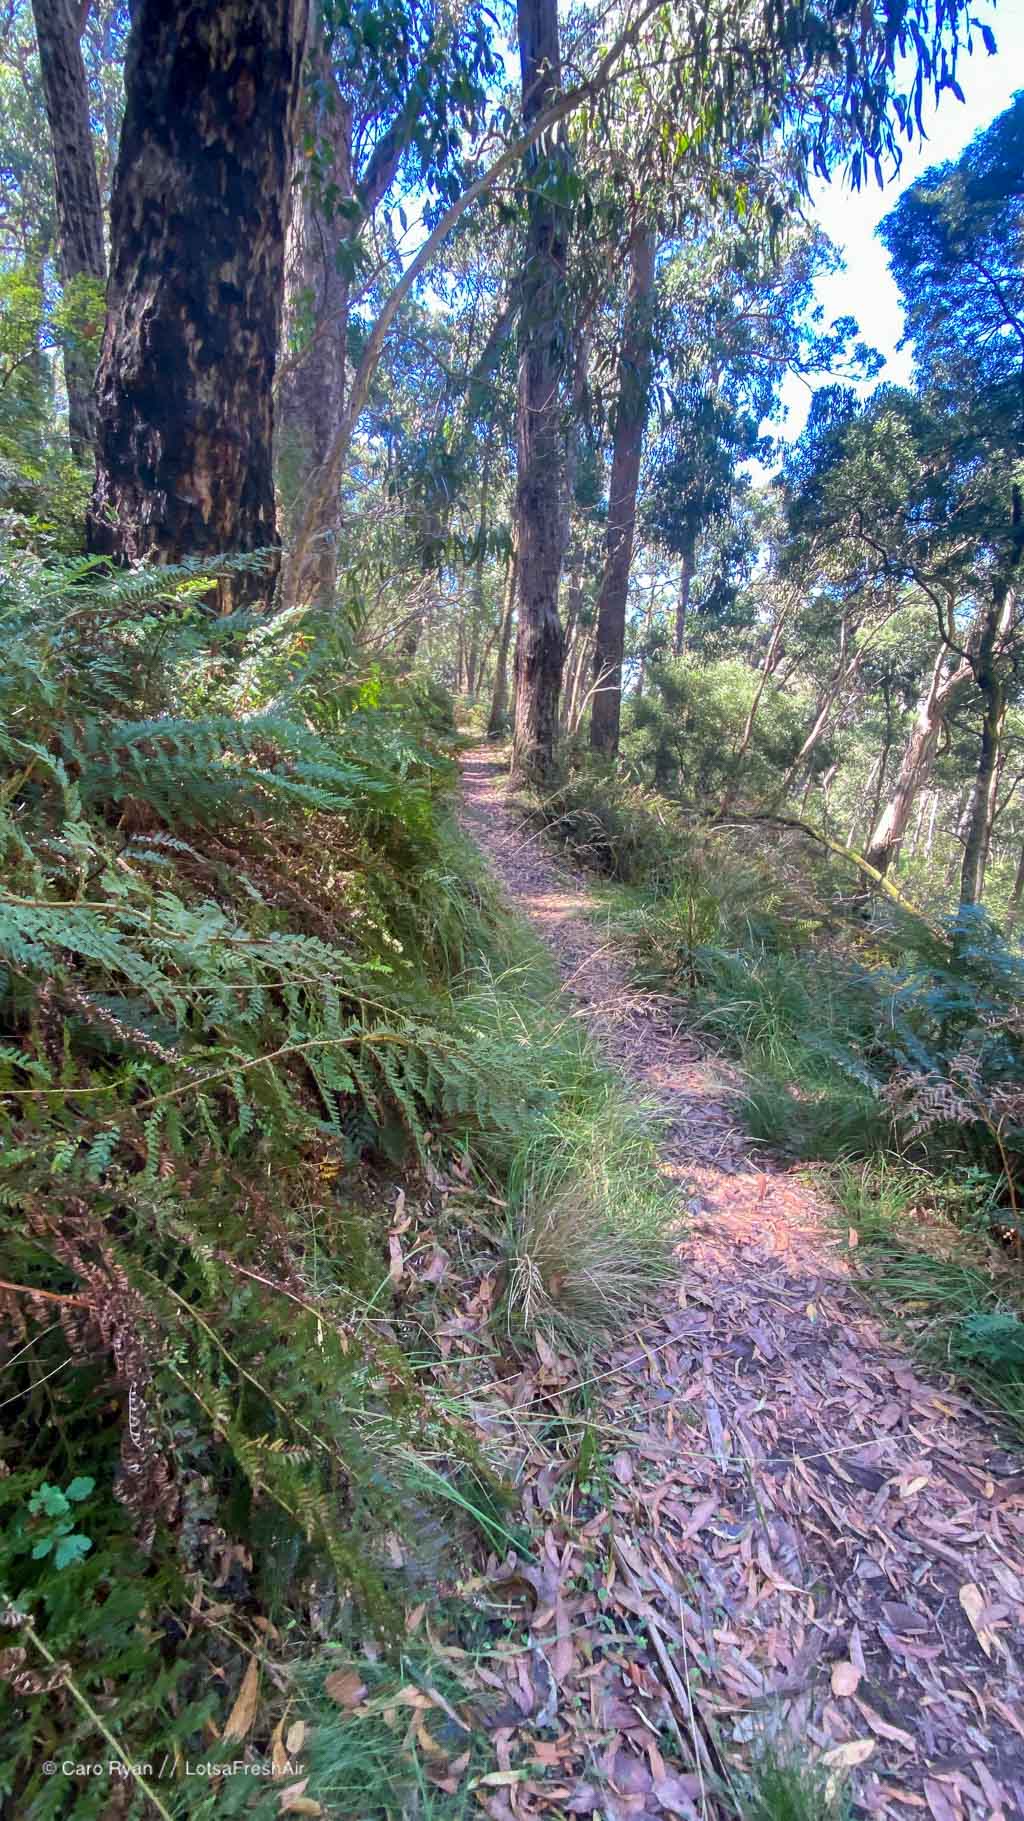
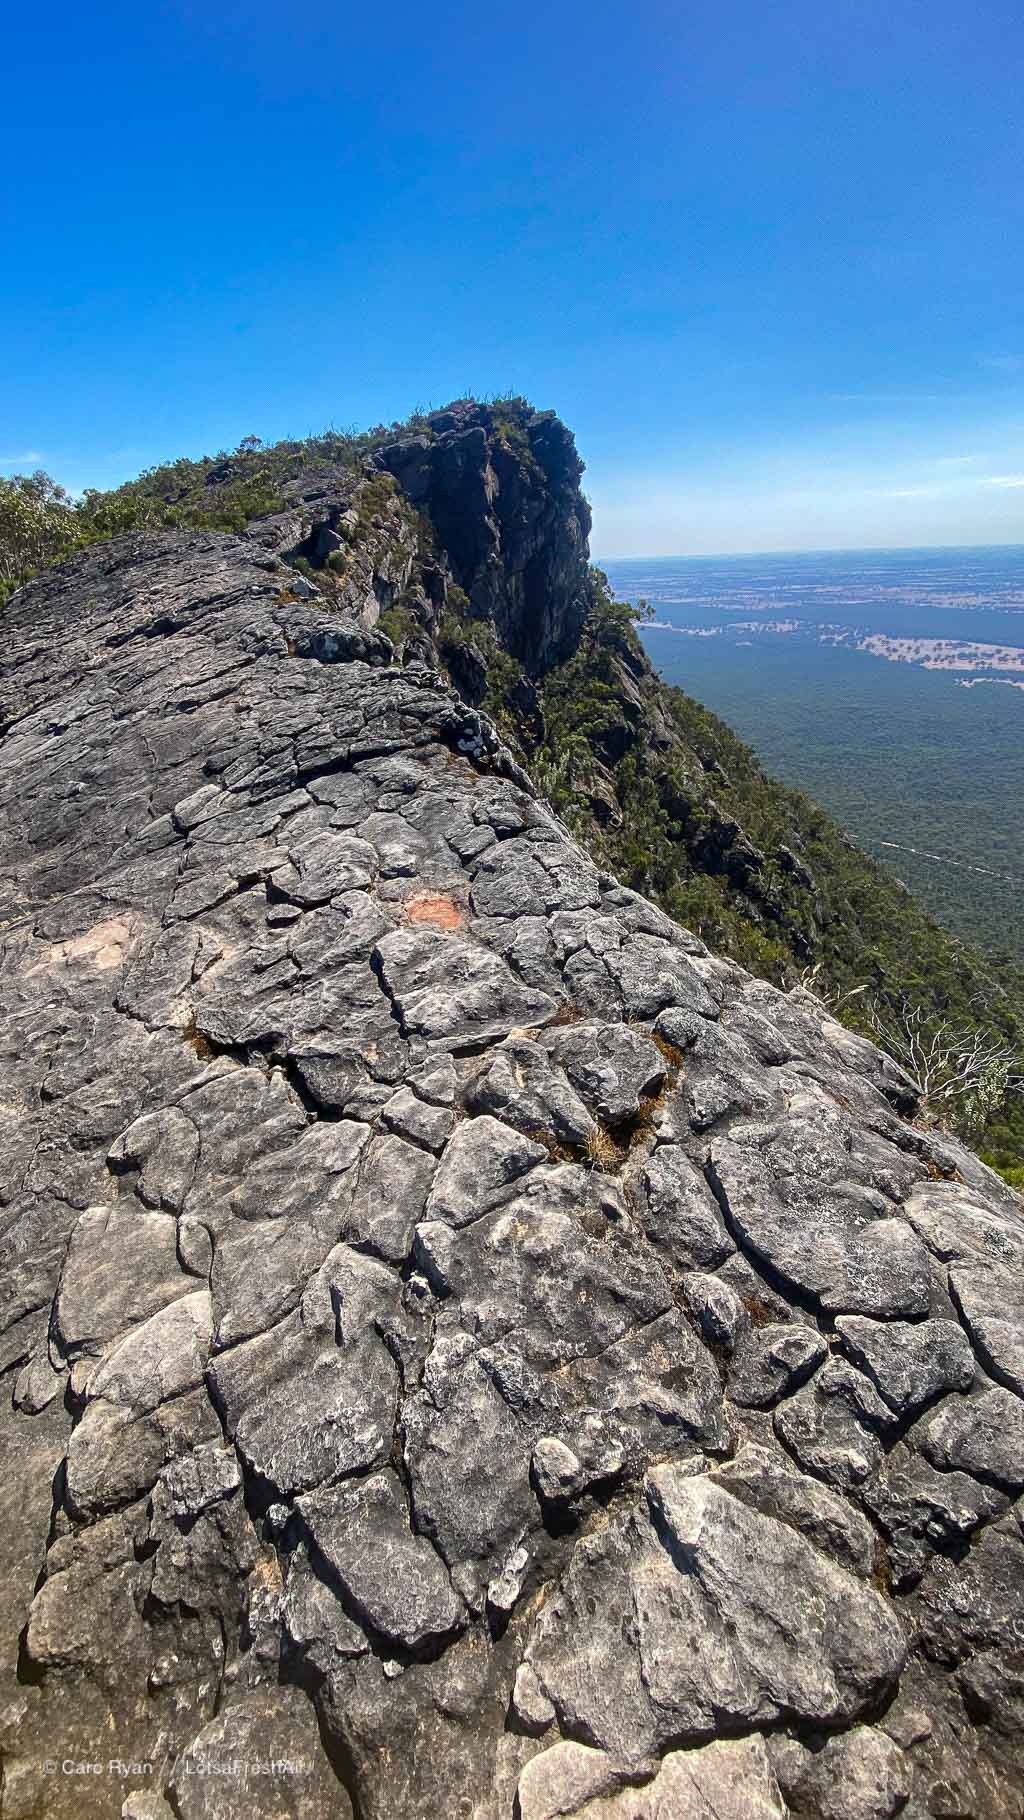
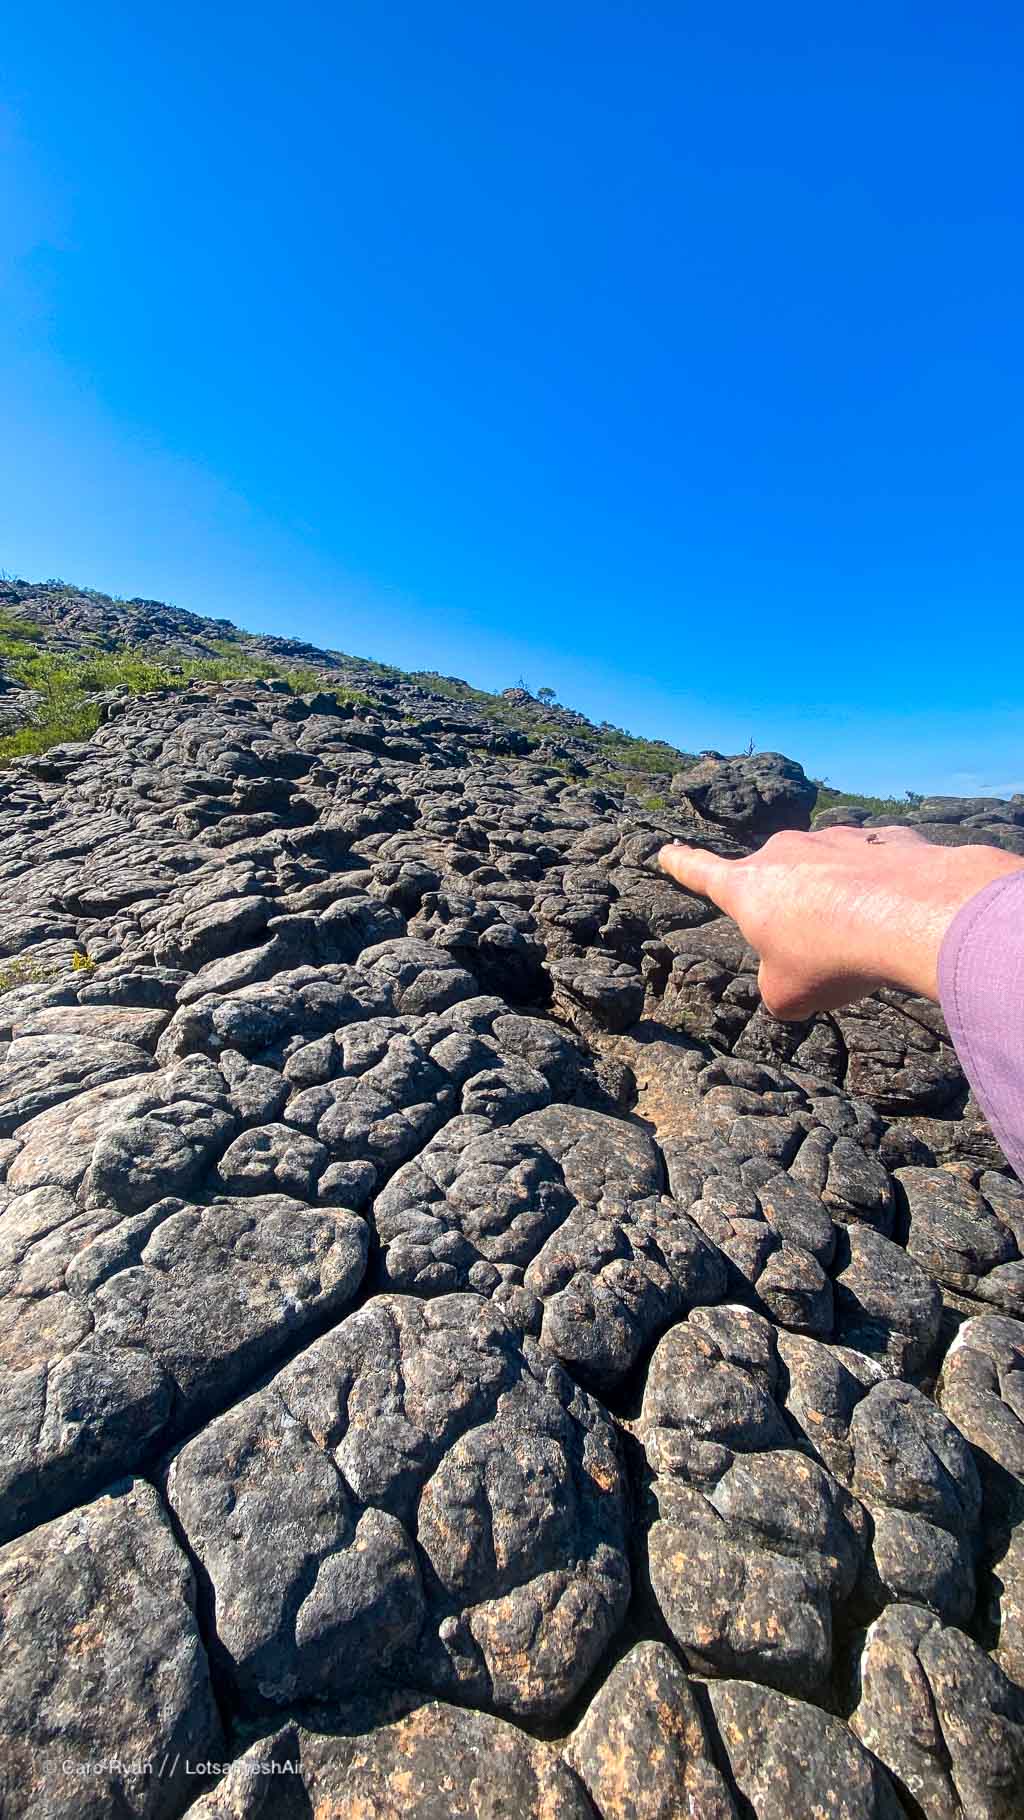
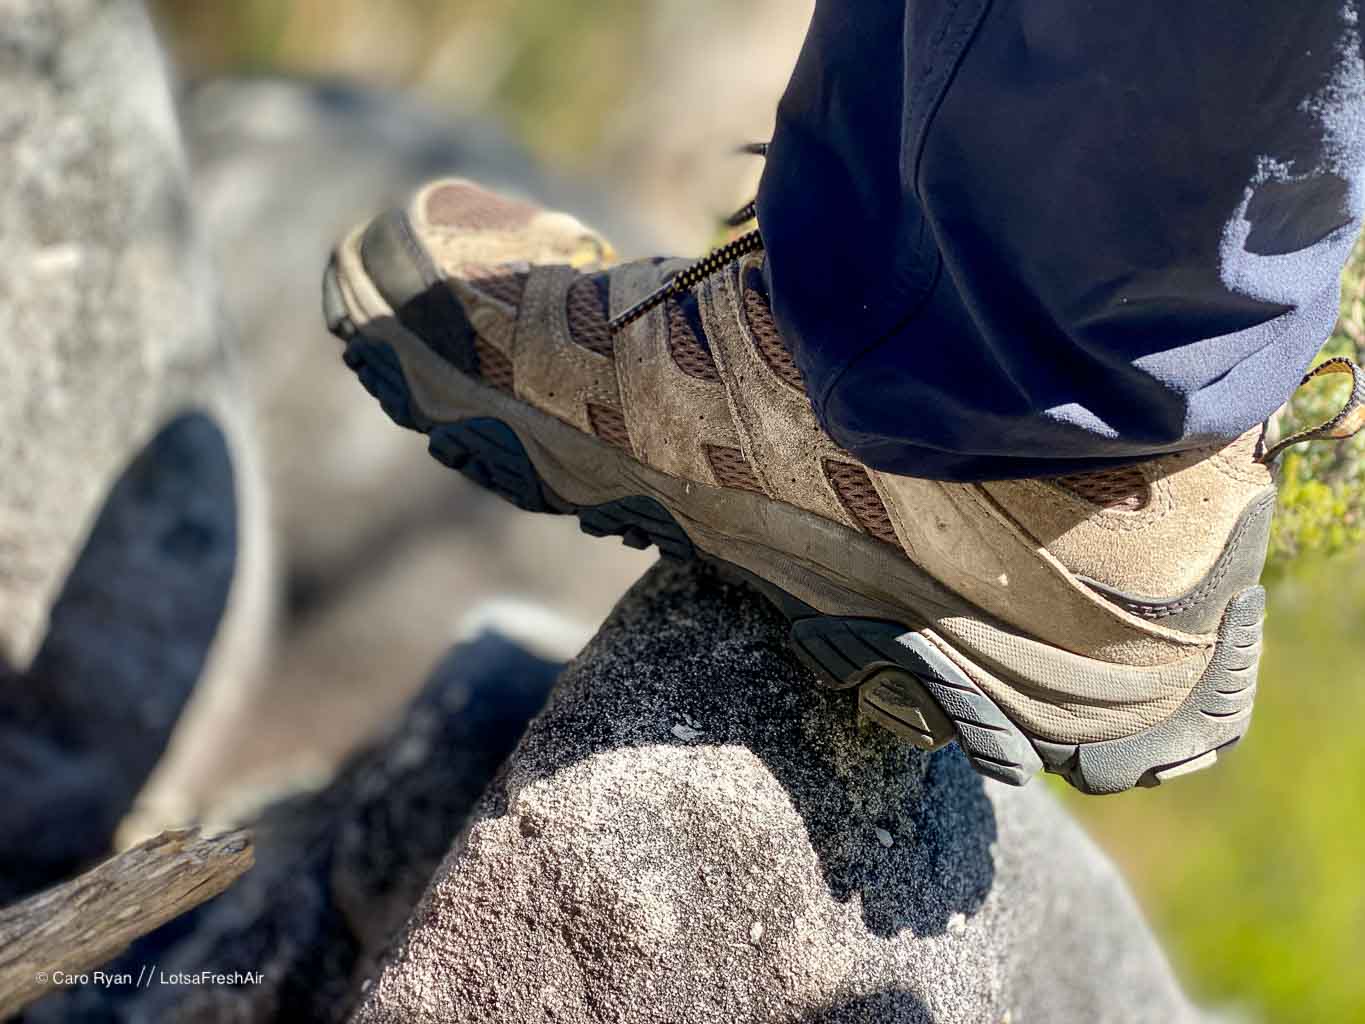
The surface of the terrain along the Grampians Peaks Trail is incredibly varied and changes often. You’ll experience everything from sealed bitumen road (ascending Mount William C4), to well-defined natural bush track (mostly in the South), to rock hopping and technical scrambling (Central) to undefined and unformed, boulder fields. This track has everything.
The most important thing is not to judge the 160 km of track by one image. I tried to include lots of the surfaces in the videos, so make sure you check them out.
Oh, and here’s a hint: Look carefully at the name, Grampians PeakS (plural) Trail. Although every now and then you get respite from the constant ups and downs, these are the exception, rather than the norm.
I also believe that the GPT is harder than the Larapinta Trail.

Getting to the Grampians Peaks Trail
I wanted to use public transport for my connections from Melbourne Airport to the trail. Sure, I could’ve hired a car and driven, but I liked the idea of not having to do car shuffles or drive when I was tired.
Halls Gap is the destination that places you smack-bang in the middle of the Grampians Peaks Trail. This town is the supply and transport hub of the walk and a good place to base yourself the day before your walk starts.
At first glance, it might look tricky given the number of changes (2 trains and 2 buses), but they connect easily. Not only that, the very friendly bus driver dropped me right at my accommodation. Gotta love country hospitality!
You can buy your tickets for Skybus and V-Line online or in person from the ticket counter at Southern Cross Station. The V-Line service (Melb-Ballarat-Ararat-Stawell and return from Dunkeld) has unreserved seating. I recommend the handy trip planner to book or checkout the timetable here. Don’t worry about buying the separate legs of the journey, just search for the final destination.
There are 8 different bus stops in Halls Gap, so check you’re booking the right one here versus where you need to go (eg. accommodation or meeting place). The Information Centre stops are right in the centre of town, whereas Lake Bellfield and Lakeside Caravan Park are about 5 km out the other side of town. If you’re not sure which one to get off at, just ask your friendly driver—I did and he took me to where I needed to go! Brambuk, The National Park and Cultural Centre, is a great place to visit before your walk: it’s a 20-30 minute walk from the centre.
Where to leave a car in Halls Gap
There’s a few options for free public parking. Just think about the locals wherever you do park and consider if it’s a busy time or public holiday.
- Heath Street behind the Information Centre
- Public Toilets opposite the General Store
- Near the Police Station in School Road
Trail Transfers // Getting to the trailheads
There are a couple of different operators for trail transfers and given the distances involved in the full track, don’t be surprised at the costs. I used Grampians Peaks Walking Co for all my logistics and thoroughly rate their customer service, friendly can-do attitude and for going above and beyond.
Other operators include Experience the Grampians or one of the other licensed tour operators may do transfers or bag drops too. You may find that your accommodation hosts might be able to help out. Oh and heads up… there’s no Uber in the area.
Best time of year
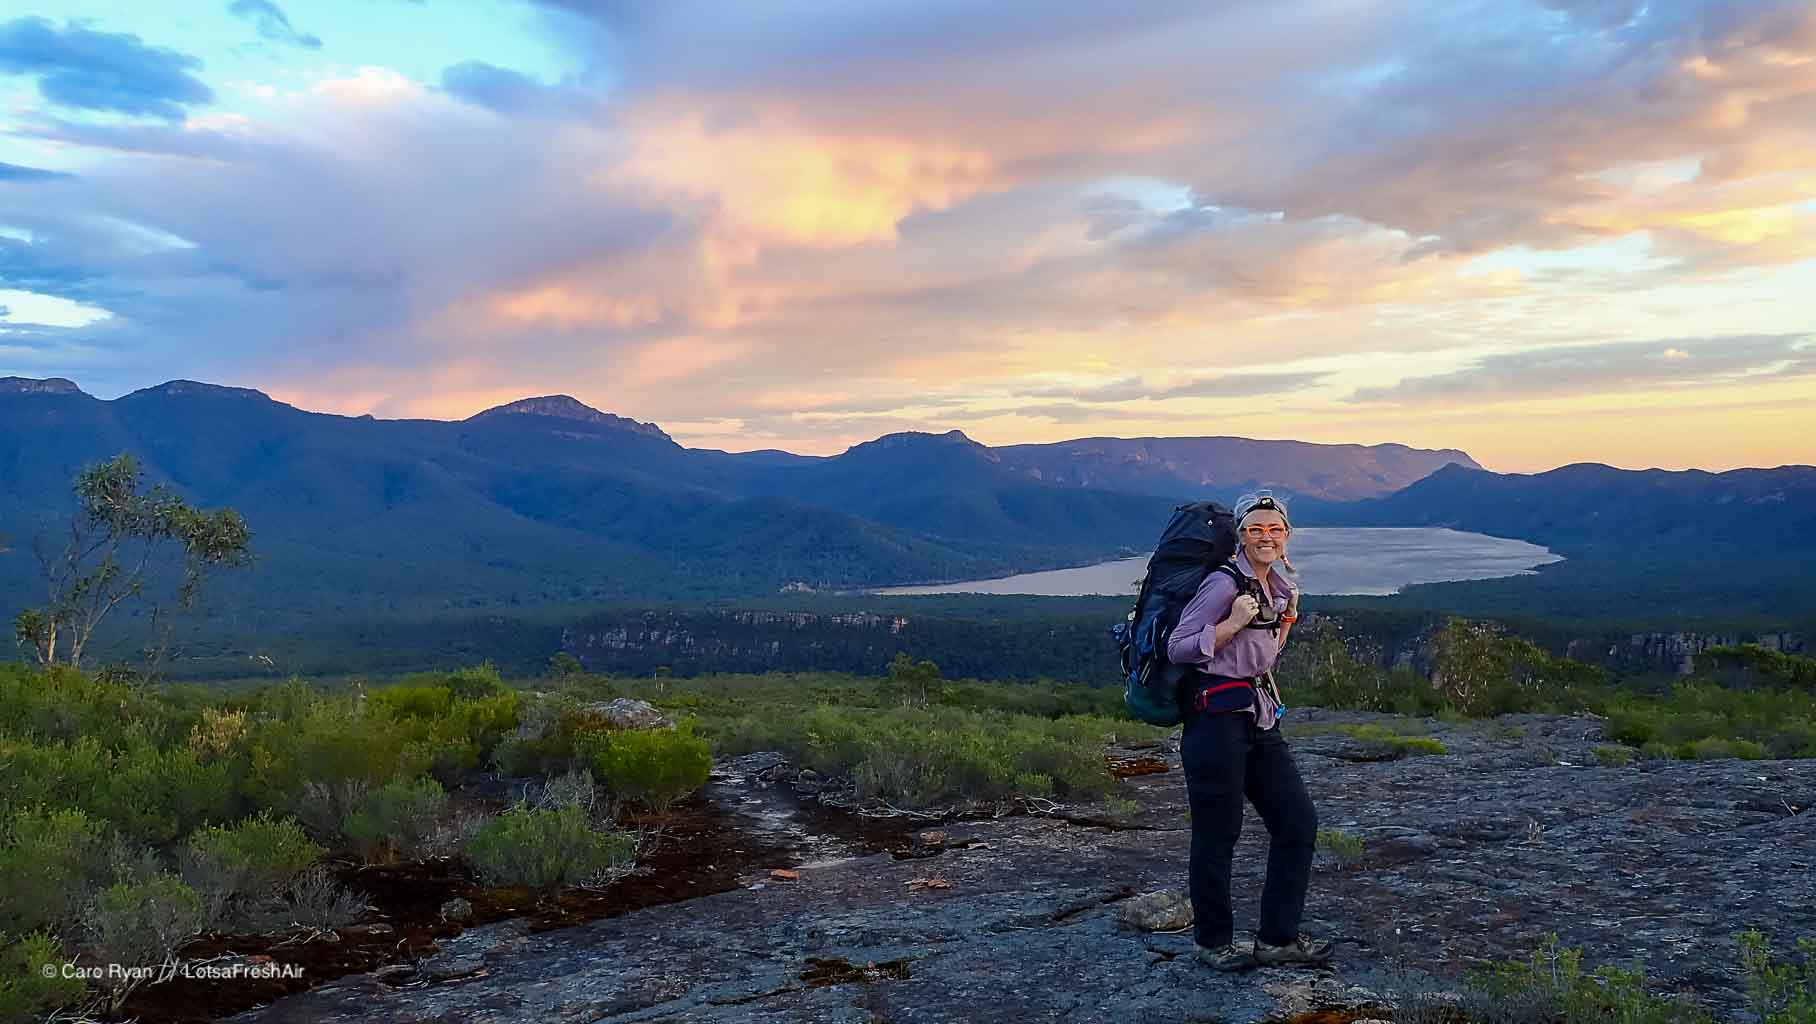
I did the Grampians Peaks Trail mid-March and experienced all seasons. Temperatures ranged from 0-34 celsius—wacky, I know! Extreme contrasts like this are common, so it’s essential that whatever time of year you go, you are prepared for anything!
Take a look at the BOM monthly statistics (from Mount William) and be guided by your smarts.
My one, big, hairy bit of advice is don’t do this in Summer. The trail runs along the tops of rocky ridgelines, with no shade and the intensity of reflected heat from the ground, means that when temps get spicy (as they did on my 34 degree day), there’s nowhere to hide. Take a look at my Central section video below and you’ll see what I did to get around this.

What gear to take
Before you dash out to Kmart (or cheap import drop-shipping sites) for that tent or sleeping bag, be guided in every decision by the exposed location and changeable conditions of the track, teamed with the expert philosophy of keeping your pack weight as light as possible. Your safety (which leads to overall stoke) is number 1, so don’t skimp or leave something behind.
I’m really lucky that I’ve been collecting bits of kit for a long time. It means the cost has been spread out over many trips and I make sure I have what I need and need what I have. If you need some gear (and especially the big ticket items like tent, sleeping bag, backpack, sleeping mat or even PLB) look into hiring them, borrowing them from generous mates or keep an eye on Gear Freak, AUS Hiking & Adventure Gear or Ultralight gear Australia (if that’s your thing) on Facebook.
Gear Hire
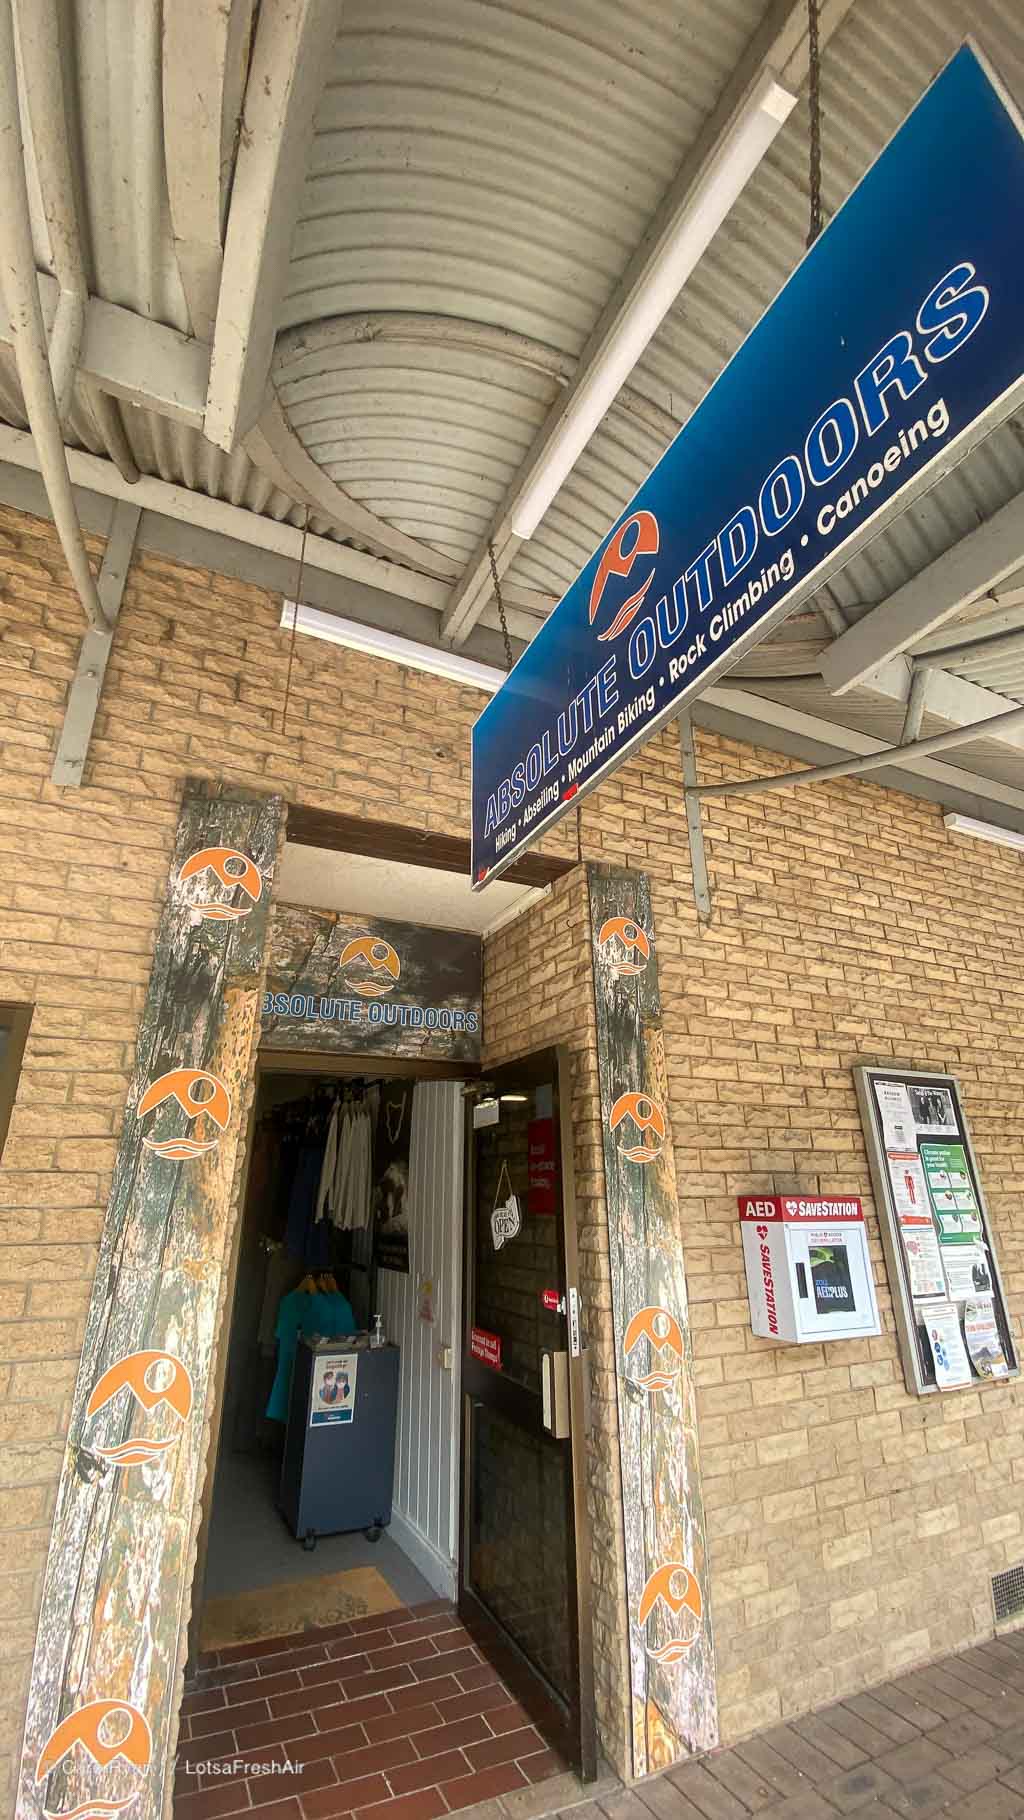
Locally, you can hire PLBs, ZOLEO (2 way satellite communicators), packs, tents, sleeping pads, stoves and hiking poles from Absolute Outdoors.
If you’re keen to get into ultralight gear, Lighter Faster Hire has a good selection of all the usual suspects, such as Gossamer, Granite Gear, Durston, Hyperlite and Tarp Tents.
Neil from Bushwalking Blog has a good summary of PLB Hire here and you can also get them from any Macpac store.
TIP: There’s limited shade along the trail and I wish I had brought some lightweight gloves to protect the backs of my hands from sunburn. This is more of a problem when using walking poles.
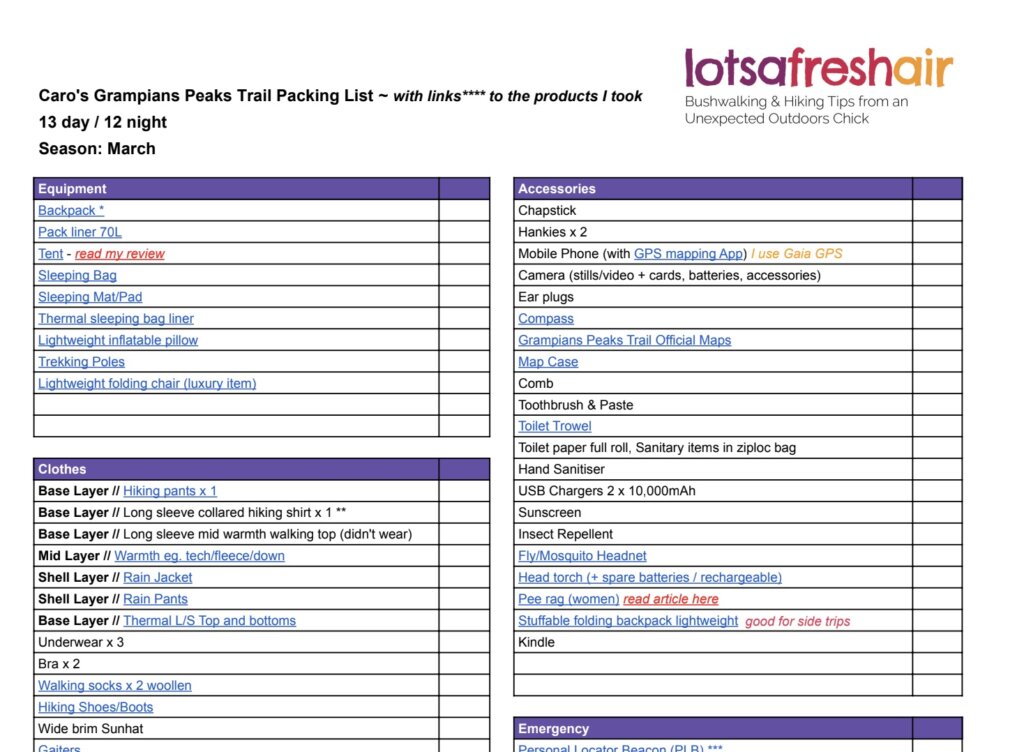
Packing List Download
I love lists! So to get you started here’s my Grampians Peaks Trail packing list, which includes links to the actual brand and style of each item I took.
Nearest Town and Trail Hub – Halls Gap

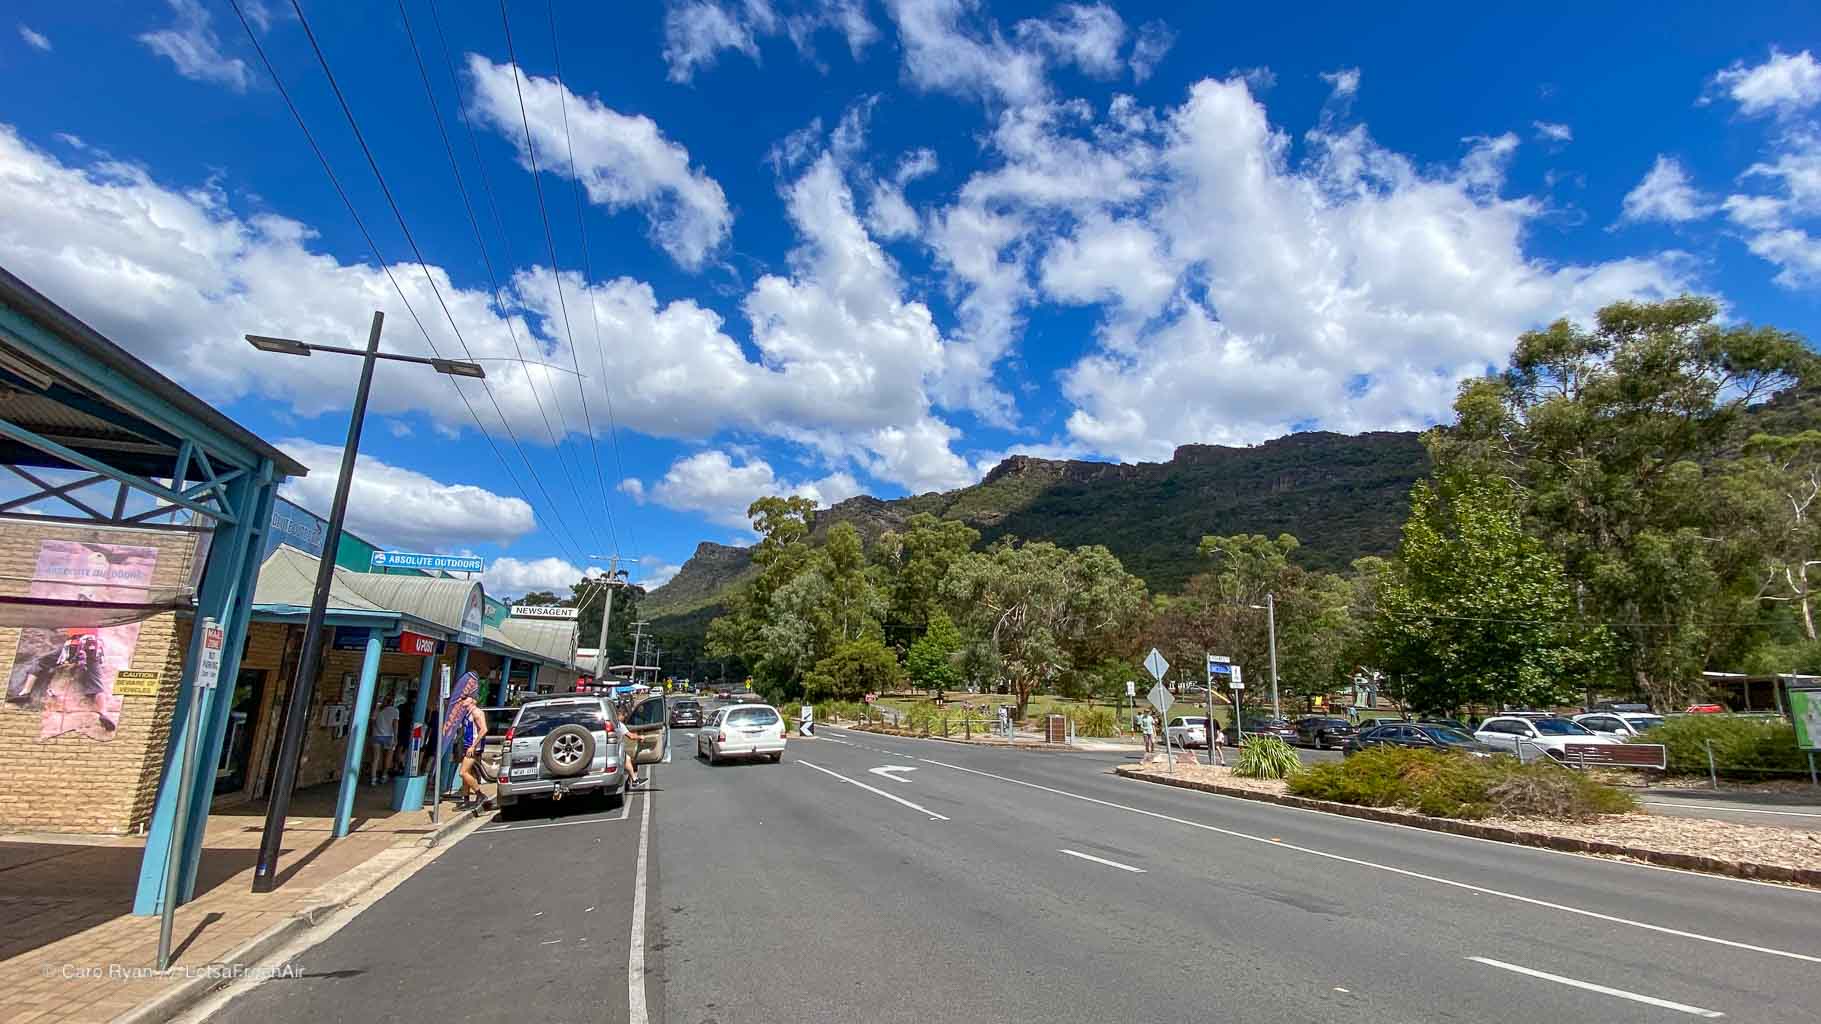
The cozy town of Halls Gap, snugly tucked between the shoulders of Gariwerd (Grampians) National Park, is the perfect launch pad for the track. Its outdoor-loving community of about 500 people and stunning natural surroundings, make it a haven for adventurers and nature enthusiasts alike. In many ways, the Gramps offer to Victorians what the Blueys does to Sydney – just a few hours by car, yet a world of adventure away.
Like many regional towns, it has one main street (the main drag!) with just about everything in walking distance.
Here you’ll find transport connections, pre & post-hike accommodation, gear supplies, groceries and tasty dining (and wine-ing) options.
Local Supplies
It’s important to be realistic about what you expect to find in Halls Gap: it is a small, regional town, without Coles-Worth, chain hardware shops or big outdoor retailers. So although things might appear a bit more exxey or not be exactly what you might have chosen in the big smoke, buying local is one way of supporting the town and its residents.
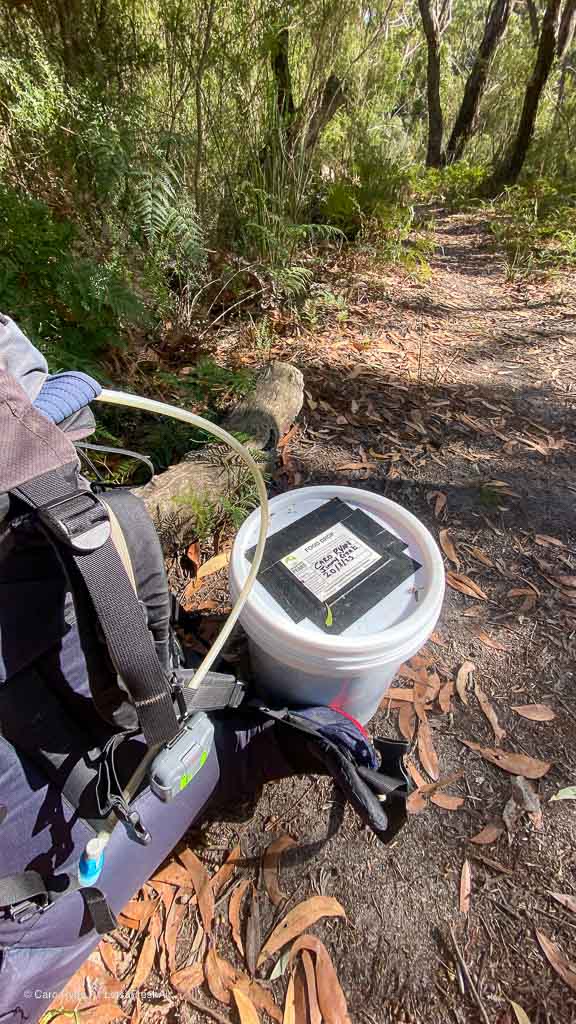
The one thing I couldn’t find is SD cards… I learnt the hard way… but thanks to my fabulous friends who posted me a couple to Grampians Peaks Walking Company who added them to my food drop! [You’re the best, Richelle + Cath x].
Outdoor Retailer (camping gas, maps, gear)
Absolute Outdoors is a great local business, owned by Adrian Manikas, who is also the bloke behind Grampians Peaks Walking Company who operate guided tours along the track.
The shop is a bit of a cornucopia of things you’re likely to need for the trail (or at the crag). Compared to outdoor retailers you’d find in cities, their selection of the big stuff like tents, packs, etc is limited, but they have a good variety of all the bits and bobs you’re likely to forget or need to replace.
I bought my gas for the trail, the official GPT map set and an extra collapsible water bottle from here. If you’re looking for advice from experienced outdoorsy folk, this is where to go.
Groceries, First Aid, Alcohol
Halls Gap Licensed General Store is one of those classic small town a-bit-of-everything type shops and is the place to buy ‘fresh’ (ish) fruit and veg. Given it’s a small business and not part of the supermarket giants, expect higher prices to deal with transport and other costs. They’ve also got a few bits of car-camping-esque kit.

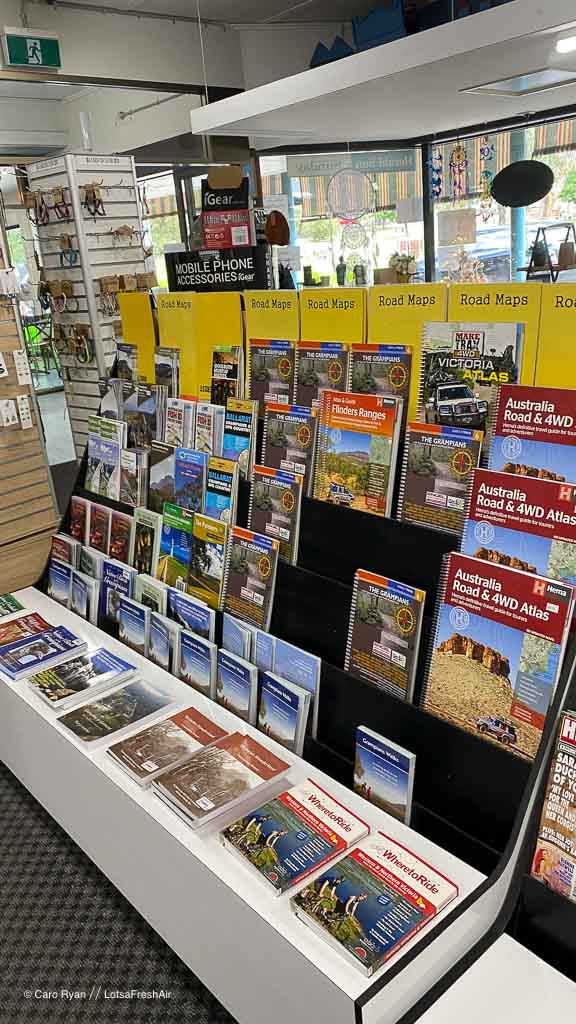
Newsagent (batteries, phone chargers, maps, art supplies)
Halls Gap Newsagency is where I found a phone charger and where you’ll find a good selection of maps (including the GPT Official Map set), and a variety of native flora/fauna ID books… and that random selection of souvenirs and cat/frog/creepy doll trinkets (and books, clothes and shoes) that town’s like Halls Gap seem to offer.
Where to Stay Halls Gap and Dunkeld
You can find every level of accommodation in Halls Gap and Dunkeld. Just remember that being a couple of hours outside of Melbourne makes it a hotspot during long weekends and school holidays; so book early if you’re staying during those times. Throughout my trip, I stayed in 3 different levels of accommodation:
- Pre-trip // NRMA Caravan Park – Tent sites, cabins/villas and caravan sites. Well-equipped caravan park, set on the approach into town, I stayed in a cabin which gave me ample room to spread out for last-minute packing and organising. There’s tasty coffee from the food van at the entrance too and you’ll even find Bear Grylls here.
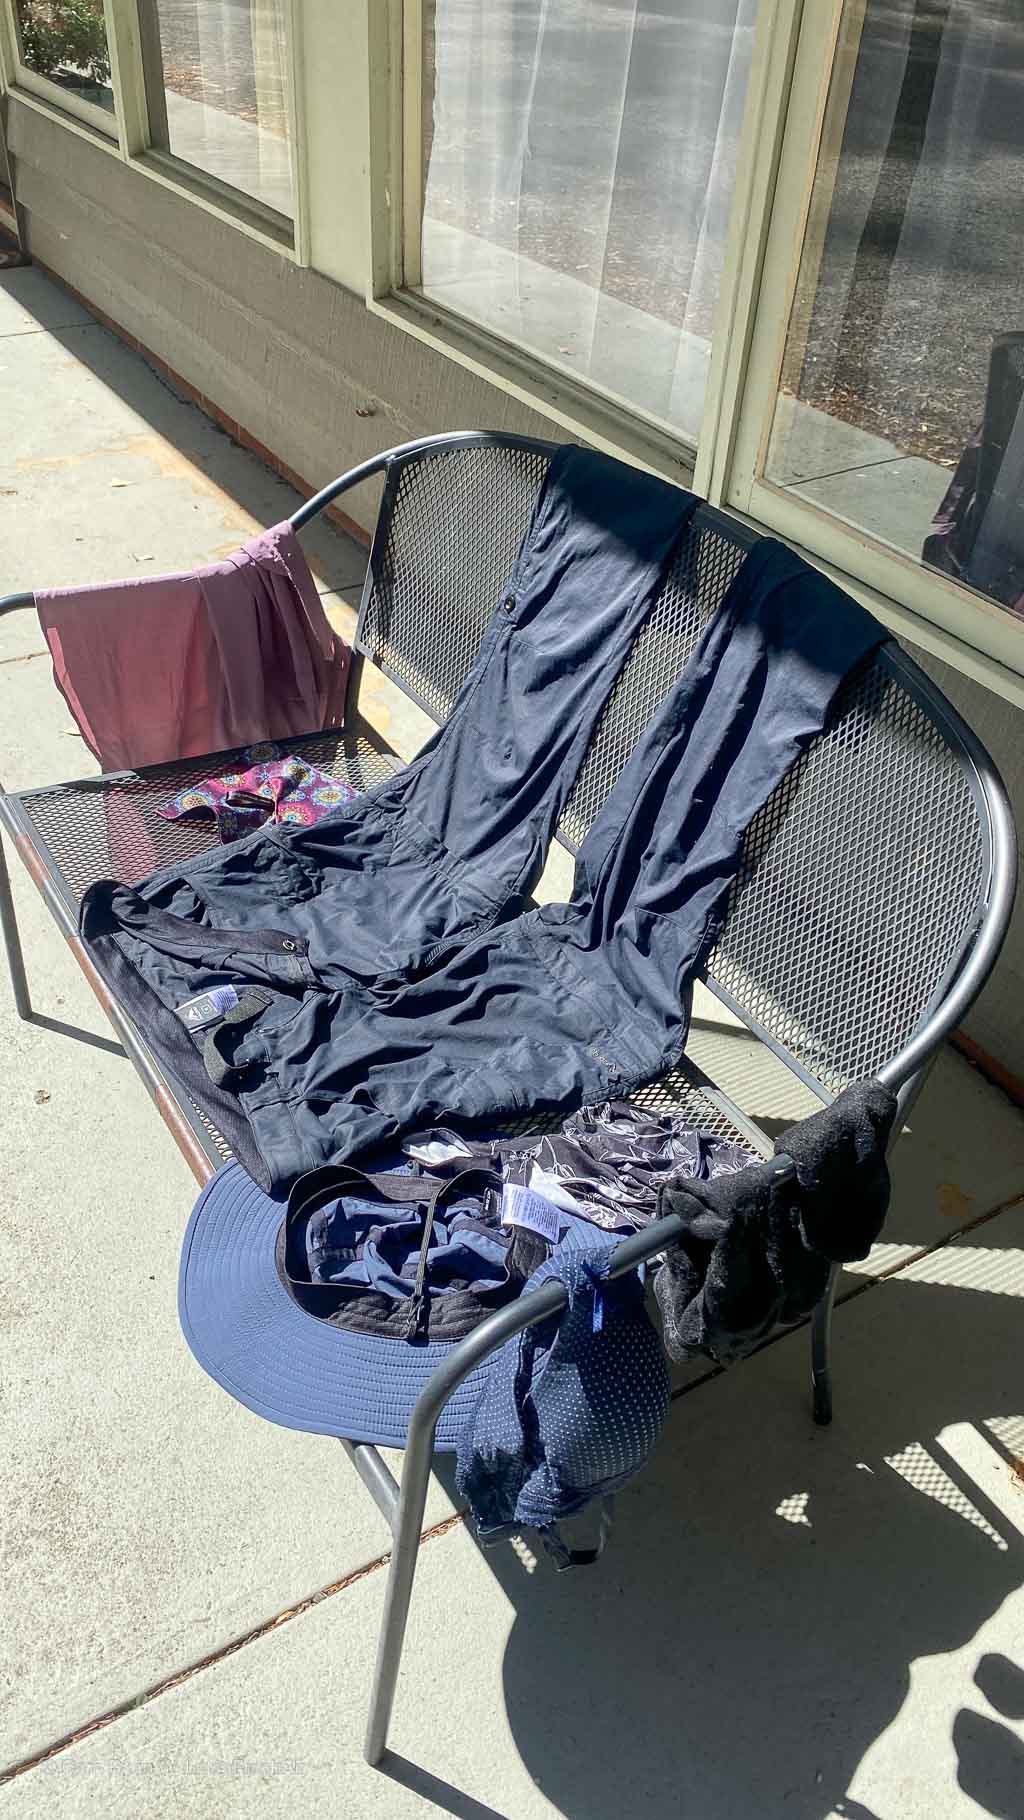
- Mid-trip – Halls Gap night // Gariwerd Motel – Classic Aussie motel, updated, clean and perfectly positioned near the end of the Northern Section trailhead. Lovely owners. With a room out the back, my washing (in the shower) dried quickly out the front door which faced west.
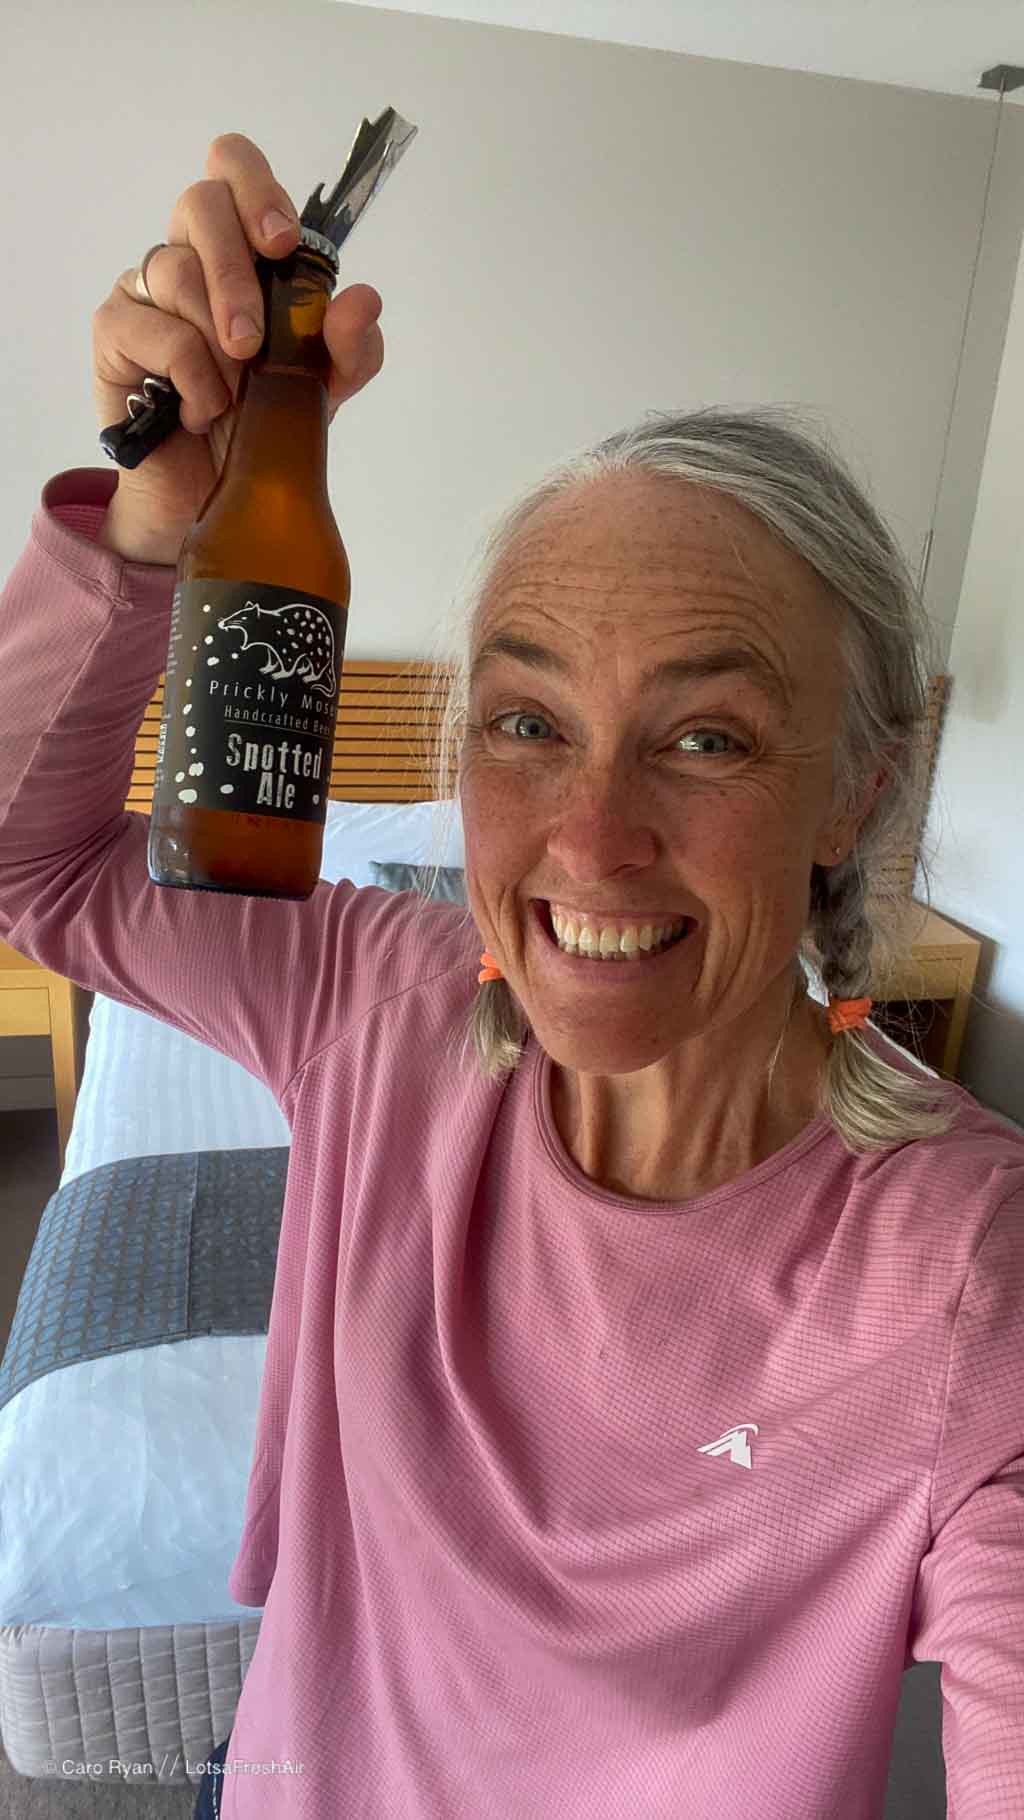
- End of trip // Royal Mail Hotel – I finished in style at the boujee Royal Mail with a glorious shower head, views of Mount Sturgeon and an incredible celebration meal at Parker Street Project.
How fit do you need to be?
There’s different types of fitness for different types of exercise. The areas to focus your fitness training on for the GPT are:
- Pack fitness
- Cardio
- Endurance
- Core
- Proprioception
- Preparing your feet
- Dealing with off-camber and rough surfaces
- Steep ascents and descents
- Stairs
- Strength and resistance
Be realistic when you start to prepare by giving yourself a bit of a body audit. How often do you hike with a full pack? Do you do something every day to move your body to maintain and build fitness? And how many hours are you usually on your feet for a bushwalk? If your fitness bank balance is low, start small, months in advance and build gradually.
Watch my video above for a full run-down, but the best thing you can do to get fit for full pack, multiday epics is to get out walk with a pack.
Maybe think about working with a personal trainer or specialist expedition coach if you really don’t know where to start and take a look at my post about building pack fitness.
Fitness, gear, and logistics all play a crucial role in setting yourself up for success. And while the trail isn’t suited for beginners, with proper planning and perhaps the guidance of licensed tour operators, I’d like to think there’s a GPT adventure (even if it’s day walks) for everyone.
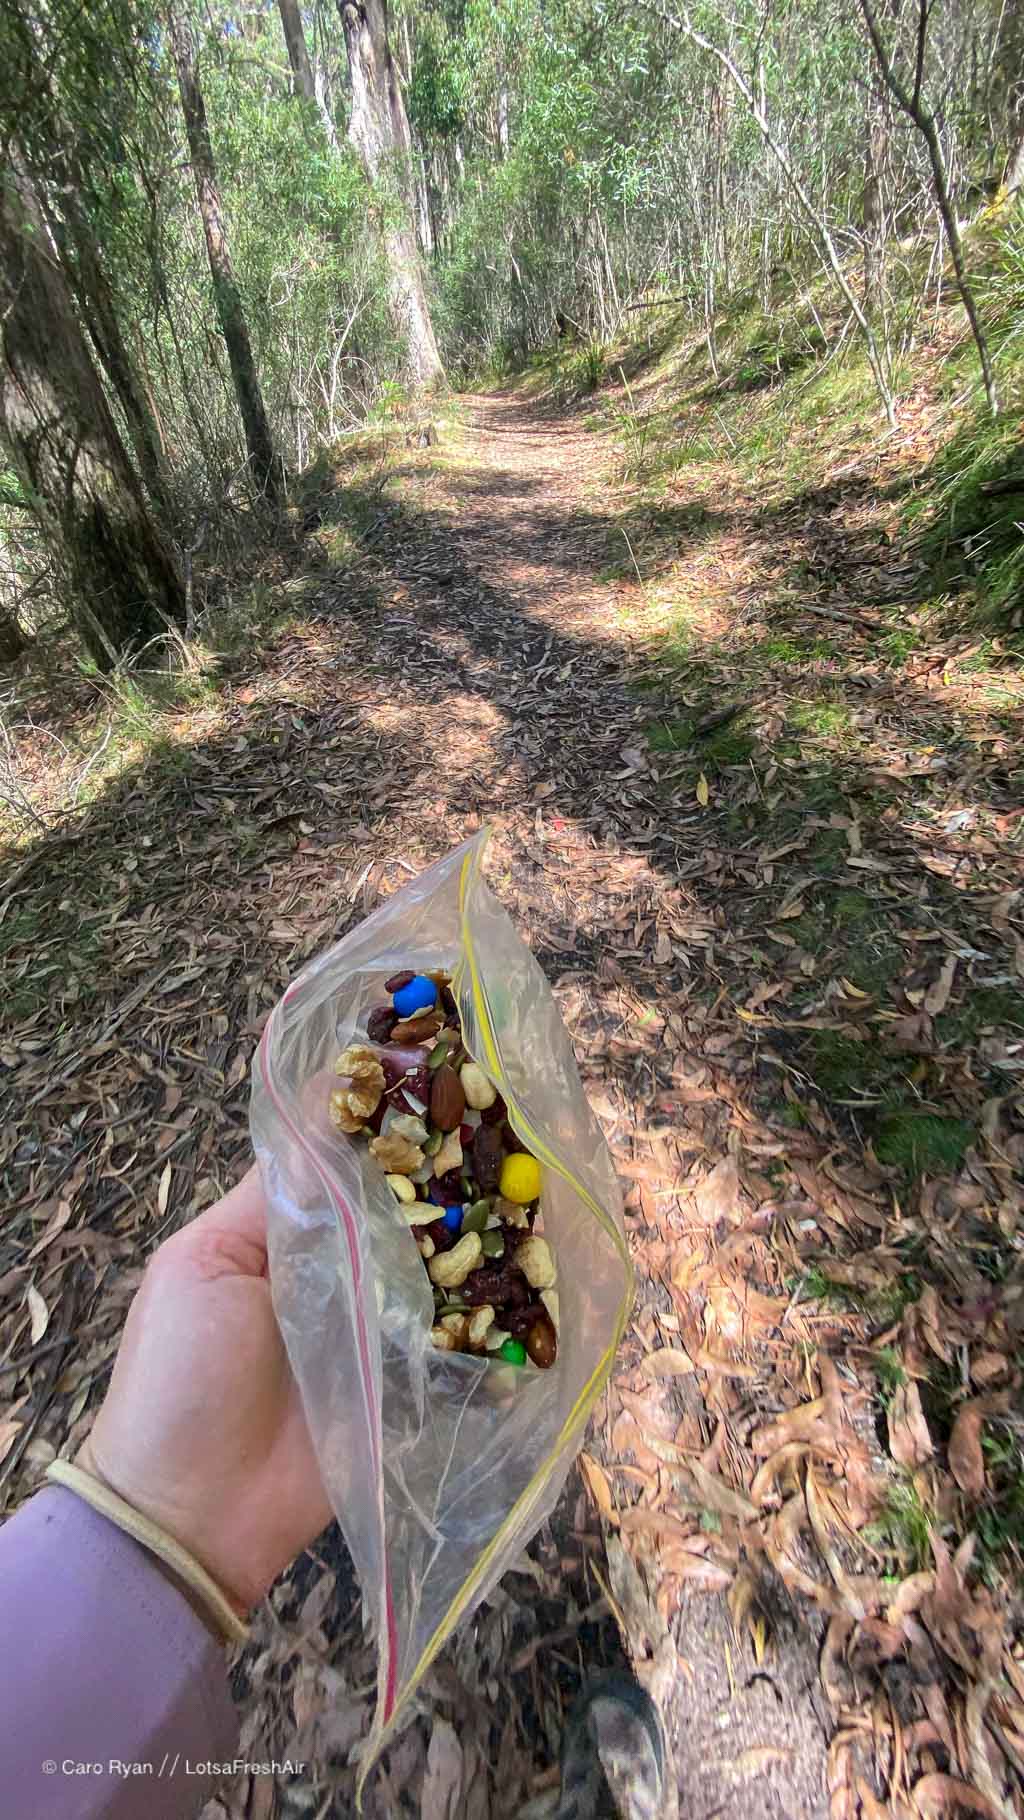
Food for the GPT
DIY or ready-made meals
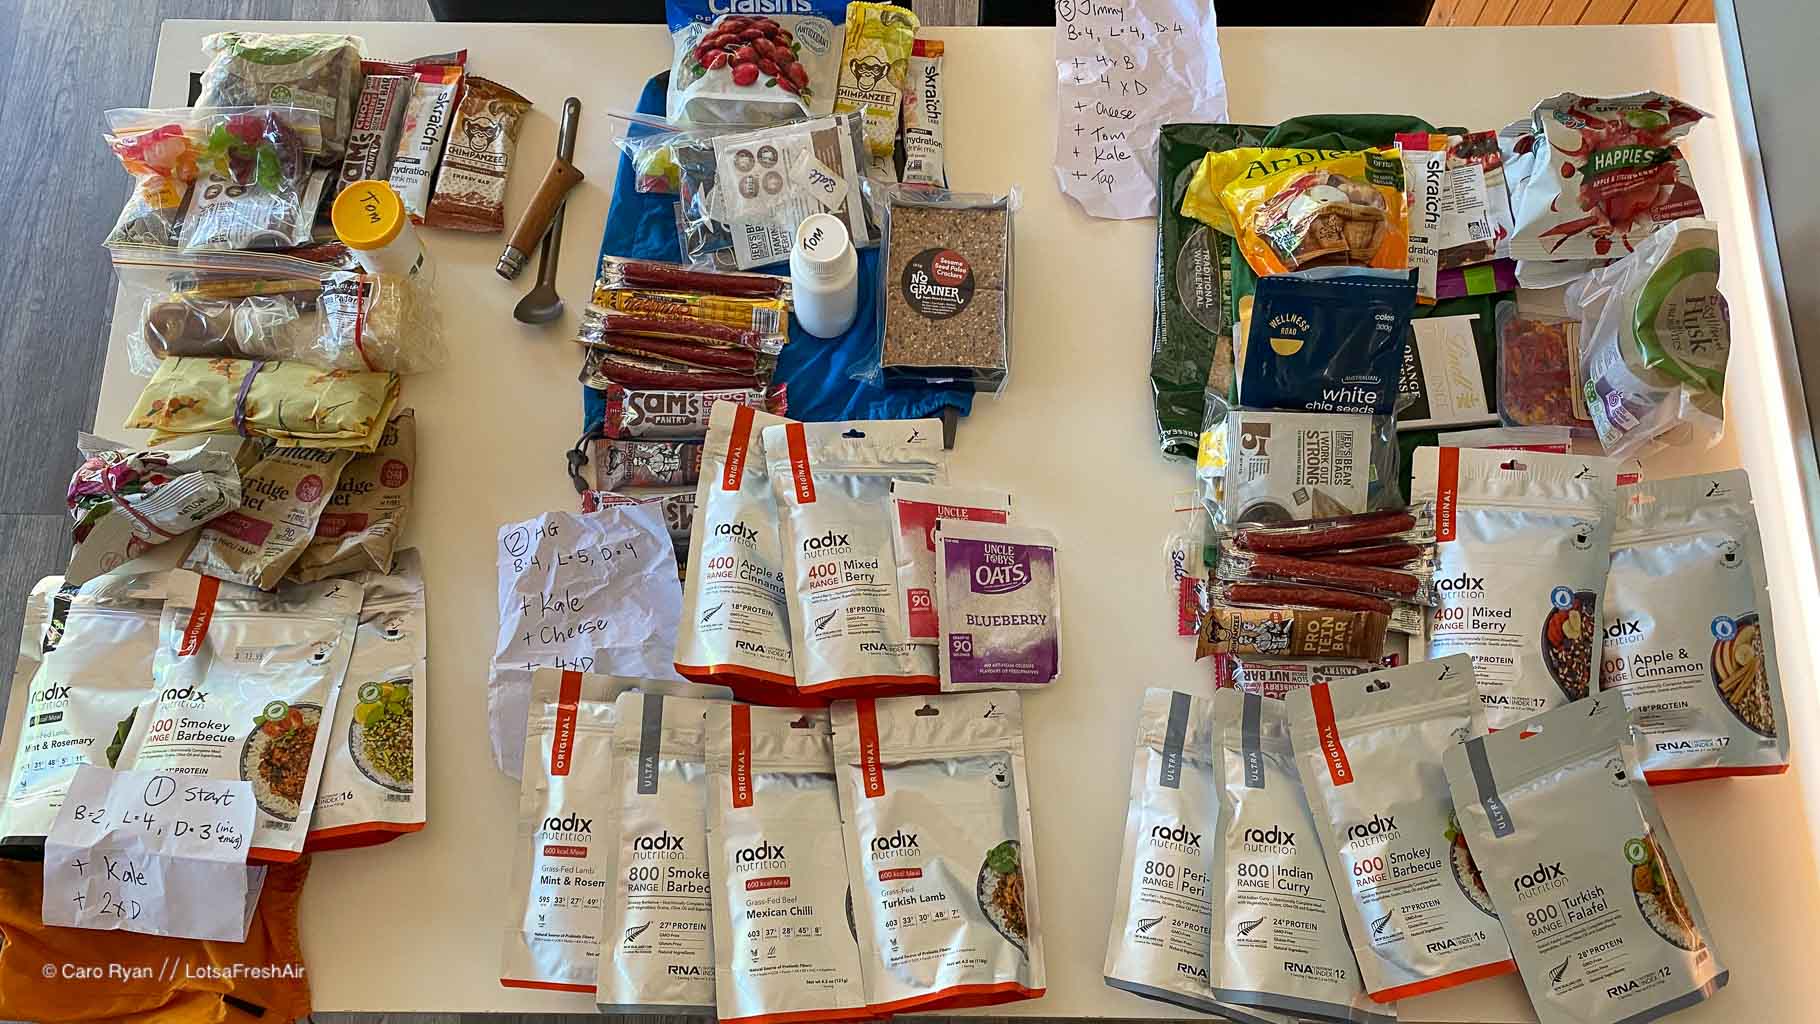
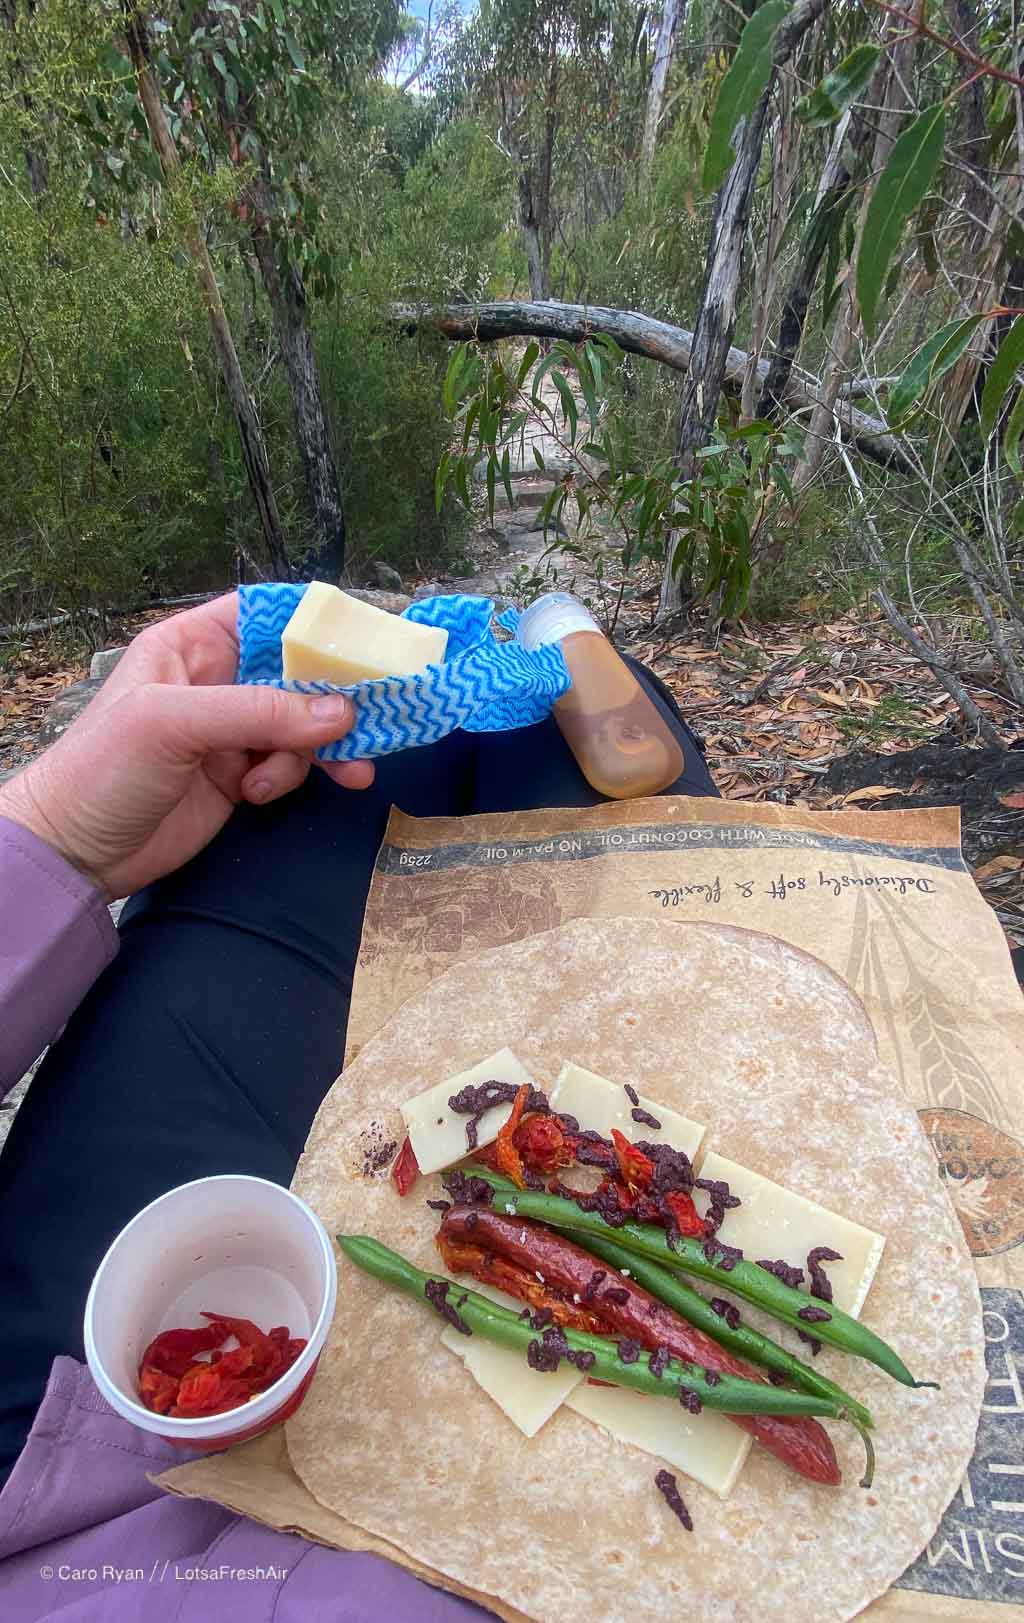
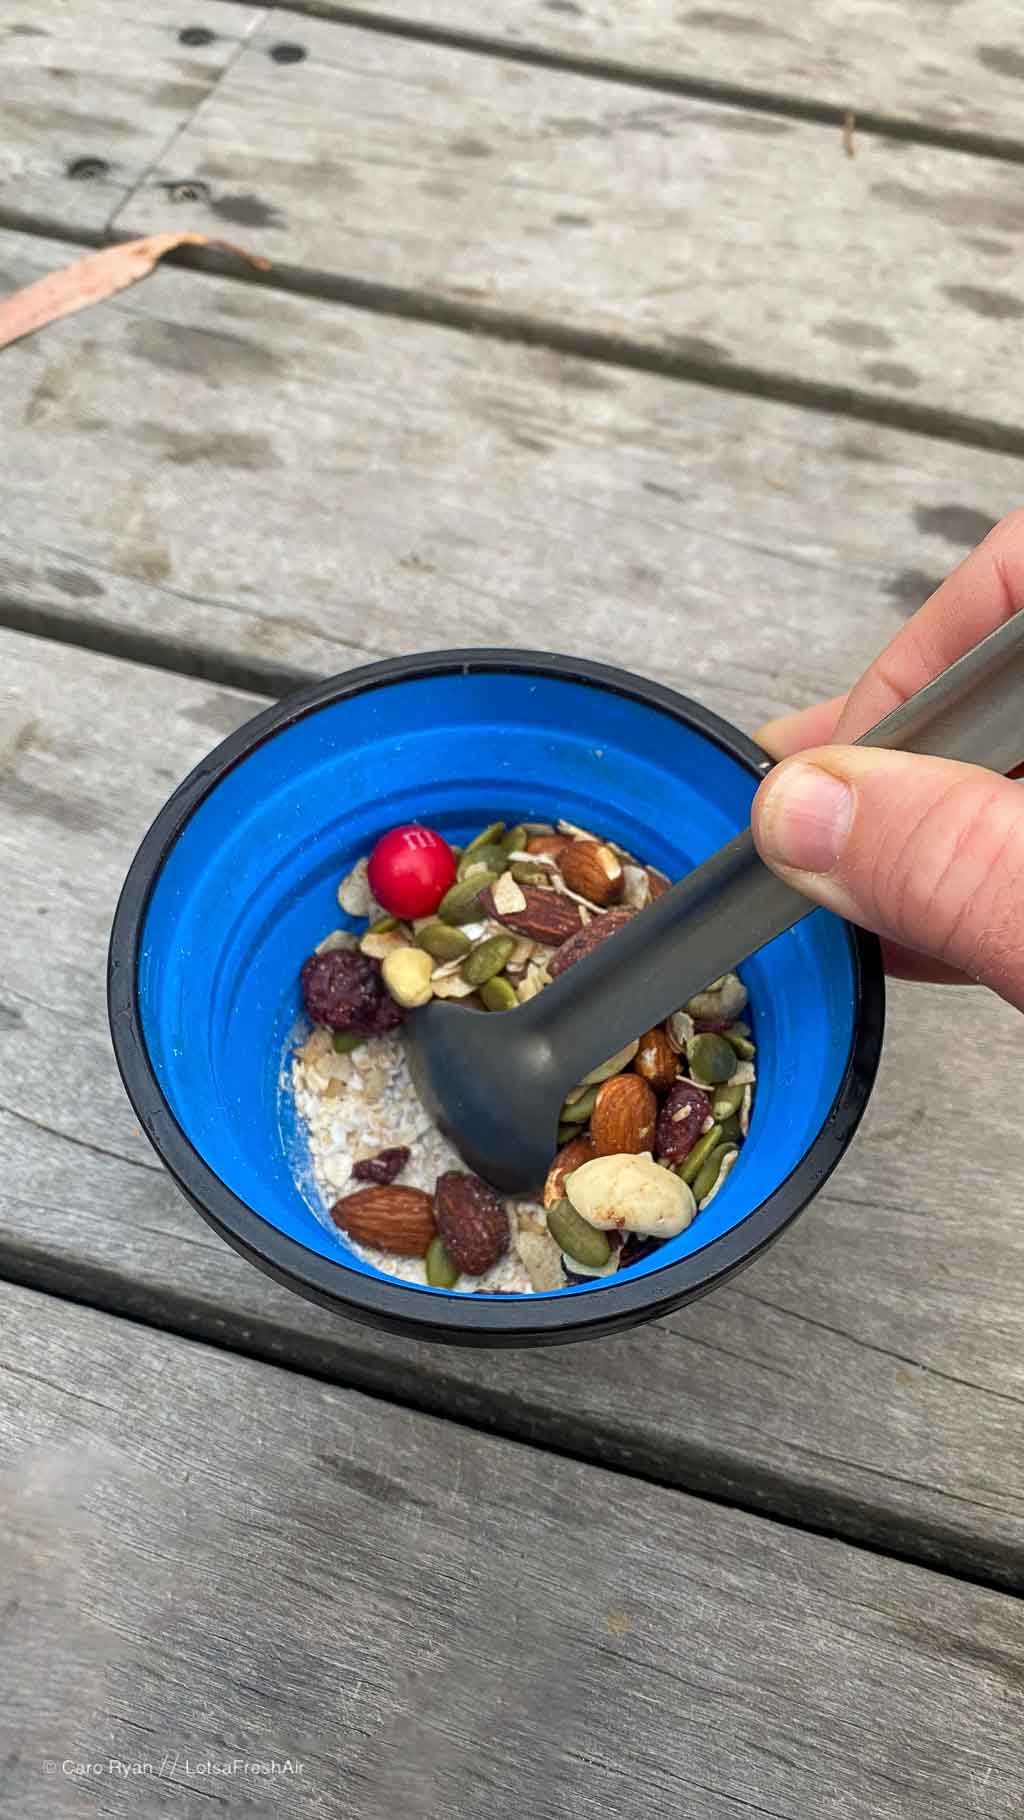
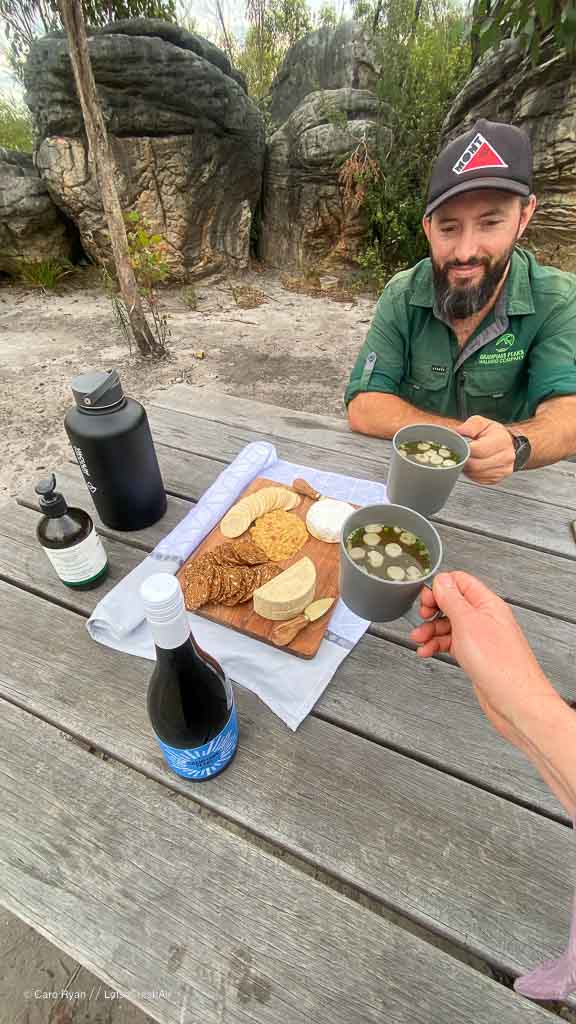
Depending on your time and budget, you can create your own lightweight camping meals or buy ready-made ones. I was working long hours in the lead-up to my GPT trip, so I opted for commercially prepared freeze-dried and dehydrated meals. It was the first time I’d tried Radix and I was really impressed with them. They’ve since switched to only creating plant-based meals, which doesn’t bother me as I’m more interested in the calorie intake. To make sure I was re-fuelling after each day I had the 800 calorie dinners and found them super tasty.
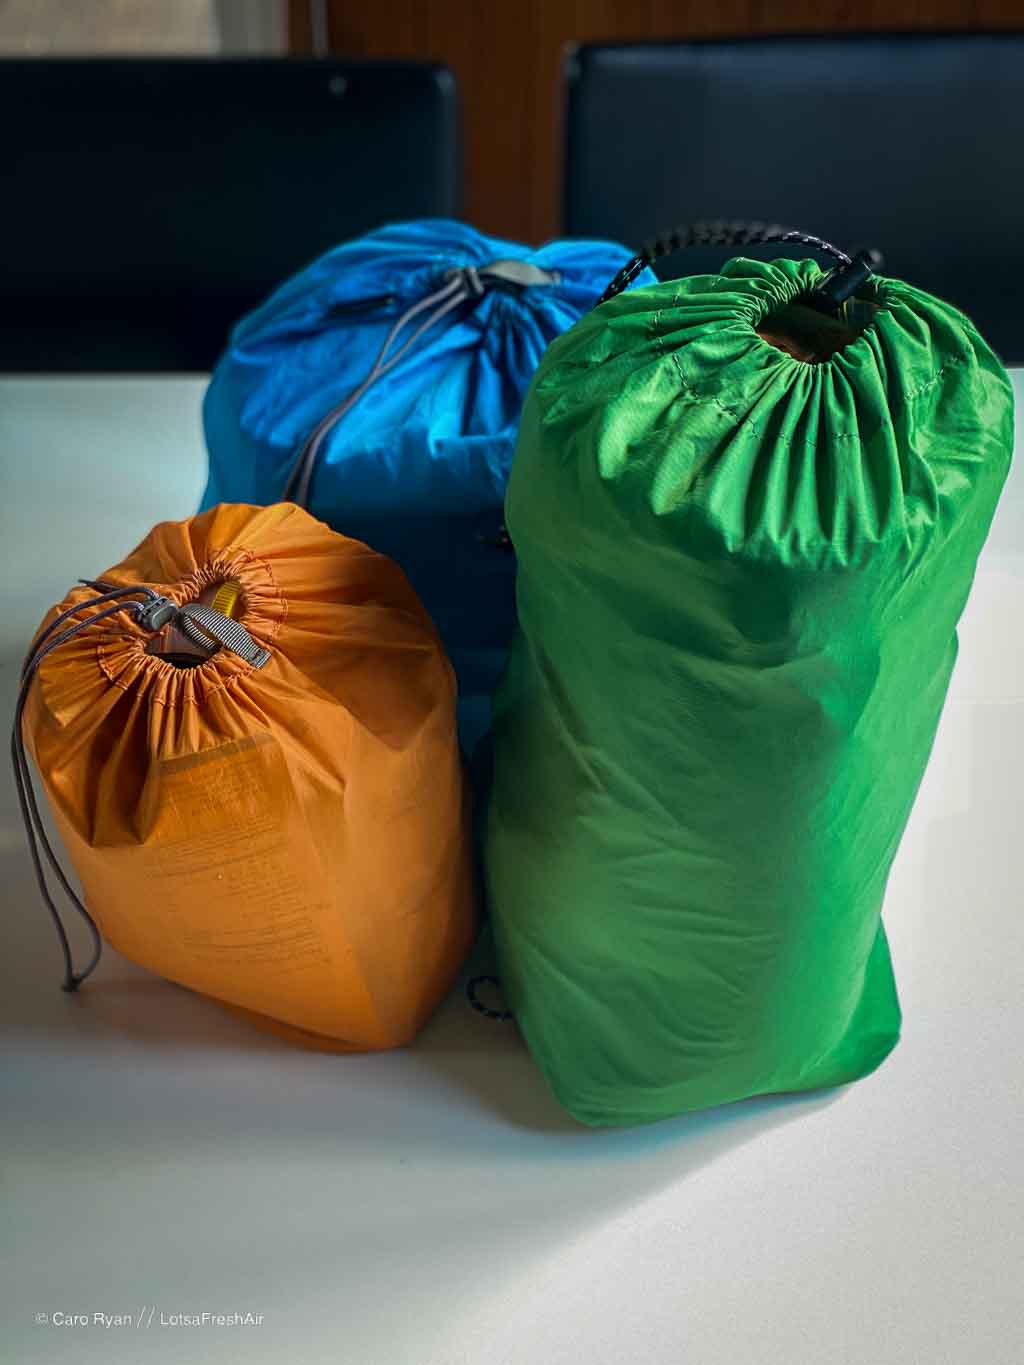
Oh and don’t forget to hang or stash your food bags securely before heading to bed. While the shelter kitchens are not as bad as, say, high country huts for rats and mice, you want to make it as hard as possible and not encourage them.
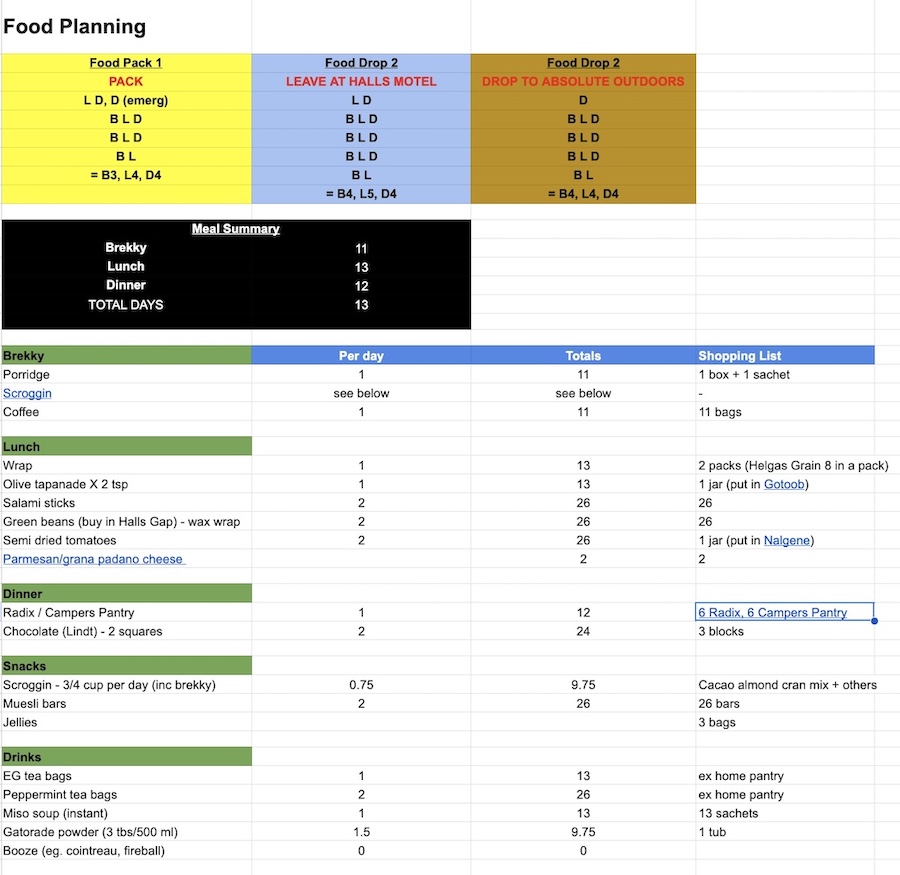
Meal Planning
I’m a visual person and love simple spreadsheets to plan my multiday adventures. The bible for each trip is a calendar-style planning sheet where I enter the dates, travel and accommodation and then break down meals for each day and any food drops I might be planning. This doc becomes my trip bible! You can download mine here and tweak to make it your own.
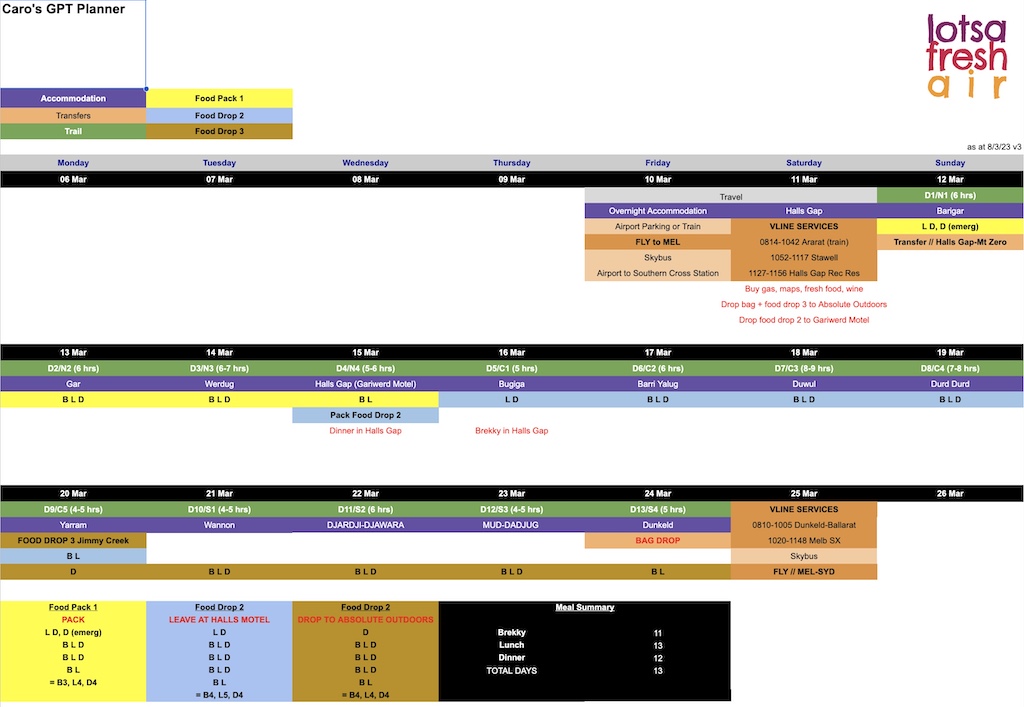
The 2nd tab of the spreadsheet is where I plan what I’m having for each meal and in this case, I kept it super simple: same thing for brekky each day (just a different porridge flavour to keep me interested), same thing for lunch and then a variety of store-bought freeze-dried meals for dinner.
Water
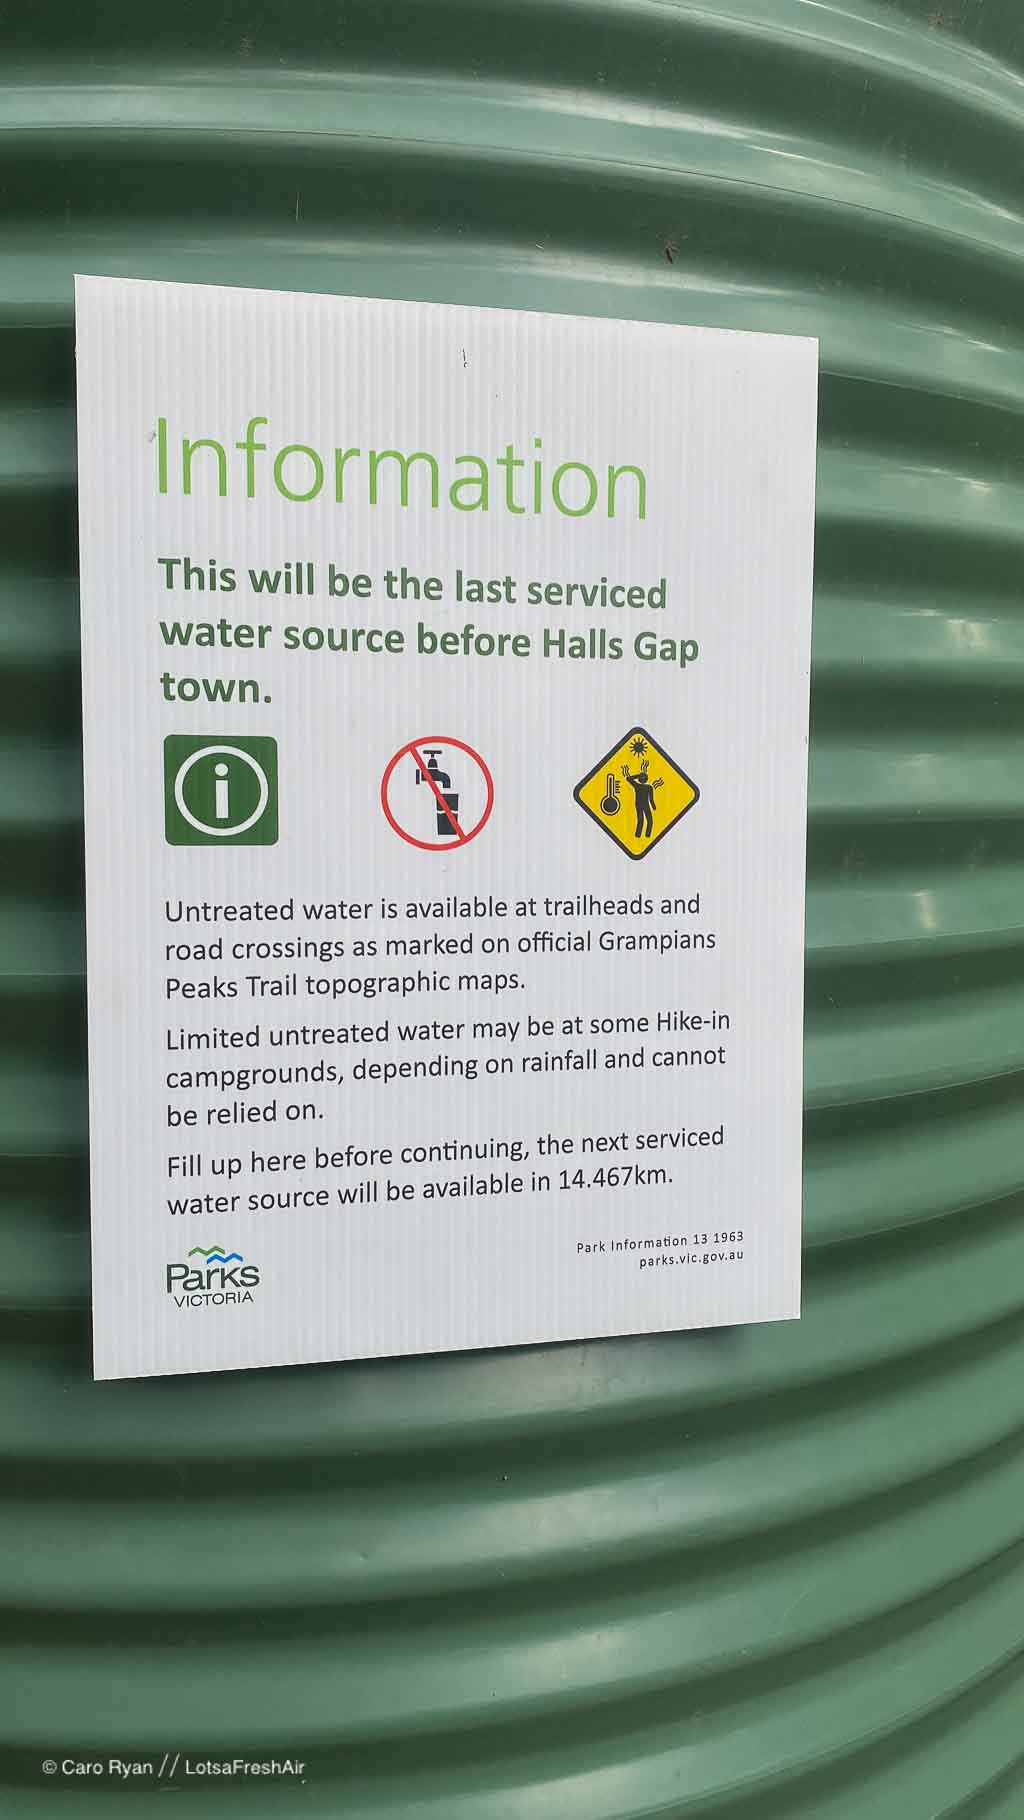
The very nature of an exposed ridgetop walk like the GPT means that not only are there a limited number of creeks along the route, but during hot and dry periods, they dry up very quickly.
The official recommendation from ParksVic is to treat the water before use. Personally (and remember you need to be responsible for your own choices ;)), I didn’t treat any water I used from the tanks along the route (although I carried Micropur tablets) and did not have a problem. A local told me that the serviced tanks are filled with treated town water. That’s not to say that critters, protozoa, bacteria or viruses won’t suddenly find themselves into these tanks. You’ve been warned.
As part of the track construction, a network of water tanks was installed at each campground (fed by runoff from the roofs on the shelter or toilets) and at trailheads with road access. These roadside tanks are serviced by water trucks and are the most reliable source for the track. To check the water levels for the tanks get in touch with the Parks Vic Visitors Centre (Brambuk) and bear in mind that the tanks at campgrounds are designed for cooking and handwashing and that levels can’t be guaranteed during drier weather.
You can also find a pretty good source of info and updates on the Grampians Peaks Trail Facebook Group. Tell Josh I sent you! 😉
Trail Accommodation
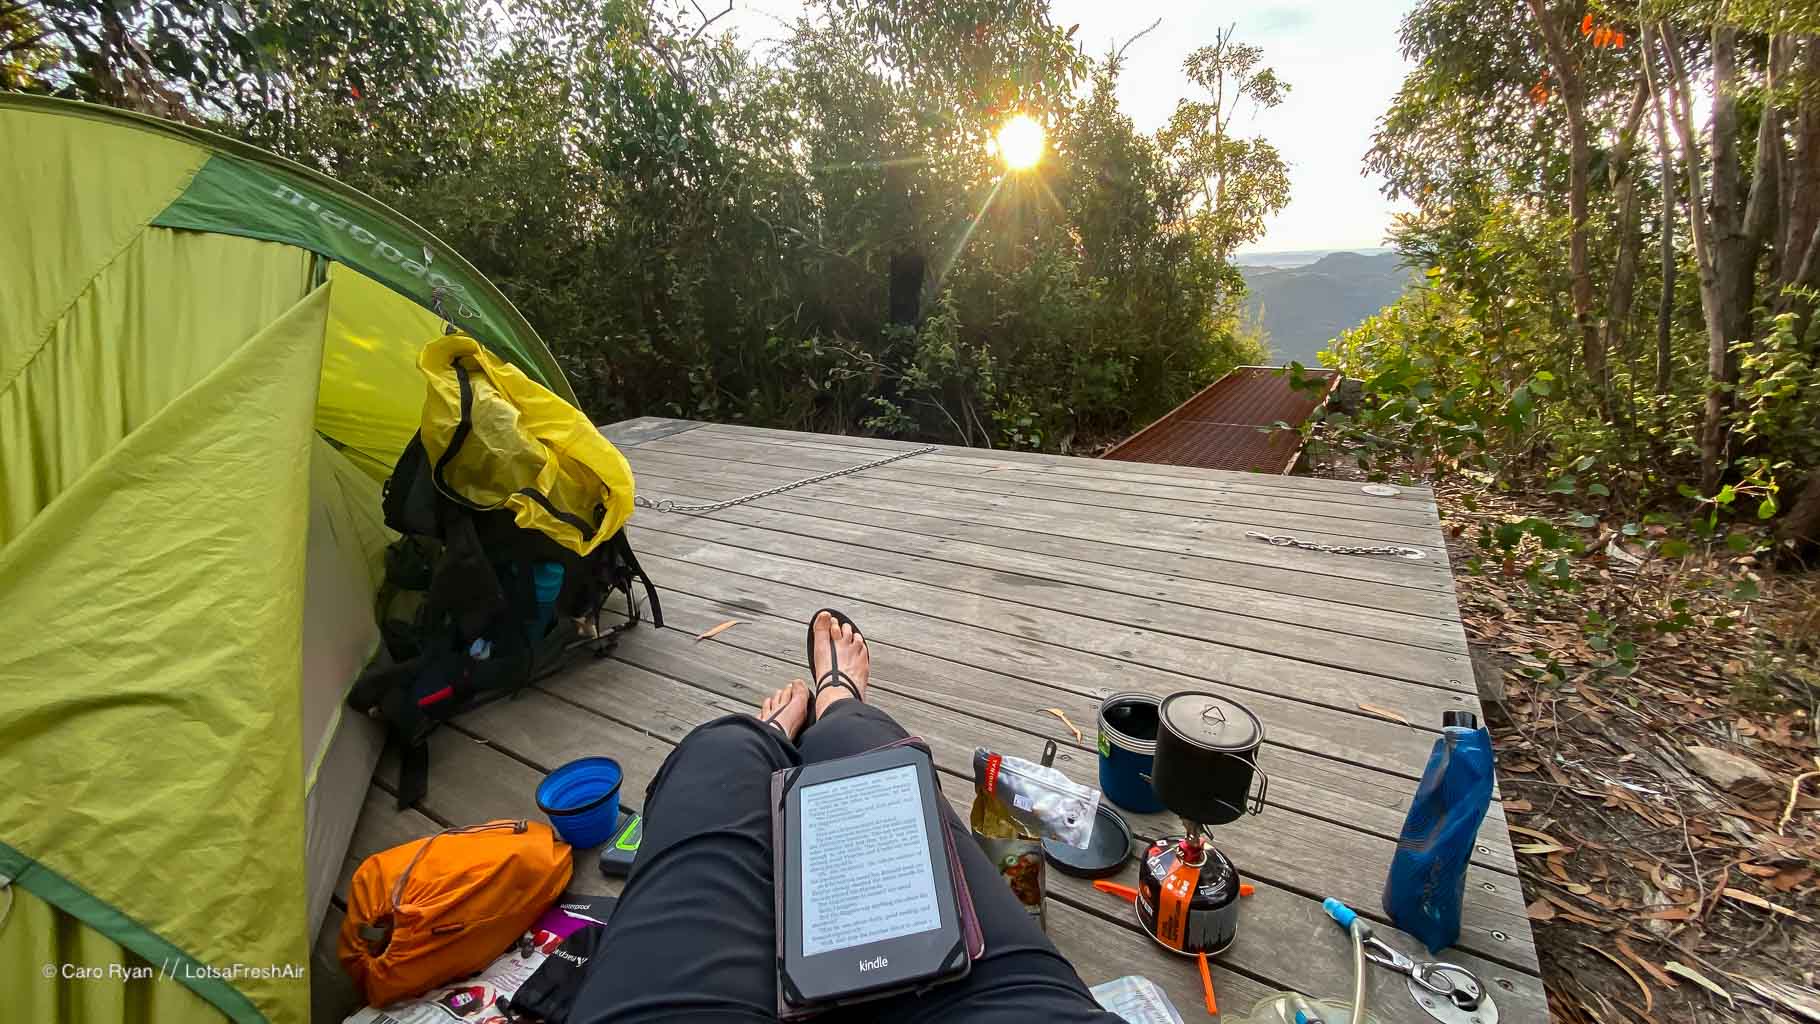
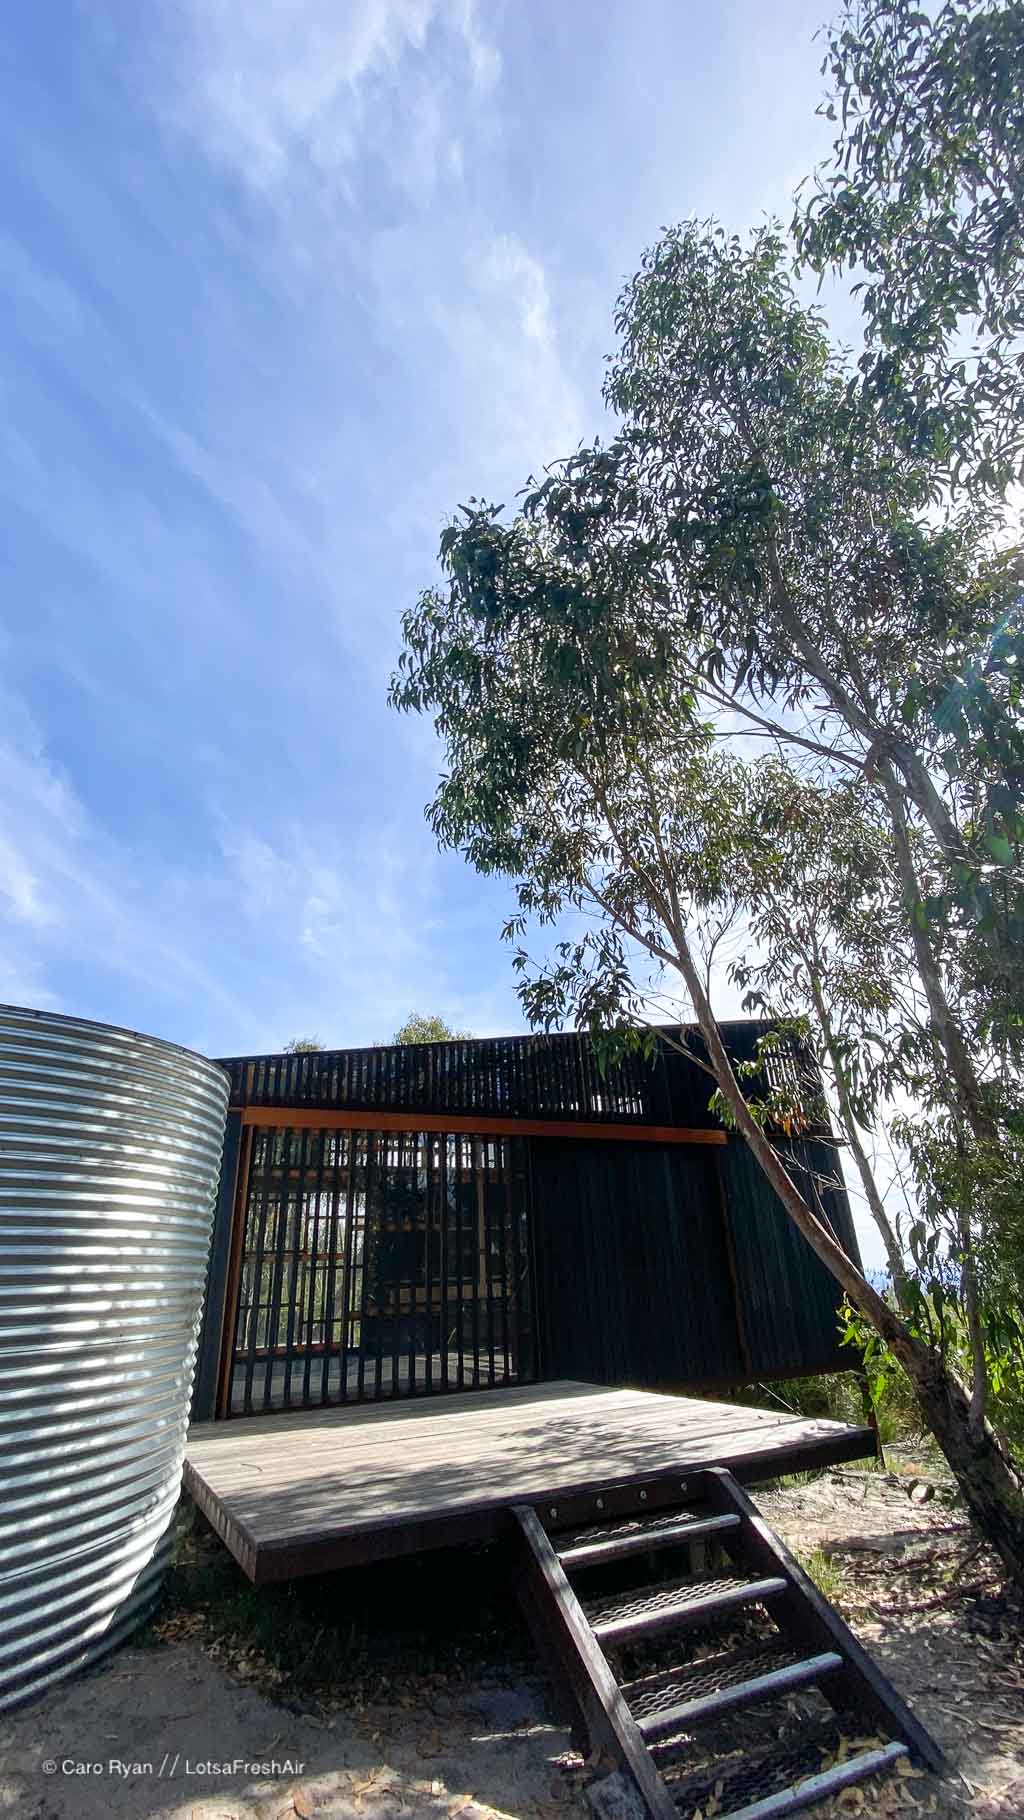
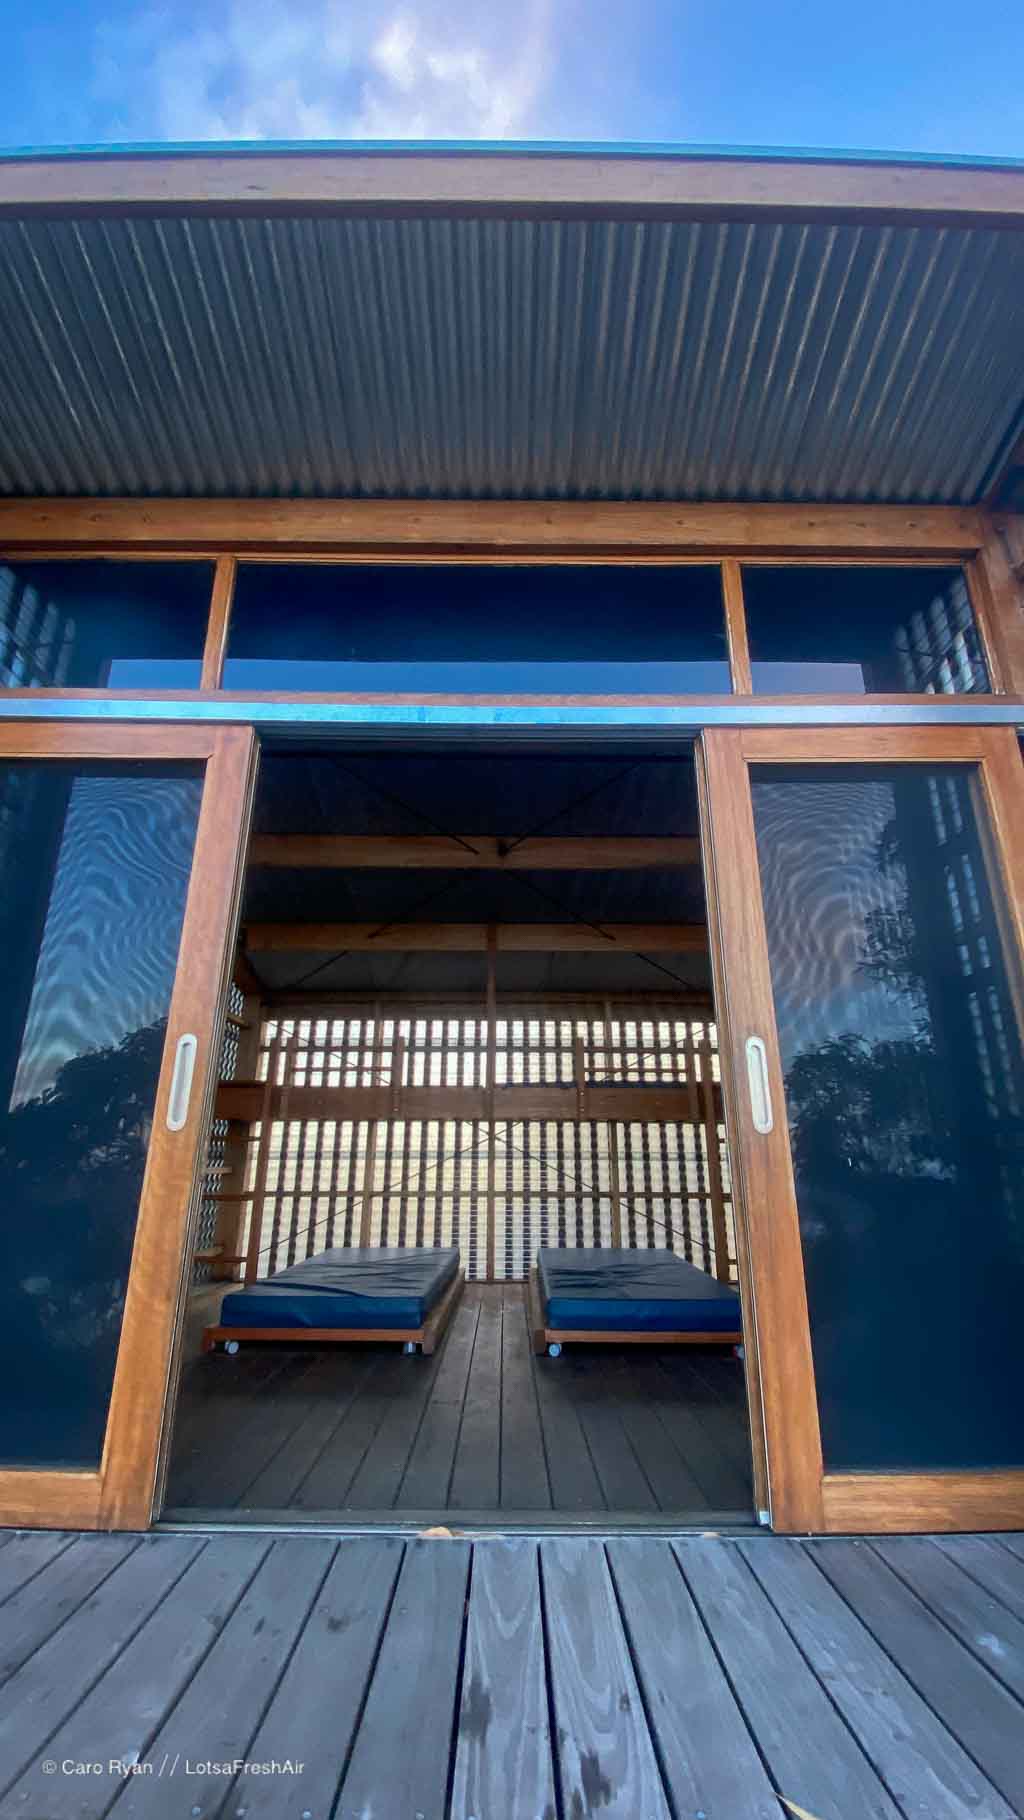
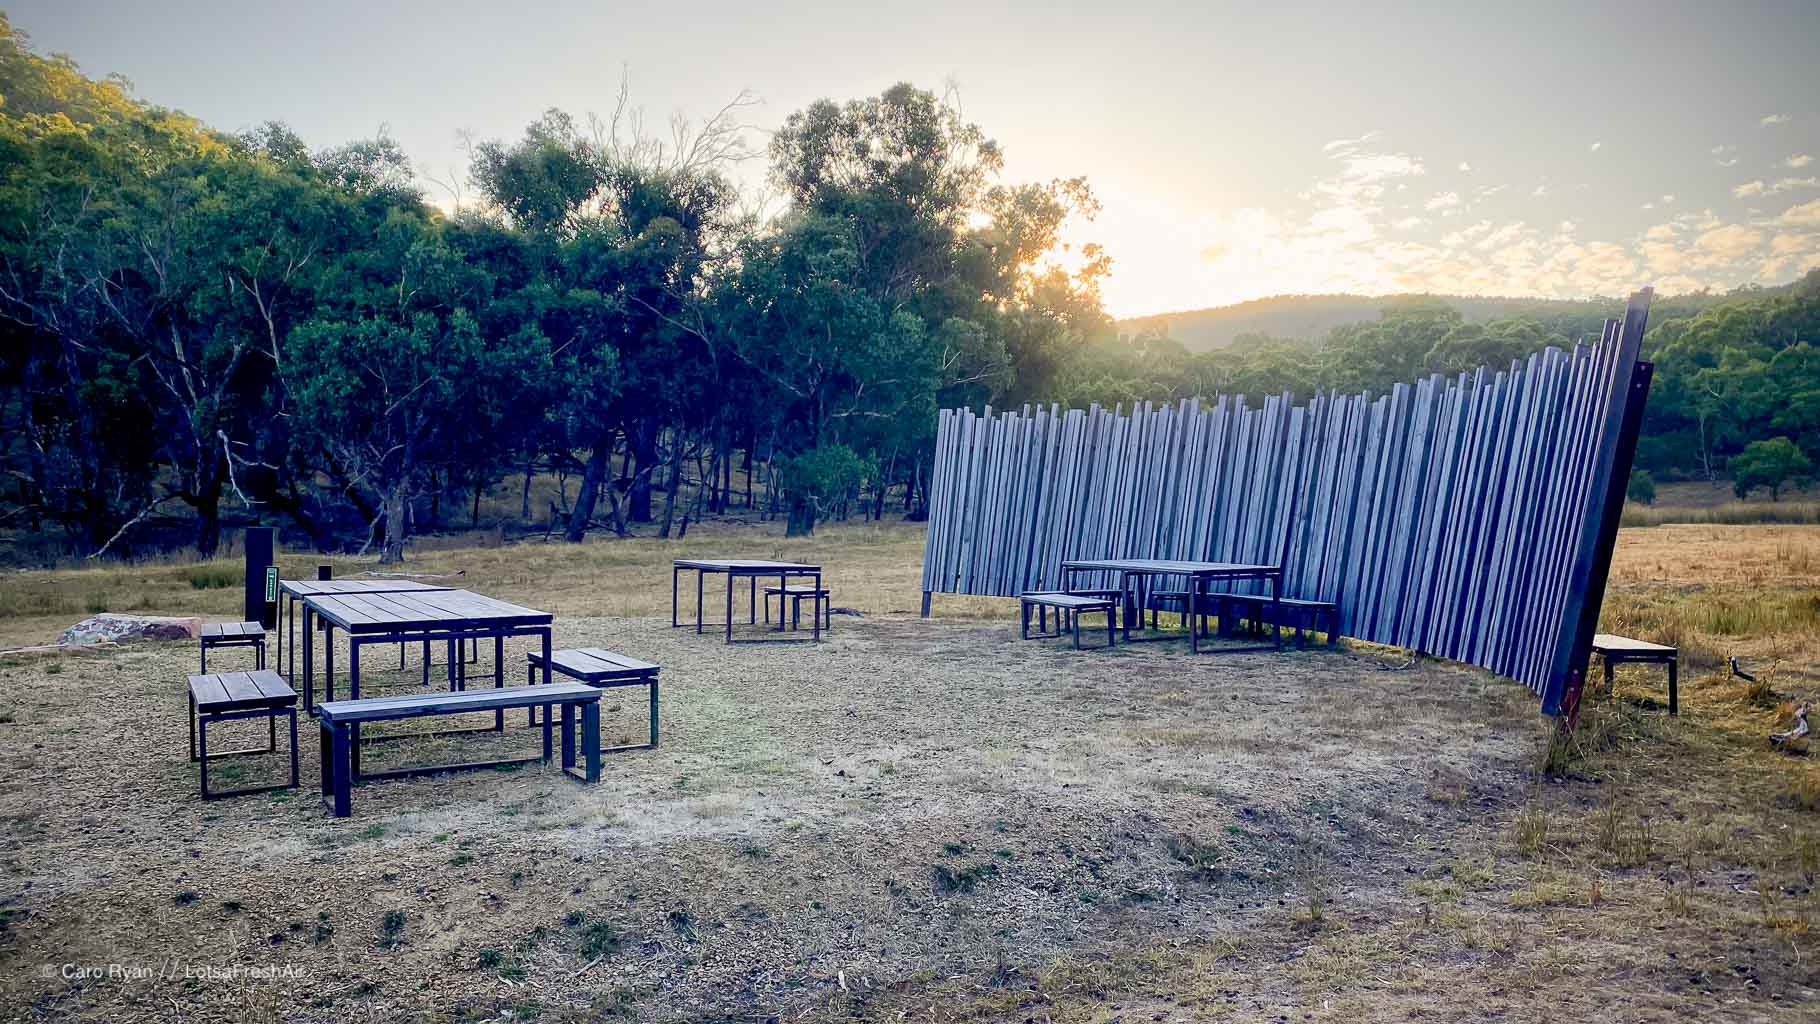
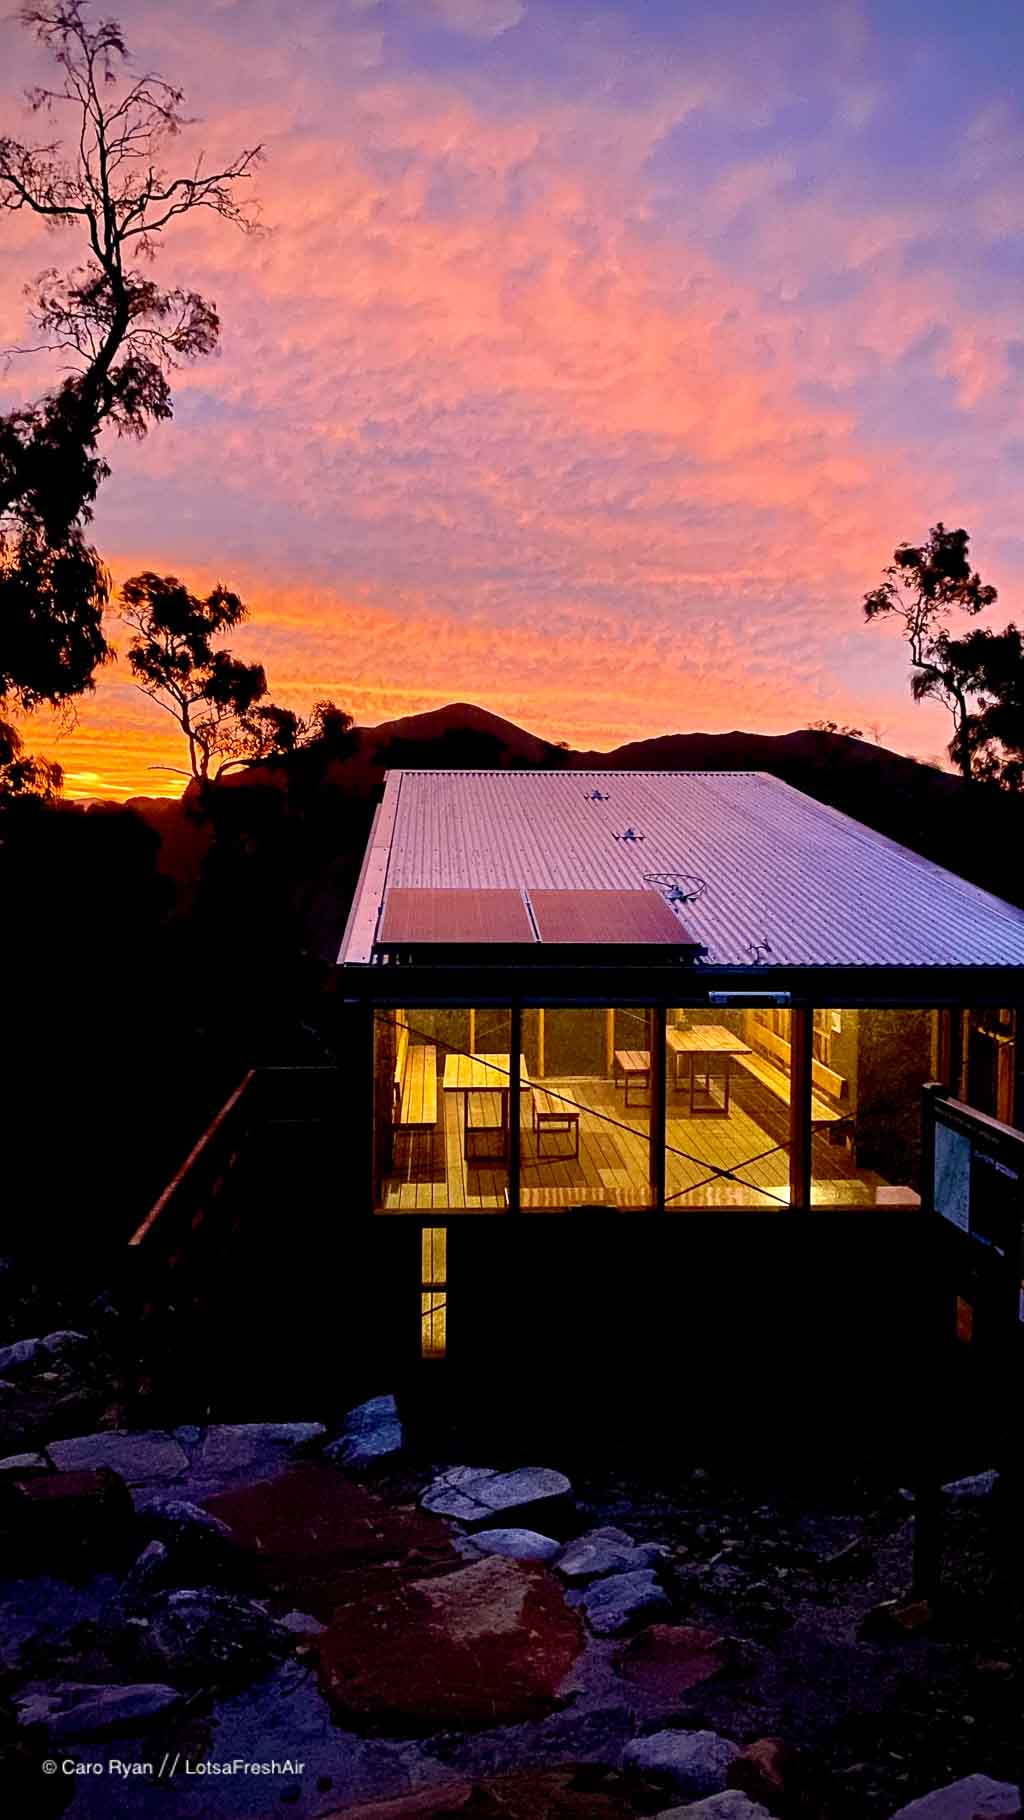
Tent platforms and shelters
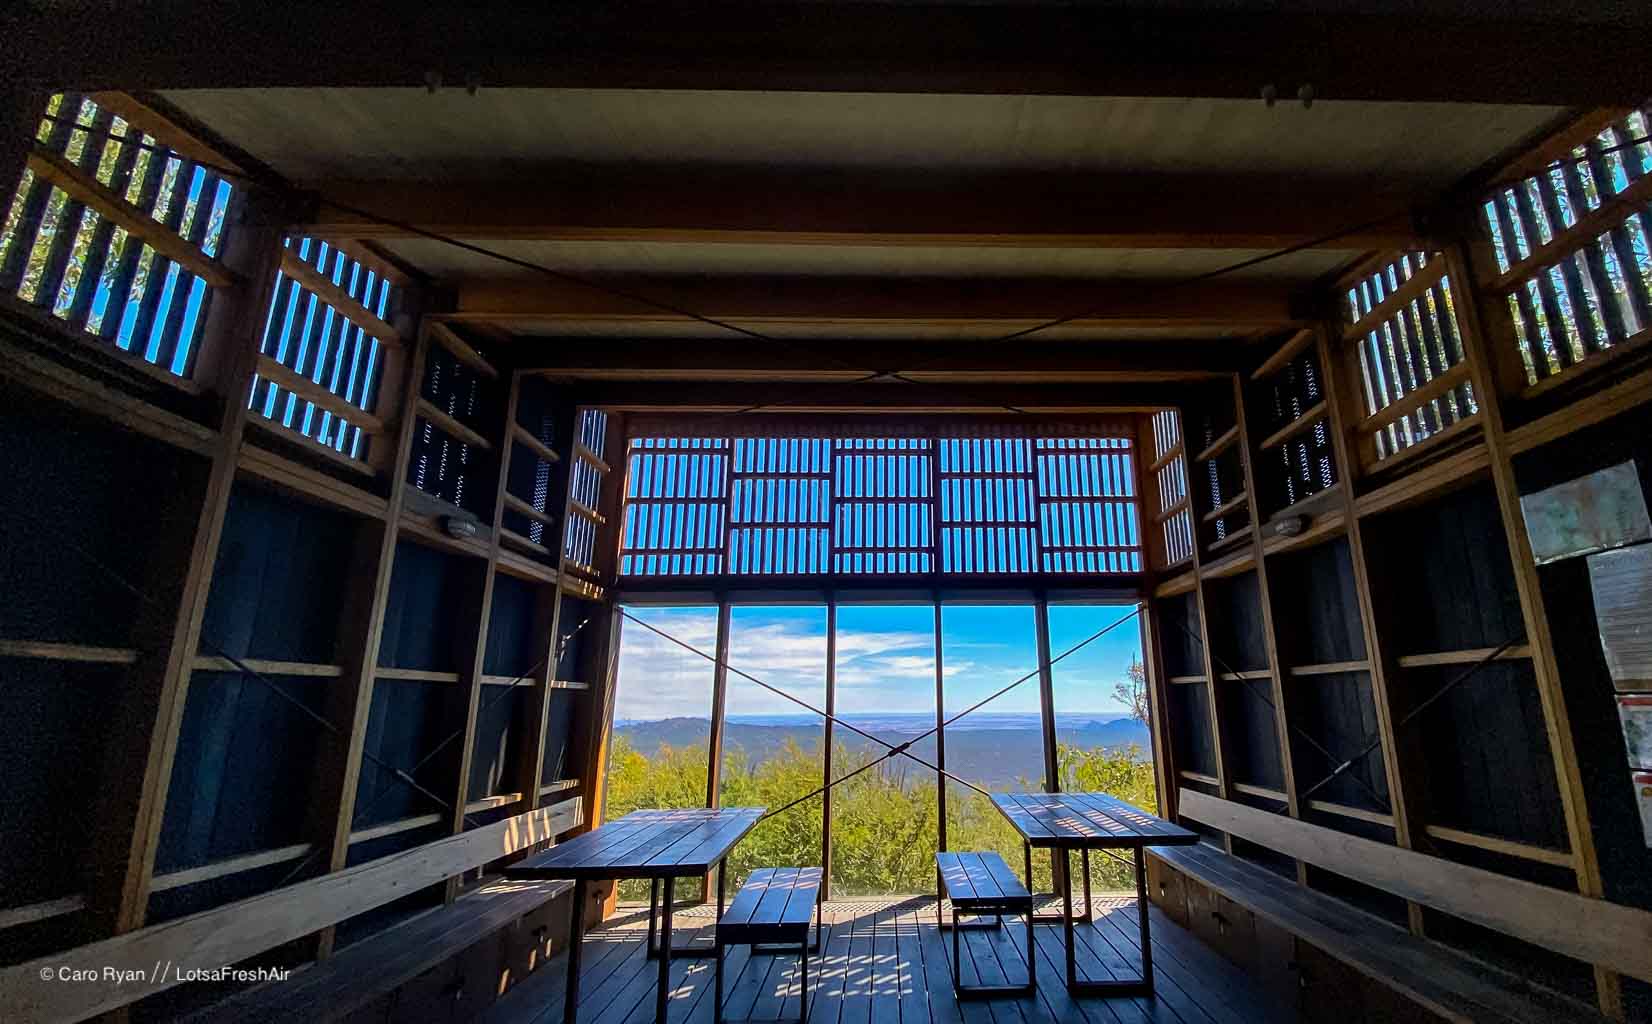
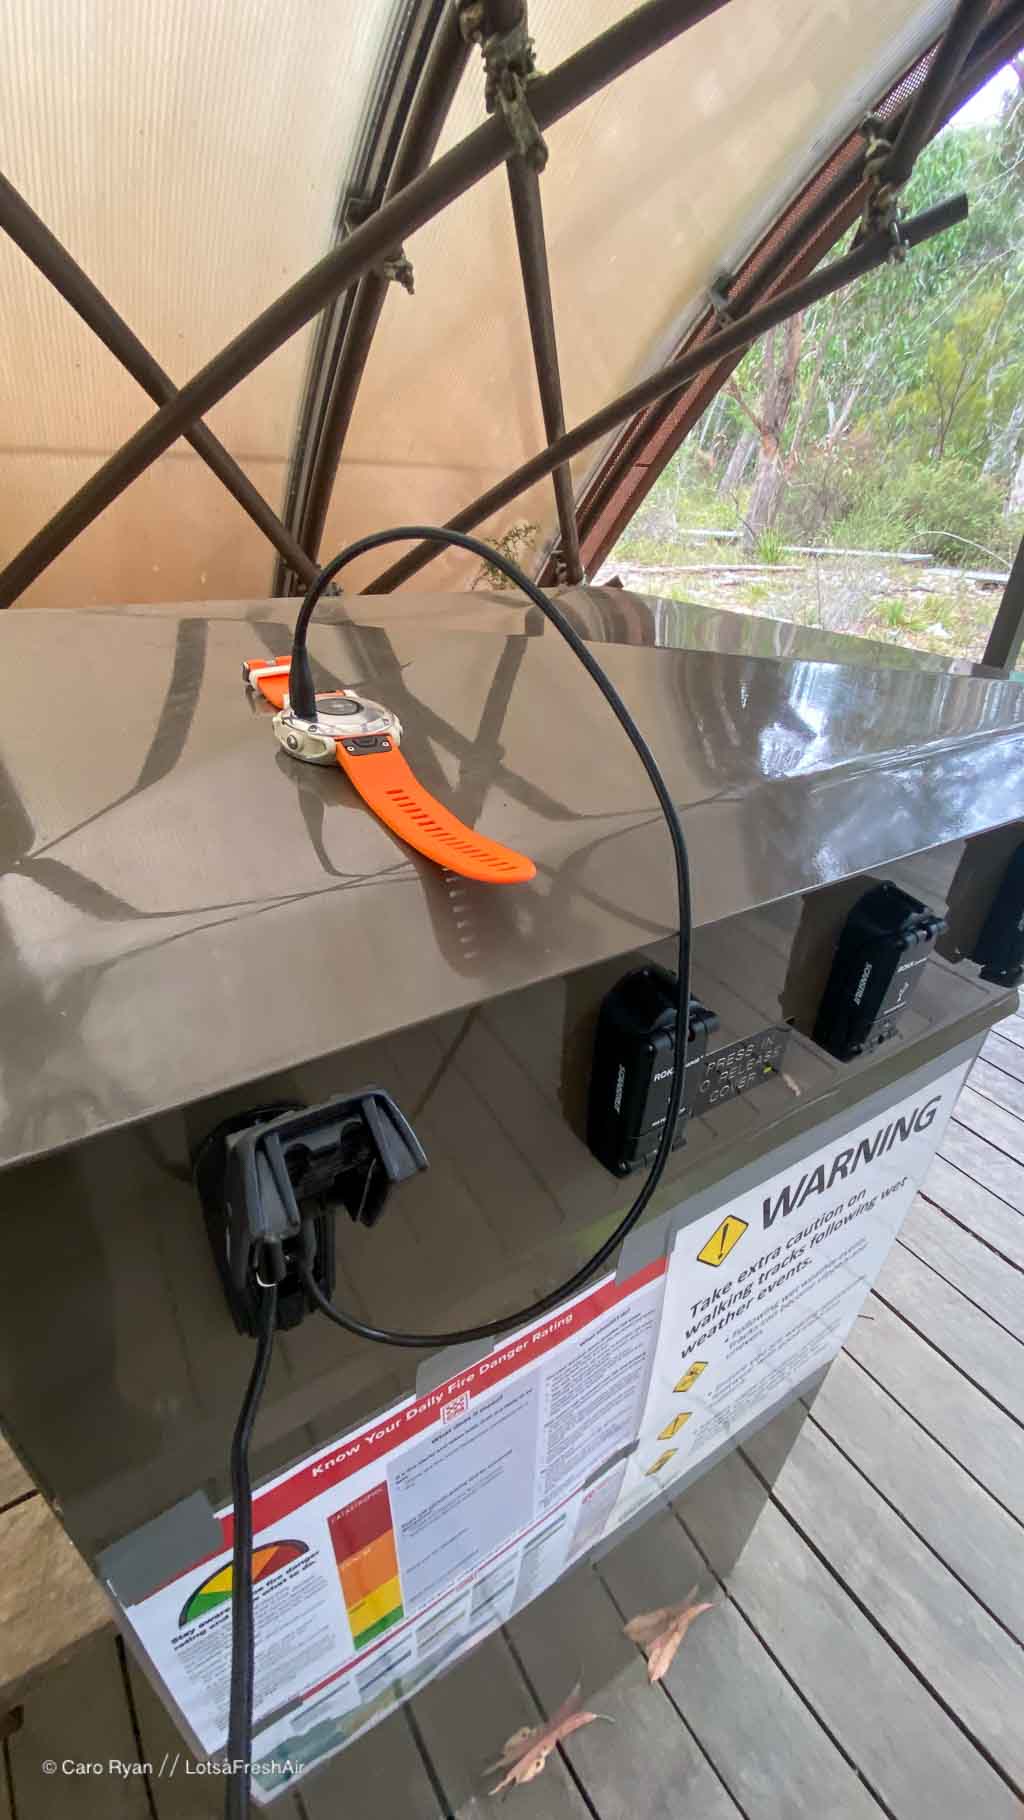
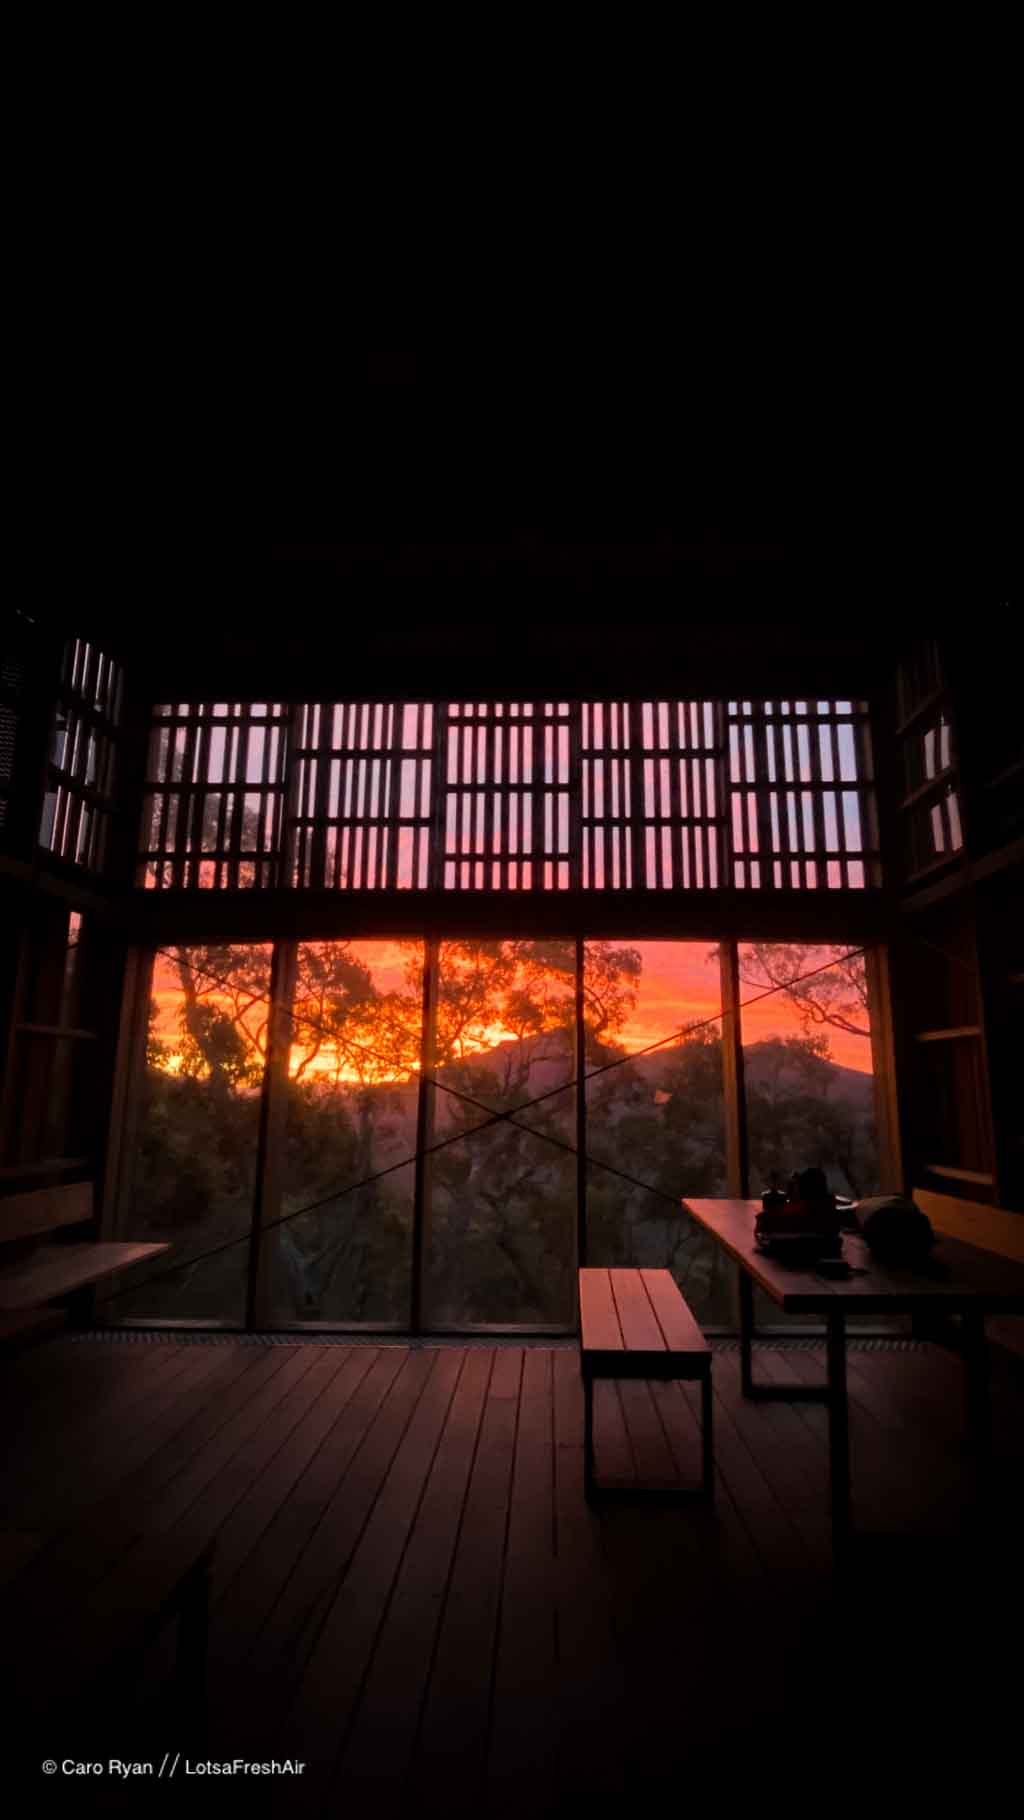
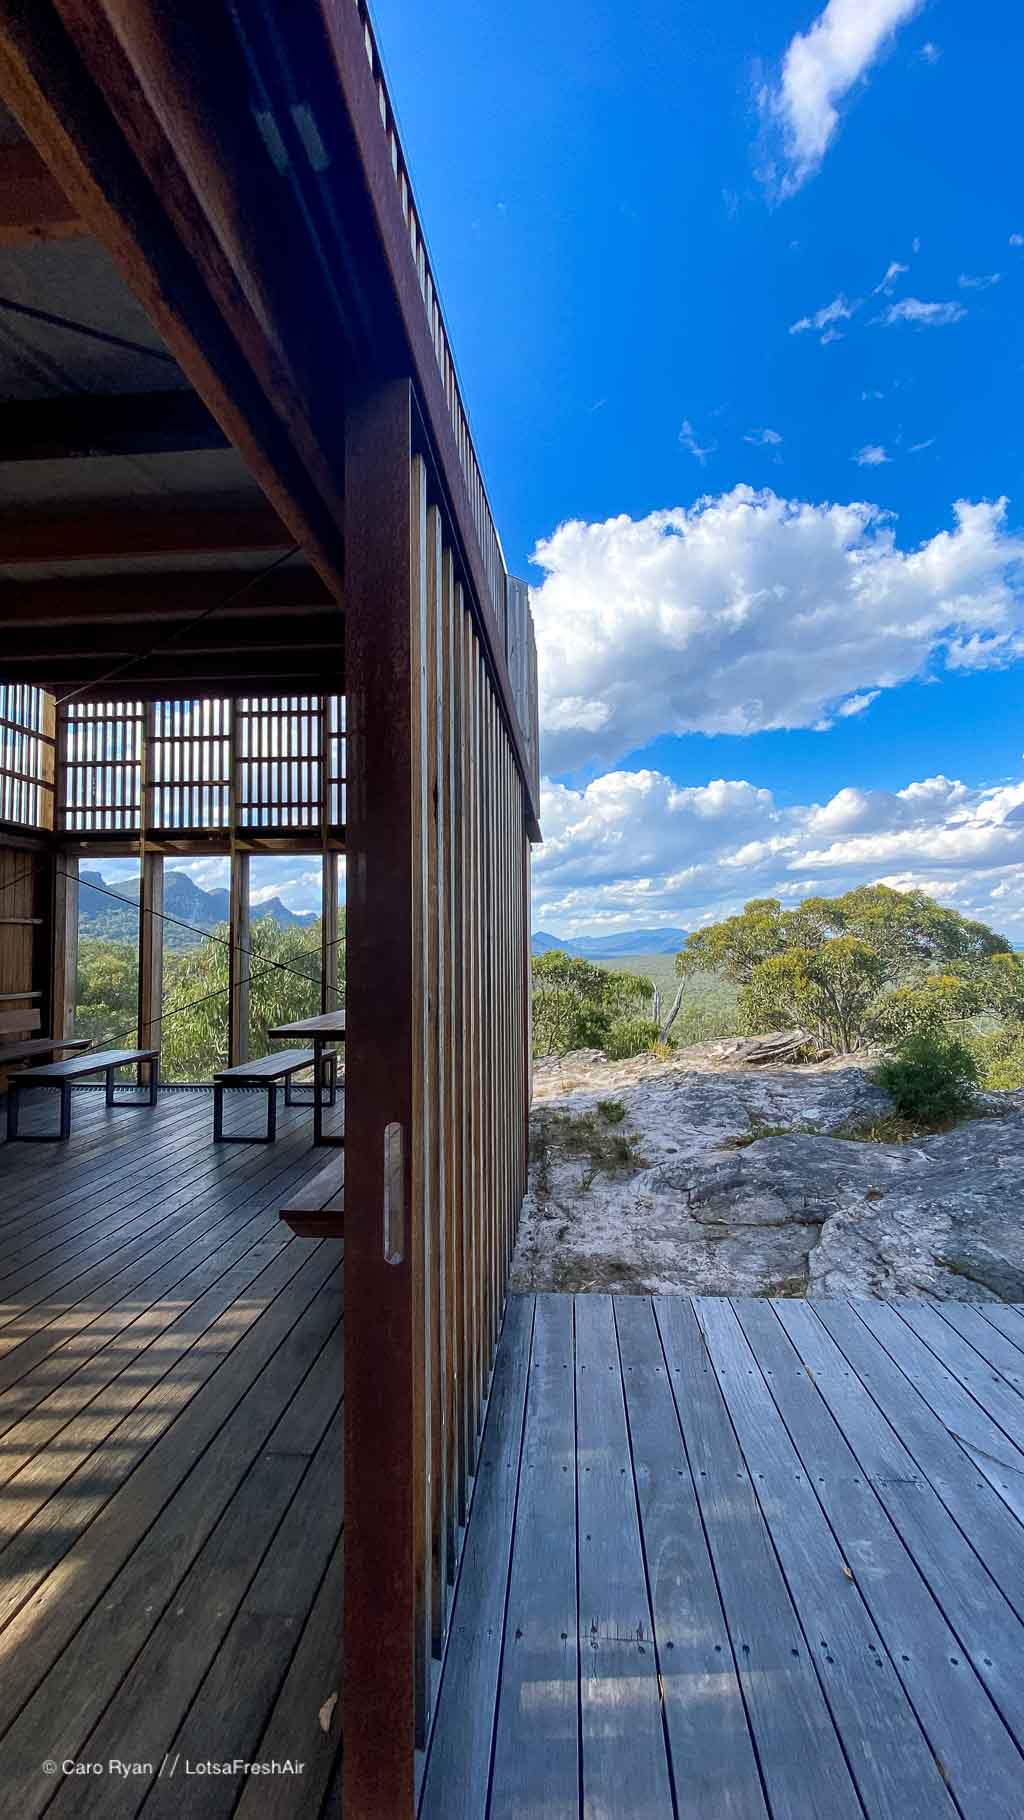
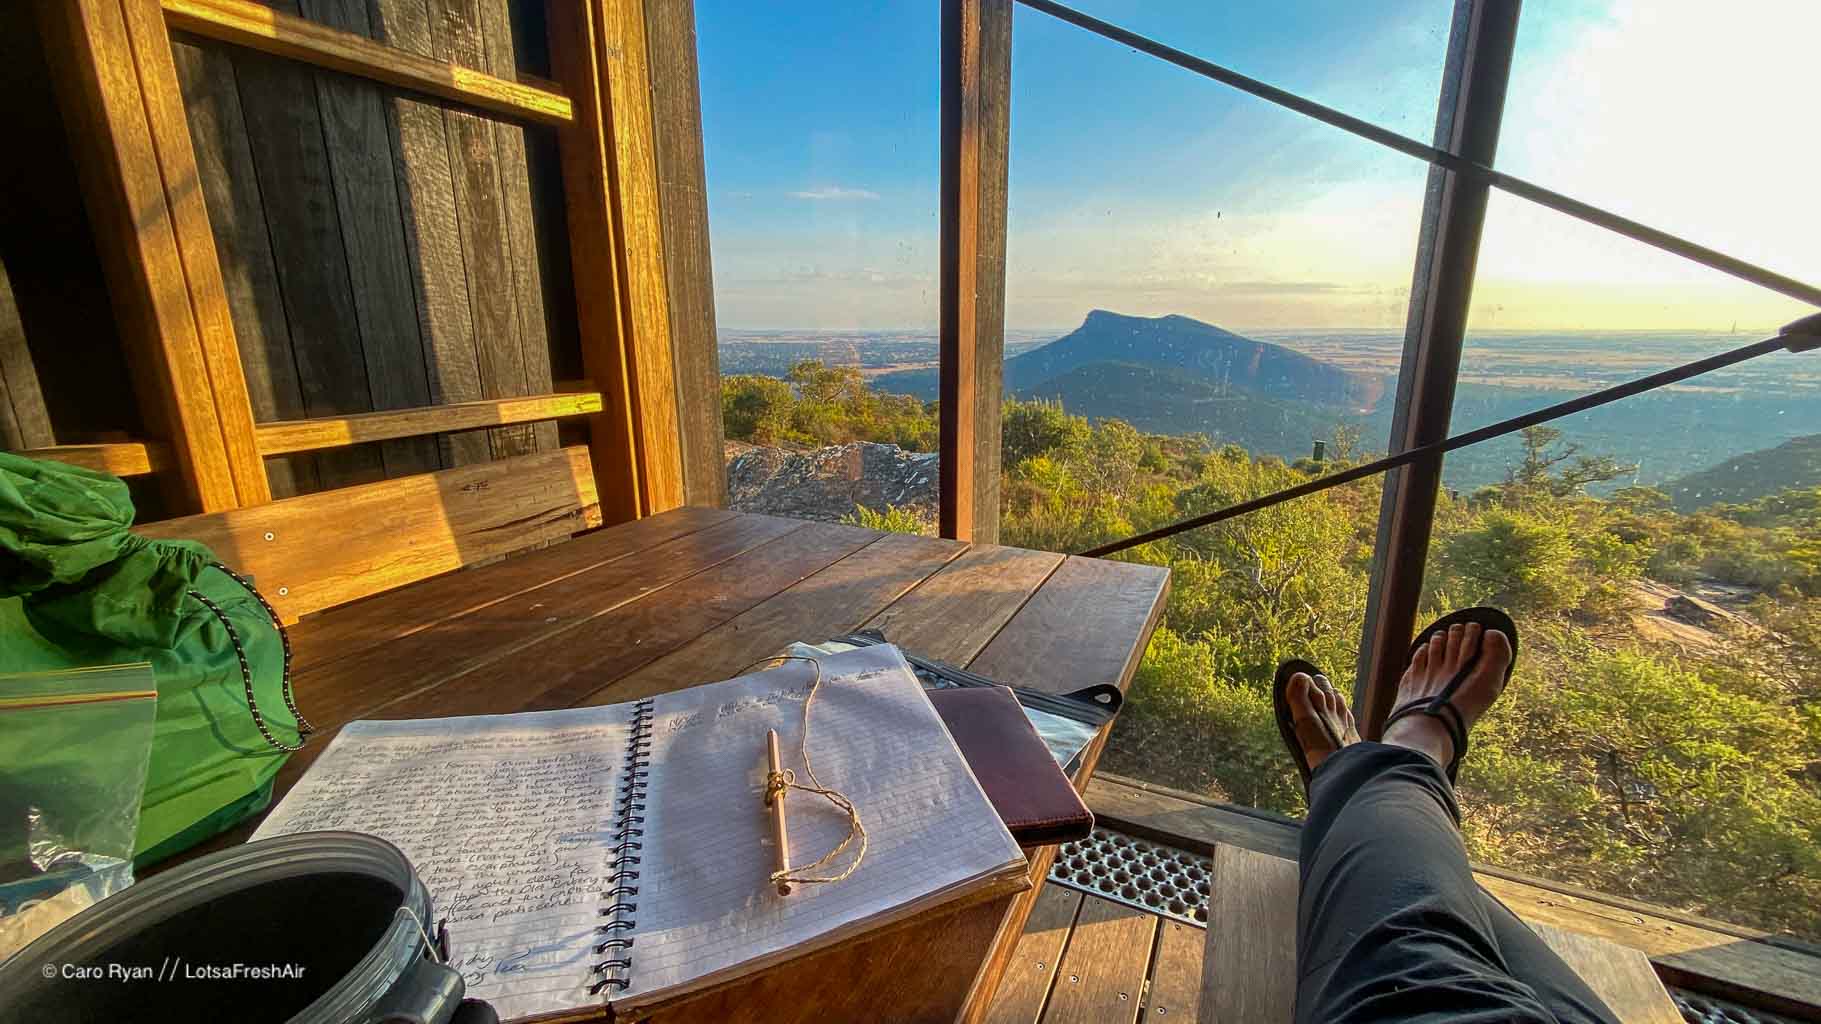
Most of the campsites have award-winning designed timber shelters, that are both beautiful and simple. These are purely for cooking, recharging devices via solar USB sockets and sheltering in (you’re not meant to sleep in them) and are a welcome and homely home, especially in wild conditions.
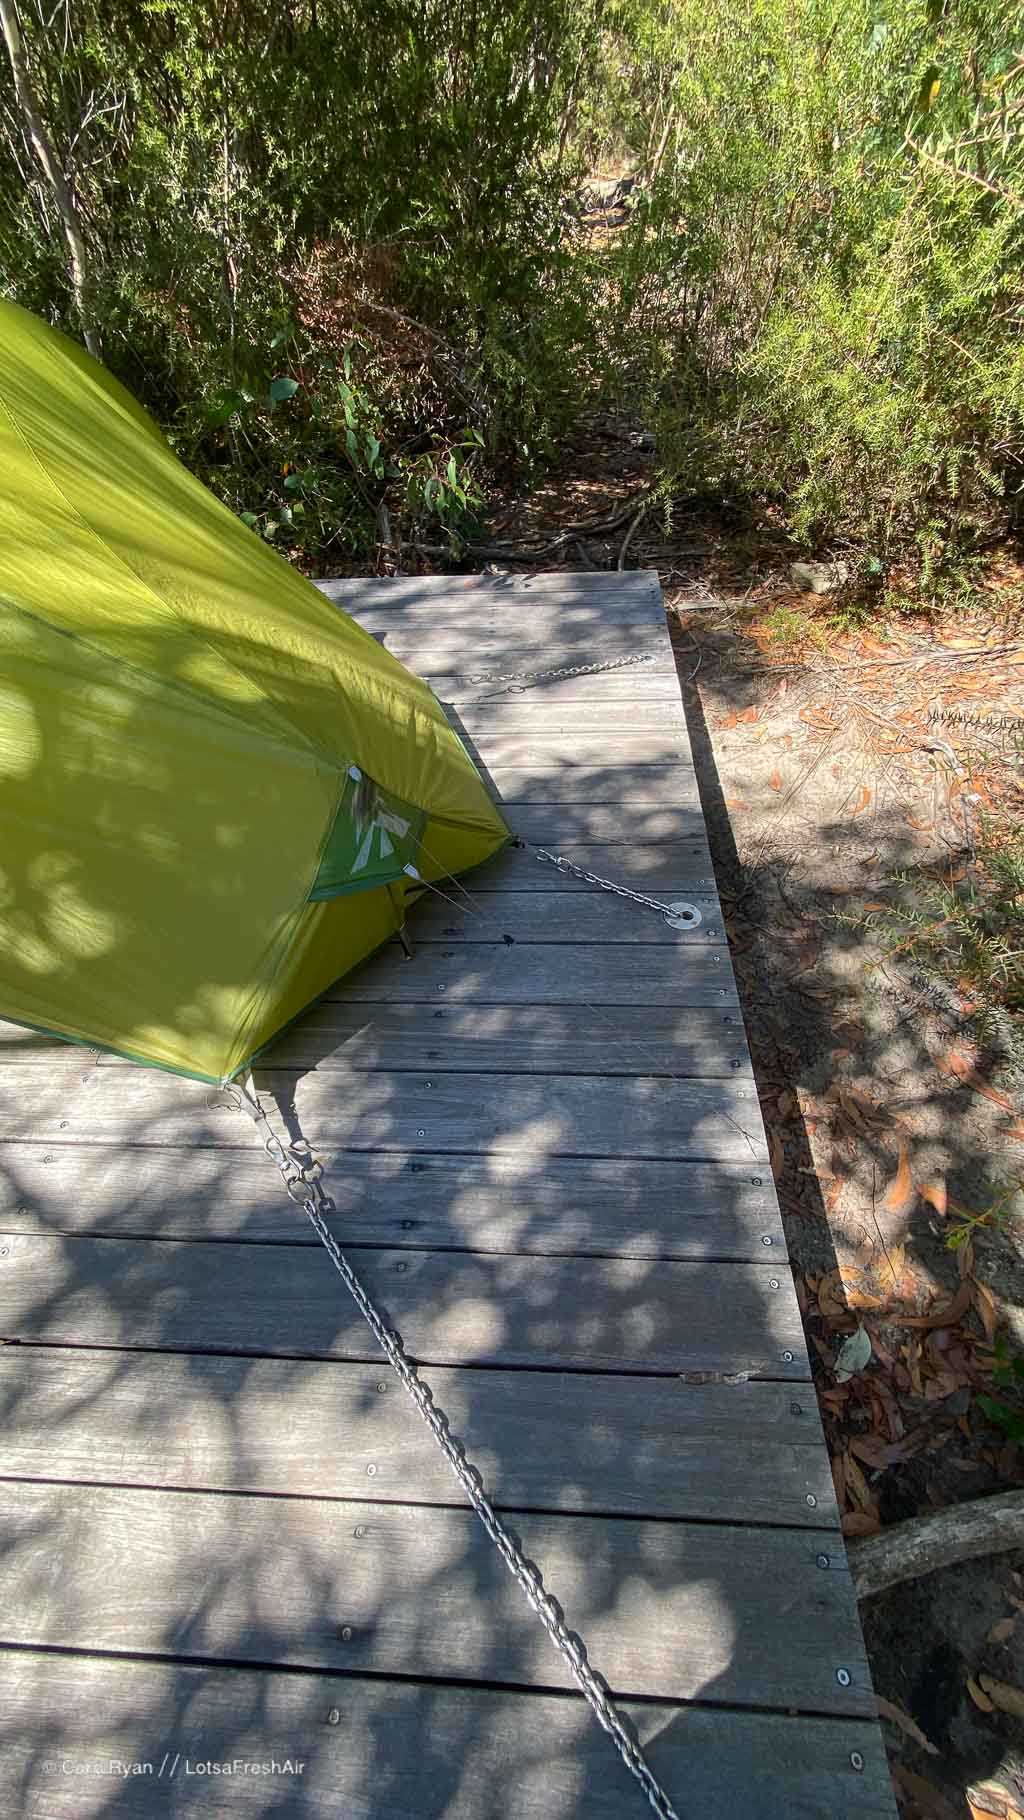
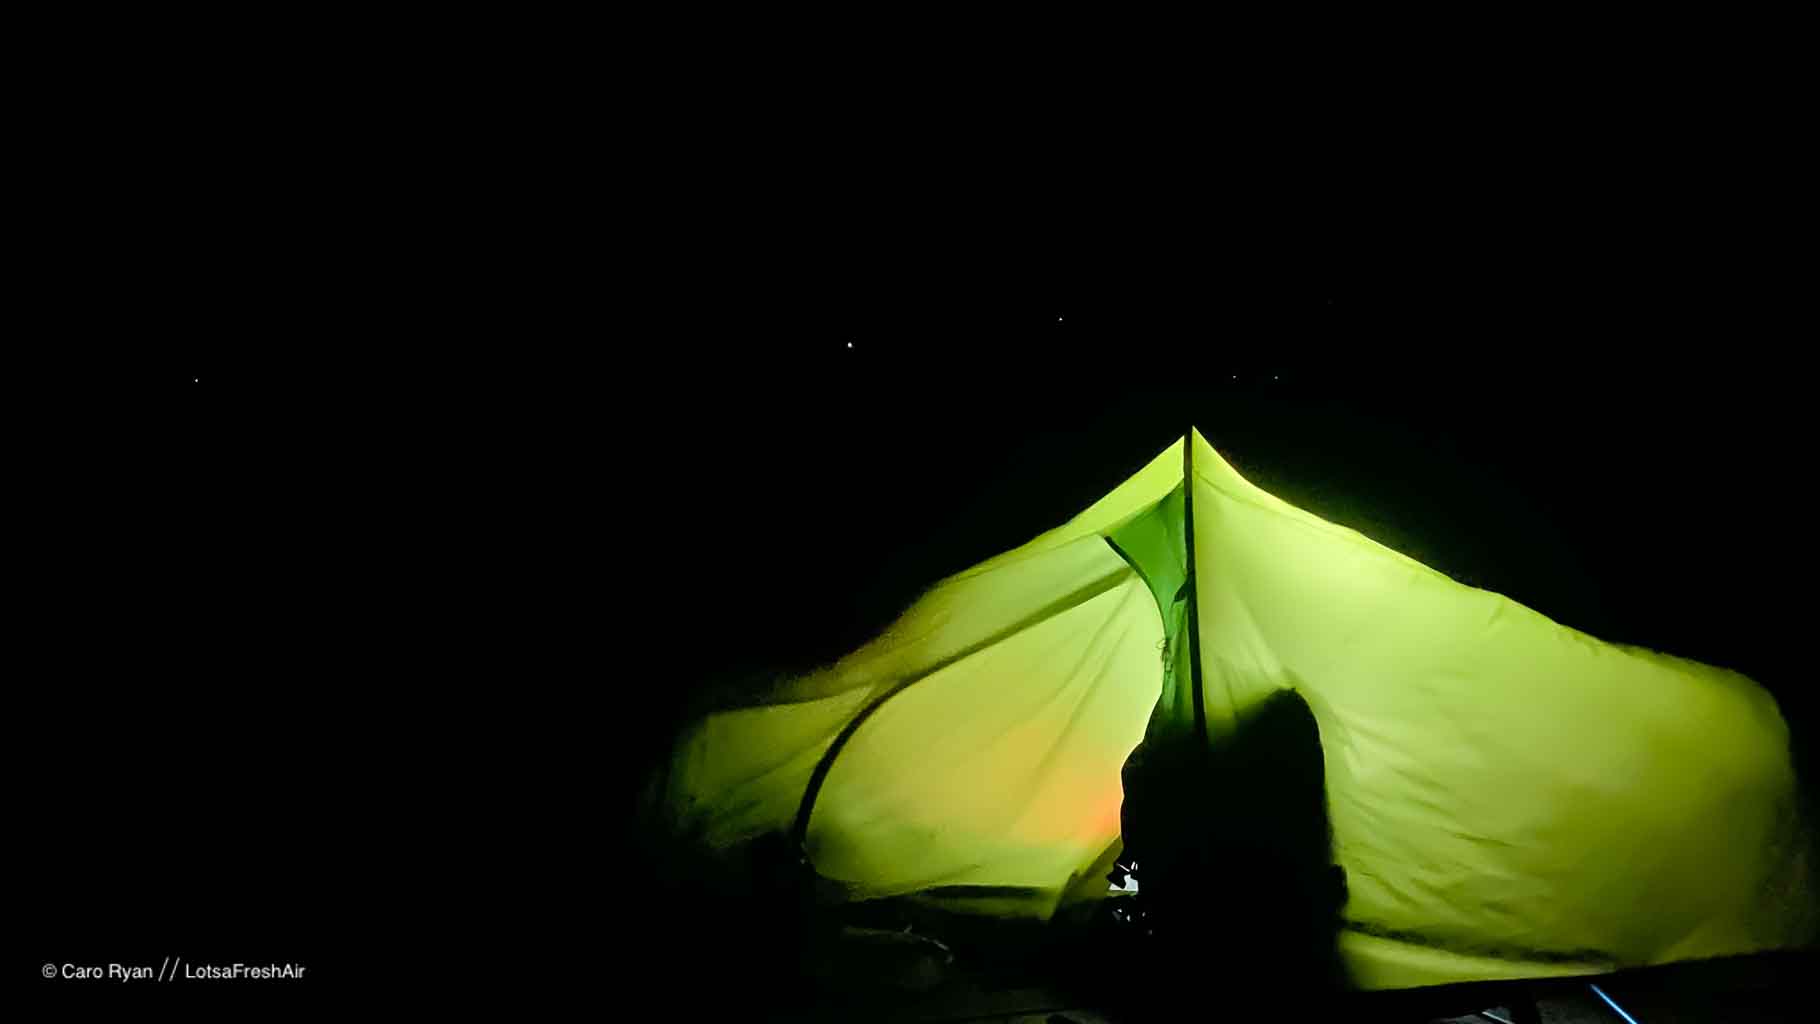
This route is designed for self-sufficient tent camping and given the timber platforms (or densely compacted sand), you’ll find a free-standing tent a simpler (and faster) setup option. Having said that, I used my Sololight to good effect with the chain system provided on the platforms tensioning well. These platforms can prove chilly, with wind whipping up underneath them in a stiff breeze. You can increase the warmth by laying an emergency ‘space’ blanket between your sleeping pad and the floor of your tent. Nights on compressed sand are warmer.
For the nights without platforms, I used rocks to secure the tent due to the very hard ground that refused to accept my pegs.
Importantly, I found that setting up on an angle (not square onto the platform) and to one corner proved the best location for the various tensioning chains.
TIP: I carried a couple of snow/sand pegs, in addition to my normal lightweight stakes, as these wedged snugly between the timber slats without damaging the boards. A length of paracord (which is pretty handy thing to have in your first aid/emergency kit anyway) can help too.
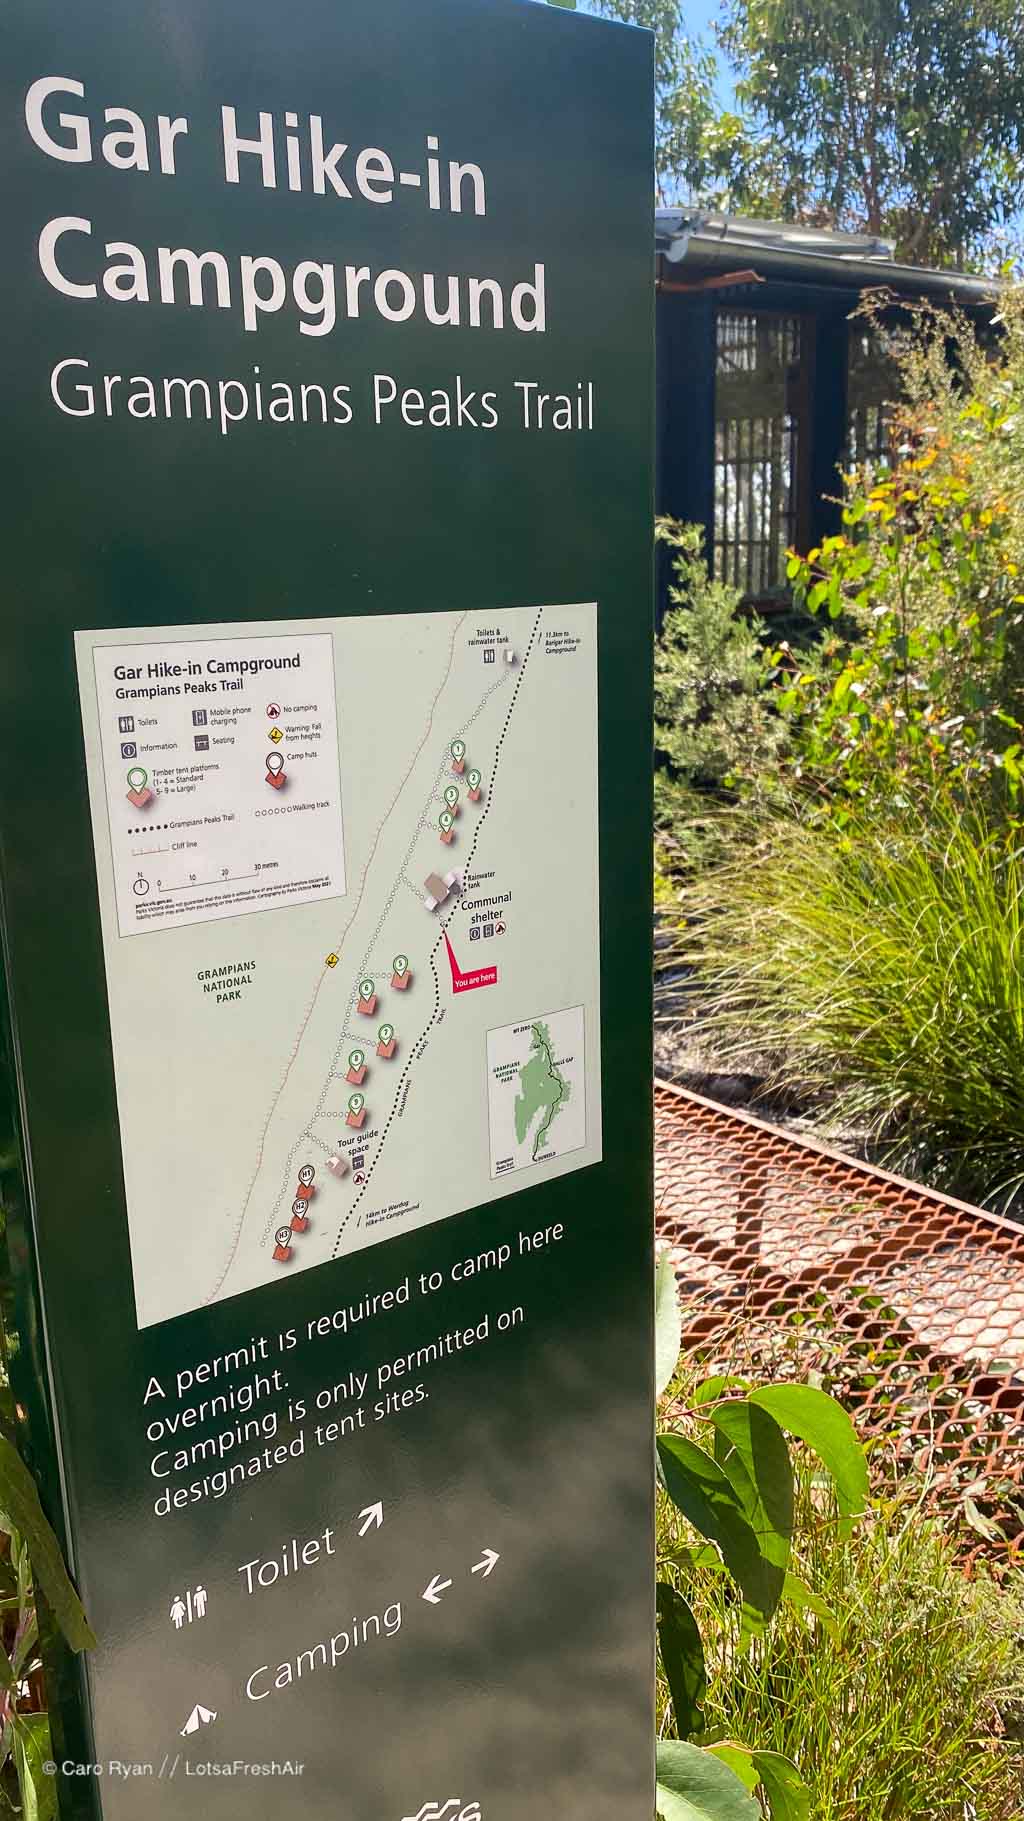
Huts
Of the 12 campsites along the track, 2 of them (Gar and Werdug – Northern Section) have Parks Vic owned huts—these are different to the beautiful award-winning shelters. These basic huts sleep 4 and can be booked through guided tour options only. They are not luxury lodges and more closely resemble huts in NZ with vinyl-covered foam mattresses on bunks.


Bookings
It’s free to walk the Grampians Peaks Trail, but if you want to stay at any of the 12 official trail campgrounds, you need to book and pay.
I did a bit of a comparison with Tasmania’s Overland Track and the cost per person, per night, works out cheaper on the GPT. As at April 2024, the Overland is $57 per person per night and the GPT is $52.50 per site (up to 2 people). This means if you’re travelling with a mate and sharing a platform, it is $26.25 per person per night.

Guided Tours on the Grampians Peaks Trail
If all this planning and logistics is a bit overwhelming, or you’re short on time or experience, the easiest thing to do is go with a licenced tour operator. There are a few different options out there and depending on the type of trip you want to have, I recommend Grampians Peaks Walking Company (for the Northern Huts experience) or the full expedition and ParkTrek for a 4-Day Grampians Highlights. I’ve travelled with both of them in the past and like what they do and how they do it.
Book a guided experienceGrampians Peaks Trail on a budget
Transport
Getting to the start/end of the GPT can be tricky to wrangle on a budget and public transport. Here’s a couple of options that you could investigate:
- Hitch (Dunkeld to Halls Gap shouldn’t be too hard, getting to Mt Zero is harder).
- Bus from Melbourne to Horsham – Taxi to Mt Zero (Trail Start) – Bus Dunkeld to Melbourne
- Leave a car in Halls Gap and catch Warrnambool – Ararat bus from Dunkeld. Just need life/transfer to start.
Campgrounds
If you’re on a budget, it is possible to spend nights in Gariwerd at alternative Parks Victoria campgrounds that are not part of the official route. These sites are generally cheaper (eg. Stony Creek is $28.90/site, Coppermine & Troopers Creek is $14.70/site) than the GPT sites and will mean you need to create a different itinerary and route, most likely with more kms/day. As many of these alternate sites are not walk-in campgrounds, you may find that they have quite a different vibe to the official ones as they may be accessible by road and/or 4WDs.
I haven’t done a deep dive into the research on these alternative sites or building an alt. schedule, but some spots you might like to investigate in are:
Communications
Is there mobile coverage on the GPT?
Although mobile communications are patchy at best along the full track (some say 75%-80% at tops of ridgelines have coverage with Telstra), if you have a SEND (Satellite Emergency Notification Device) eg: Zoleo, InReach or SPOT, you could call for a pickup from one of the tour operators (or a friend) in town (heads up: there’s no Uber).
And (as always) carrying a PLB (Personal Locator Beacon) is one of my essentials. I carried both my Zoleo (I also got my weather reports through this) and my PLB.
Take a listen to my podcast interview with Linda from AMSA (Australian Maritime Safety Authority) in Canberra, an expert in satellite and remote communication. It includes discussion of the satellite capabilities of iPhone 14 and 15.
Emergencies
Before you do anything else to plan for your trip, make sure that your ambulance cover is up to date. Medicare does NOT cover ambulance, which in remote and rugged locations like the Grampians, usually means a helicopter. If you have private health insurance, check the fine print to make sure that you’re covered for more than 1 trip. In one emergency you may need a helicopter AND a road ambulance (eg. from landing site to hospital) and you can probably guess which one an insurance company may want to cover ;).
TIP: Before you leave coverage make sure you have downloaded Emergency+ and VicEmergency apps.
Taking care of the GPT
I’d love to think that if you’re the type of person who loves wild places like Gariwerd enough to want to do the trail, then you’re also going to be the lovely type of folk who practice minimal impact bushwalking (aka Leave No Trace).
In addition to all the normal things we do in the bush to reduce our impact, on the GPT we also need to be aware of the threat of phytopthera (literally: plant killer) and make sure we do all we can to reduce its spread.
- Before // Clean tent floors, ground sheets, pegs, hiking poles and shoes to ensure you’re not transporting more invasive species to the area.
- During // Use all the boot cleaning/washdown stations you’ll walk past along the route. Don’t forget to clean your hiking pole tips as well as your shoes.
- After // Repeat ‘before’ so you don’t transfer nasties anywhere else
TIP: You can download my free boot spray recipe card here.
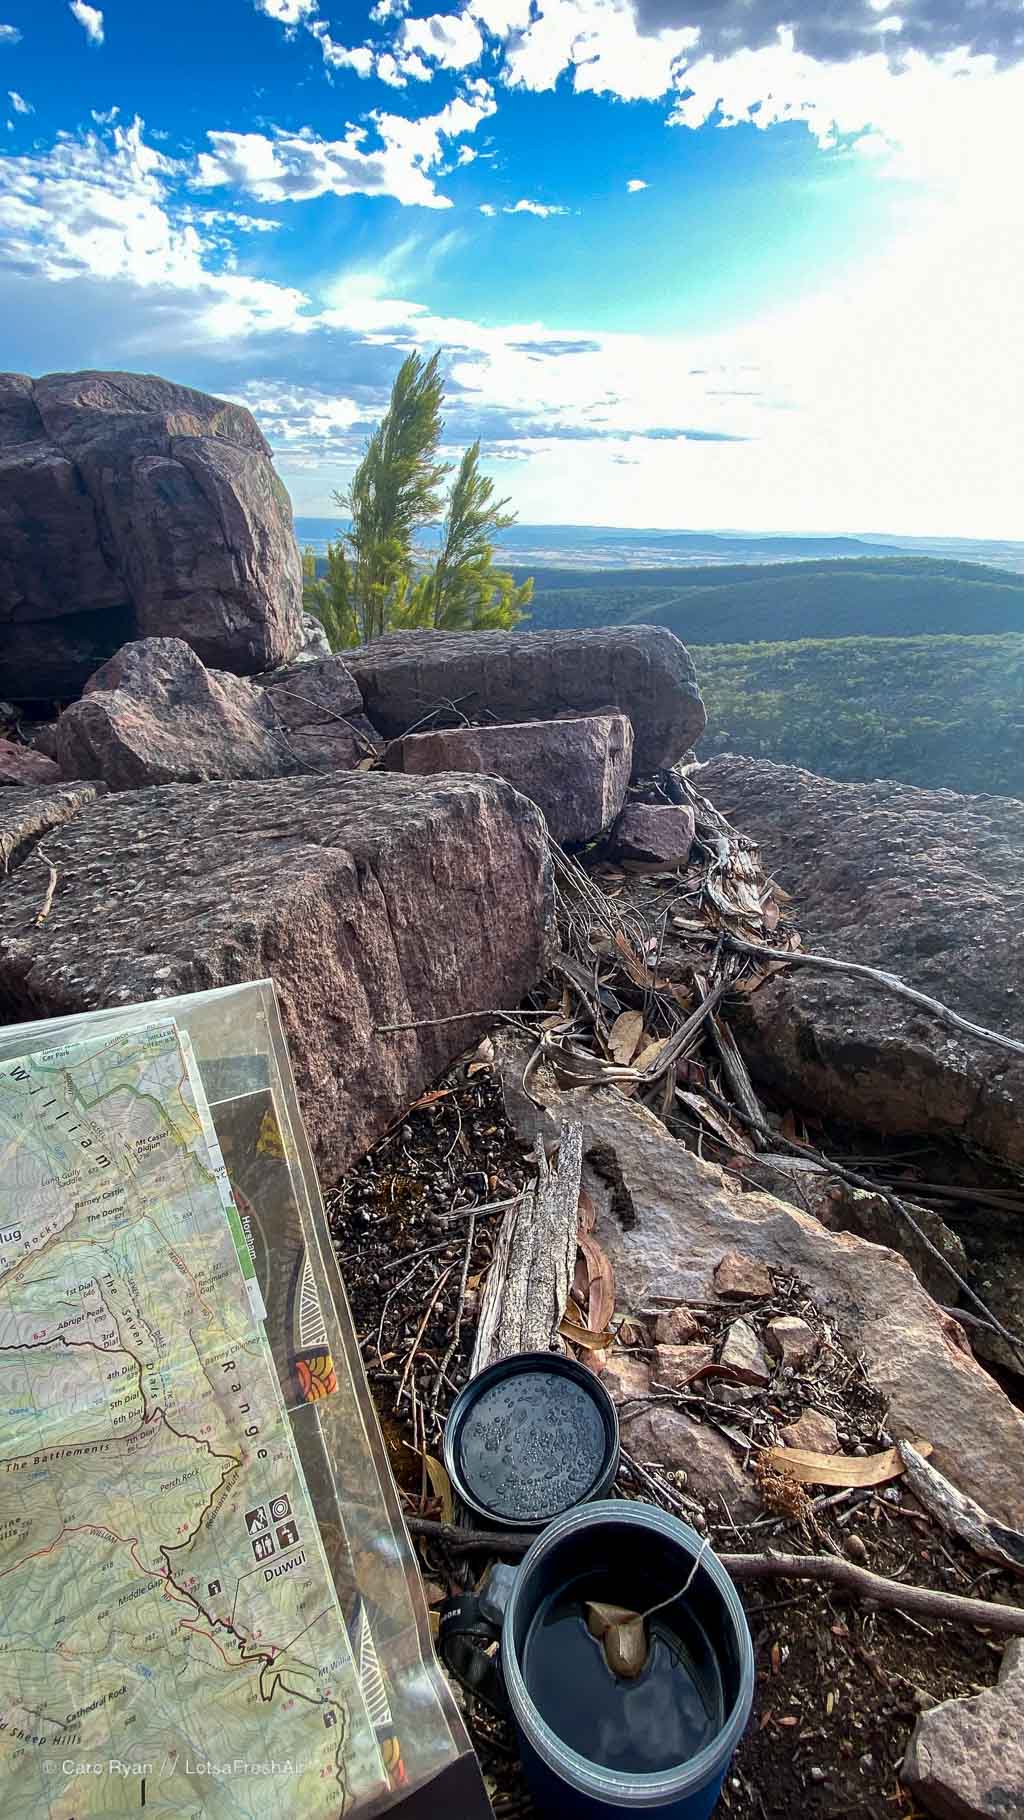
Maps of the Grampians Peaks Trail
I am a confessed cartophile—there’s no hiding it. I love the tactile nature of paper maps and the worlds that they open up for me. It’s like reading the book before you see the movie! These days most folk out in the bush will be using a navigation app to place themselves in the land. The comforting blue pulsating dot can be helpful, but just be warned I found that some of the GPT (including campgrounds), weren’t always placed accurately on apps drawing from OSM (Open Street Maps) data. This data isn’t official or verified by Parks Victoria, who are the land managers for Gariwerd National Park, which the GPT sits within.
The official GPT map series (1 for each section) is jam-packed with helpful info. They’re more like a trail guide with track notes, than just a map.
TIP: Bring a roll of scotch tape to leave in your city bag so you can seal all the folds before you head out on the trail. I had tears appear on the first opening. A map case is essential.

Trail Sections
I reckon the GPT is best summed up with a musical analogy of a box set:
Northern Section ~ The Triple Platinum album loaded with hits
Distance: 50.4 km
Grade: 4
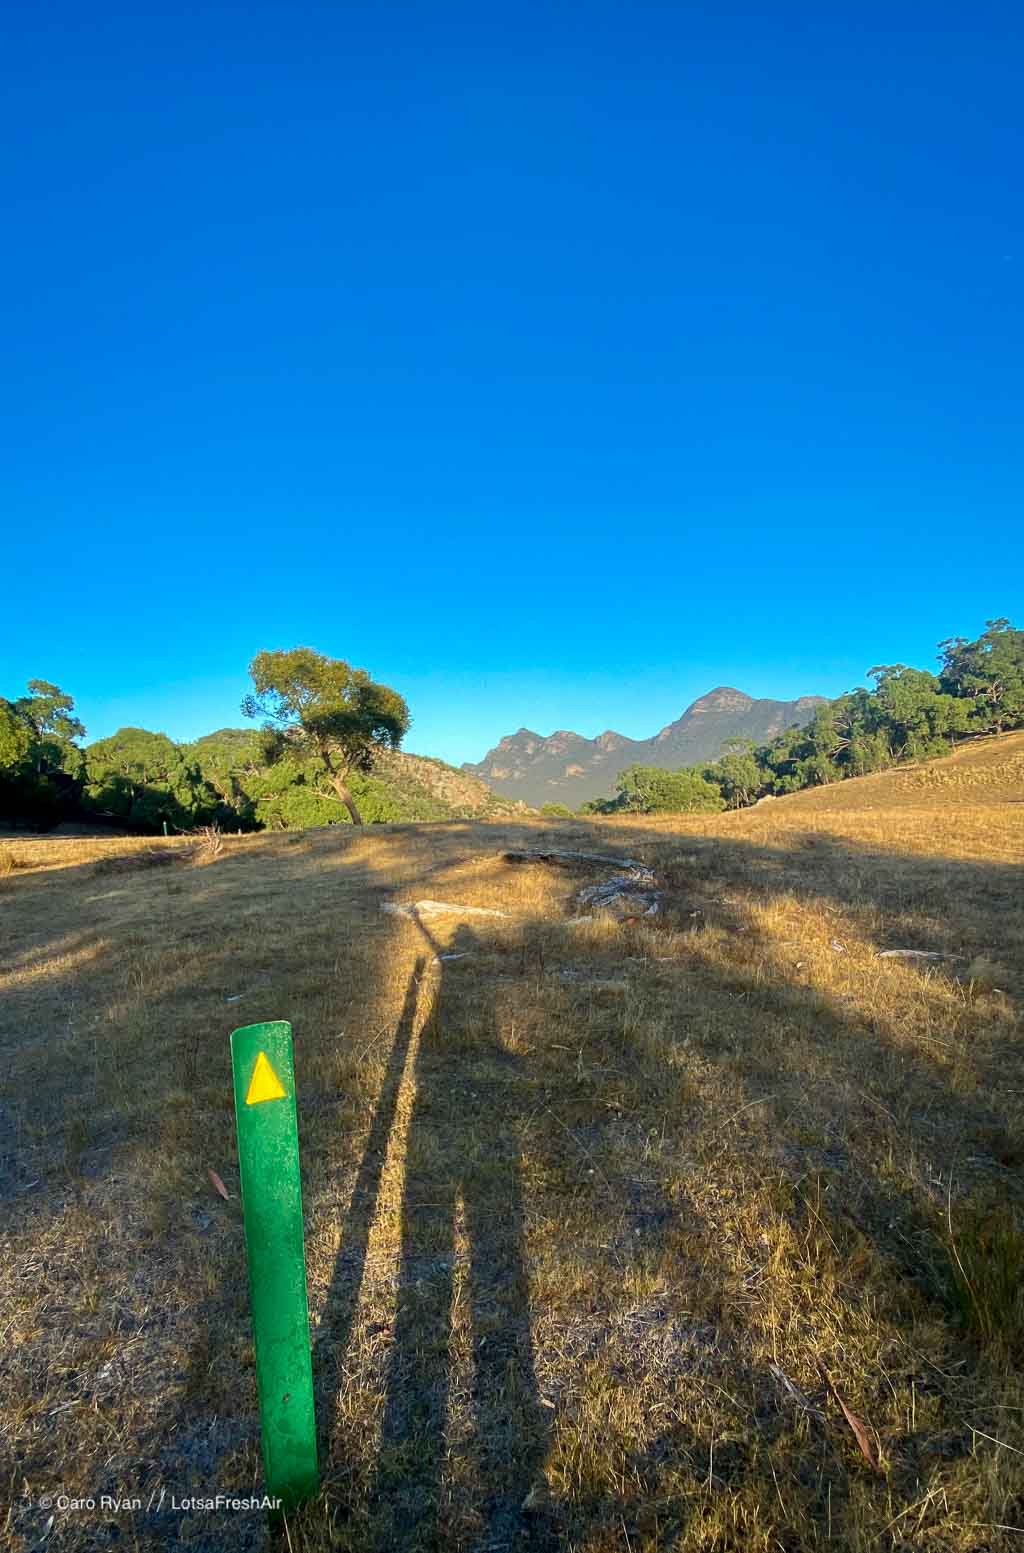
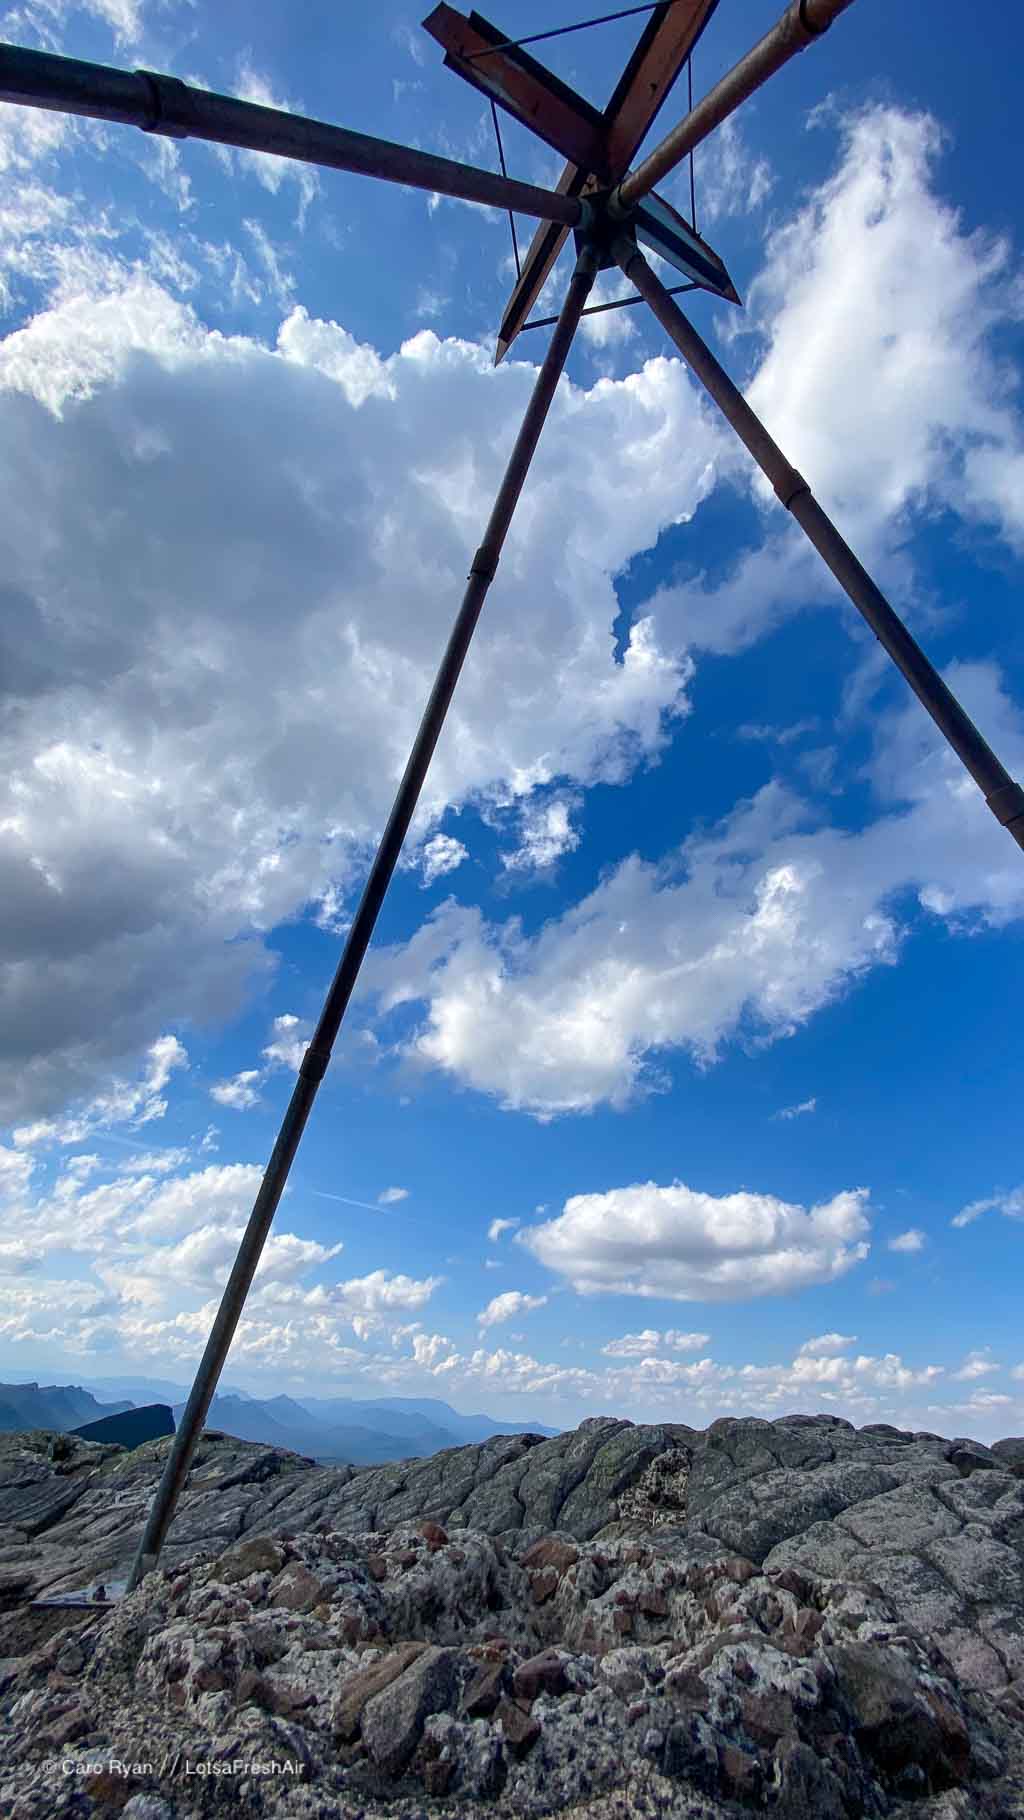
The northern section is a great introduction to some of the challenges that are to come in the Central and Southern sections. Steep, rocky ascents, spectacular views, great campsites, mischievously tricky-to-see trail markers and a massive sense of wonder.
The busiest of the sections with the most day-hikers, you’ll need to book well in advance if planning for a long weekend or school holidays.
The genius of the GPT is that if you find yourself out of your depth in the North, you can easily pull out at Halls Gap and decide not to continue. When I did the track, one other walker started at the same time as me. They looked fairly fit and well-prepared, but was surprised at how difficult it was… I didn’t see them again after Halls Gap. When I came across their food drop a few days later I sent a ZOLEO message to check they were OK. Yep, they’d withdrawn at Halls Gap and hadn’t told anyone. Let’s just say that the fresh fruit (and chocolate) in their food drop looked amazing :).
Tips:
- Do the optional side trip to ascend Mt Zero/Mura Mura at the start for 360 views. I took a moment here to honour and thank the Jadawadjali and Djab Wurrung elders and ancestors.
- Take your time getting used to the heavy pack, but start as early as your transport allows.
- Checkout the climbers as you wrap around the base of Hollow Mountain
- Don’t forget to close the heavy doors to the shelters to keep animals and birds out.
- Slow down as you’re getting used to spotting the trail markers—some are easy to miss on big rocky outcrops and platforms.
| # | From – To | Facilities | Distance | Grade | PV est | My time* | + m |
| N1 | Mt Zero Picnic Area – Barigar | Shelter, tent platforms, toilets, USB charger | 12.1 km | 4 | 6 hrs | 4.5 hrs | 718m |
| N2 | Barigar – Gar | Shelter, tent platforms, huts, toilets, USB charger | 11.3 km | 4 | 7 hrs | 3.75 hrs | 688m |
| N3 | Gar – Werdug | Shelter, tent platforms, huts, toilets, USB charger | 14 km | 4 | 7-8 hrs | 4.25 hrs | 588m |
| N4 | Werdug – Halls Gap | Caravan parks, motels, AirBnB, toilets, USB charger | 13 km | 4 | 6 hrs | 3 hrs | 260m |

Central Section ~ The Difficult Second Album
Distance: 63.2 km
Grade: 5 and 4 (and yes, it’s a ‘proper 5’)
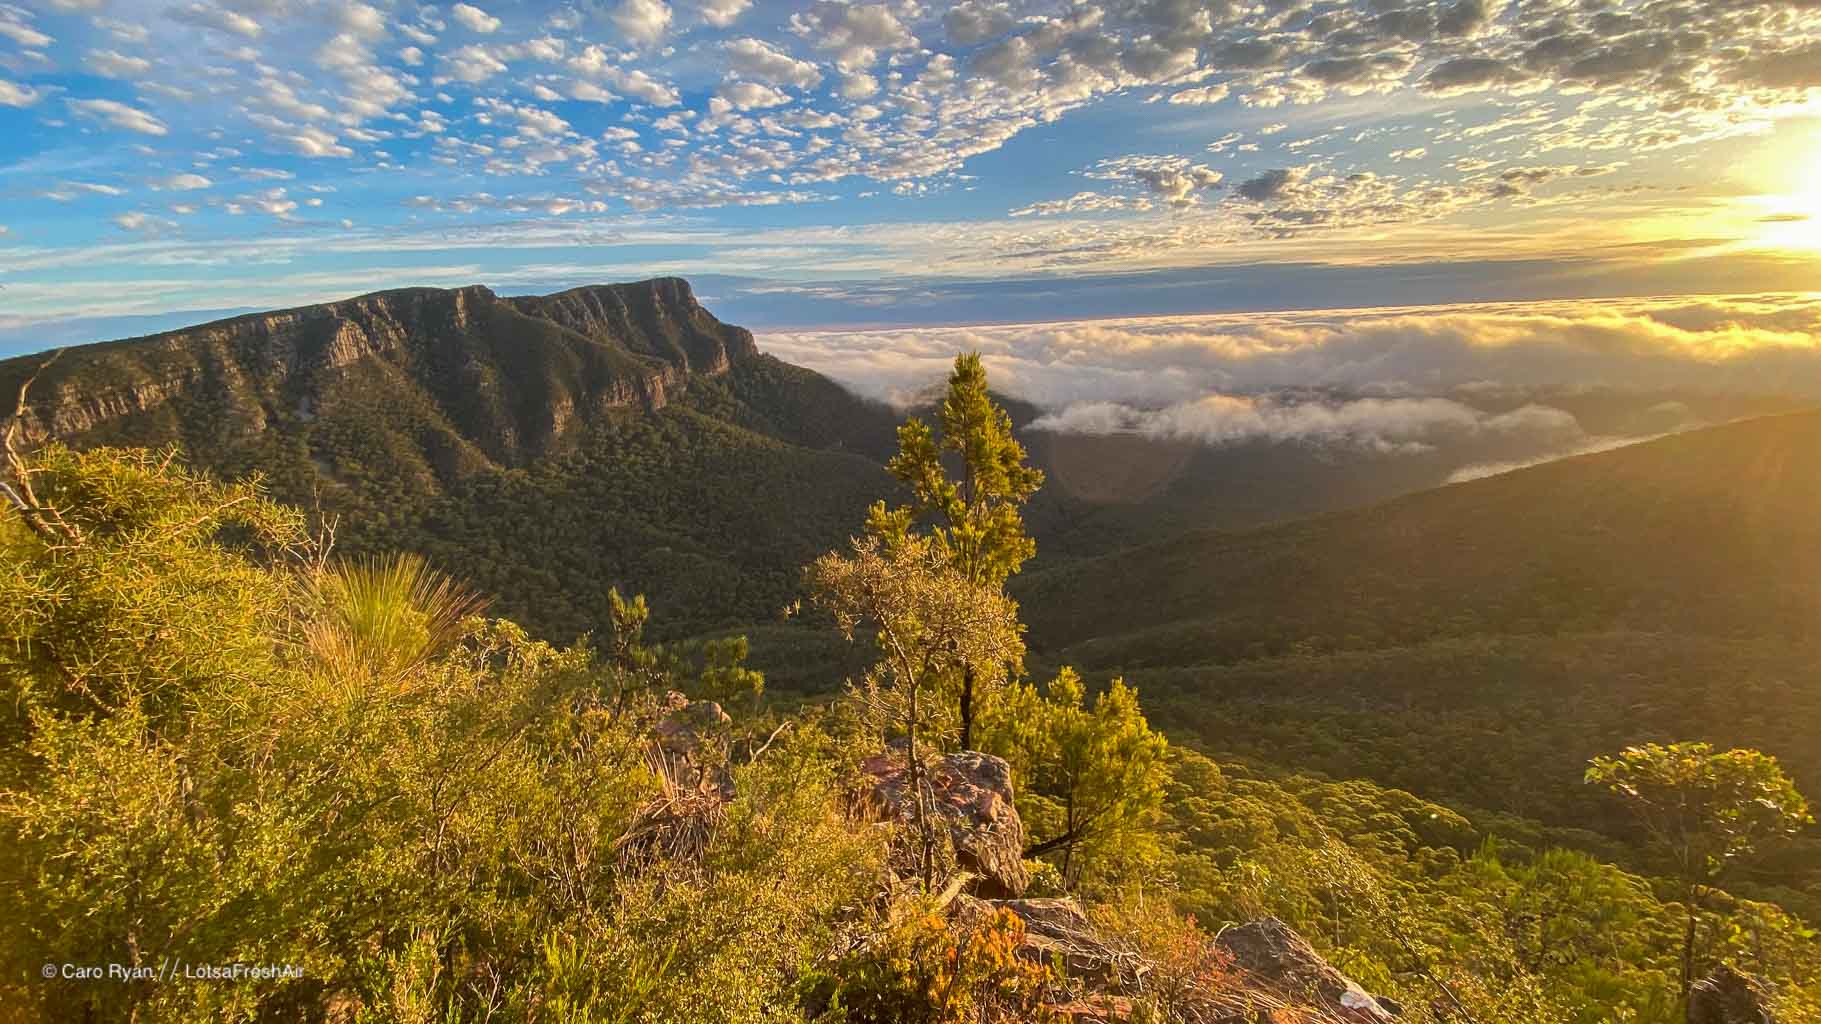
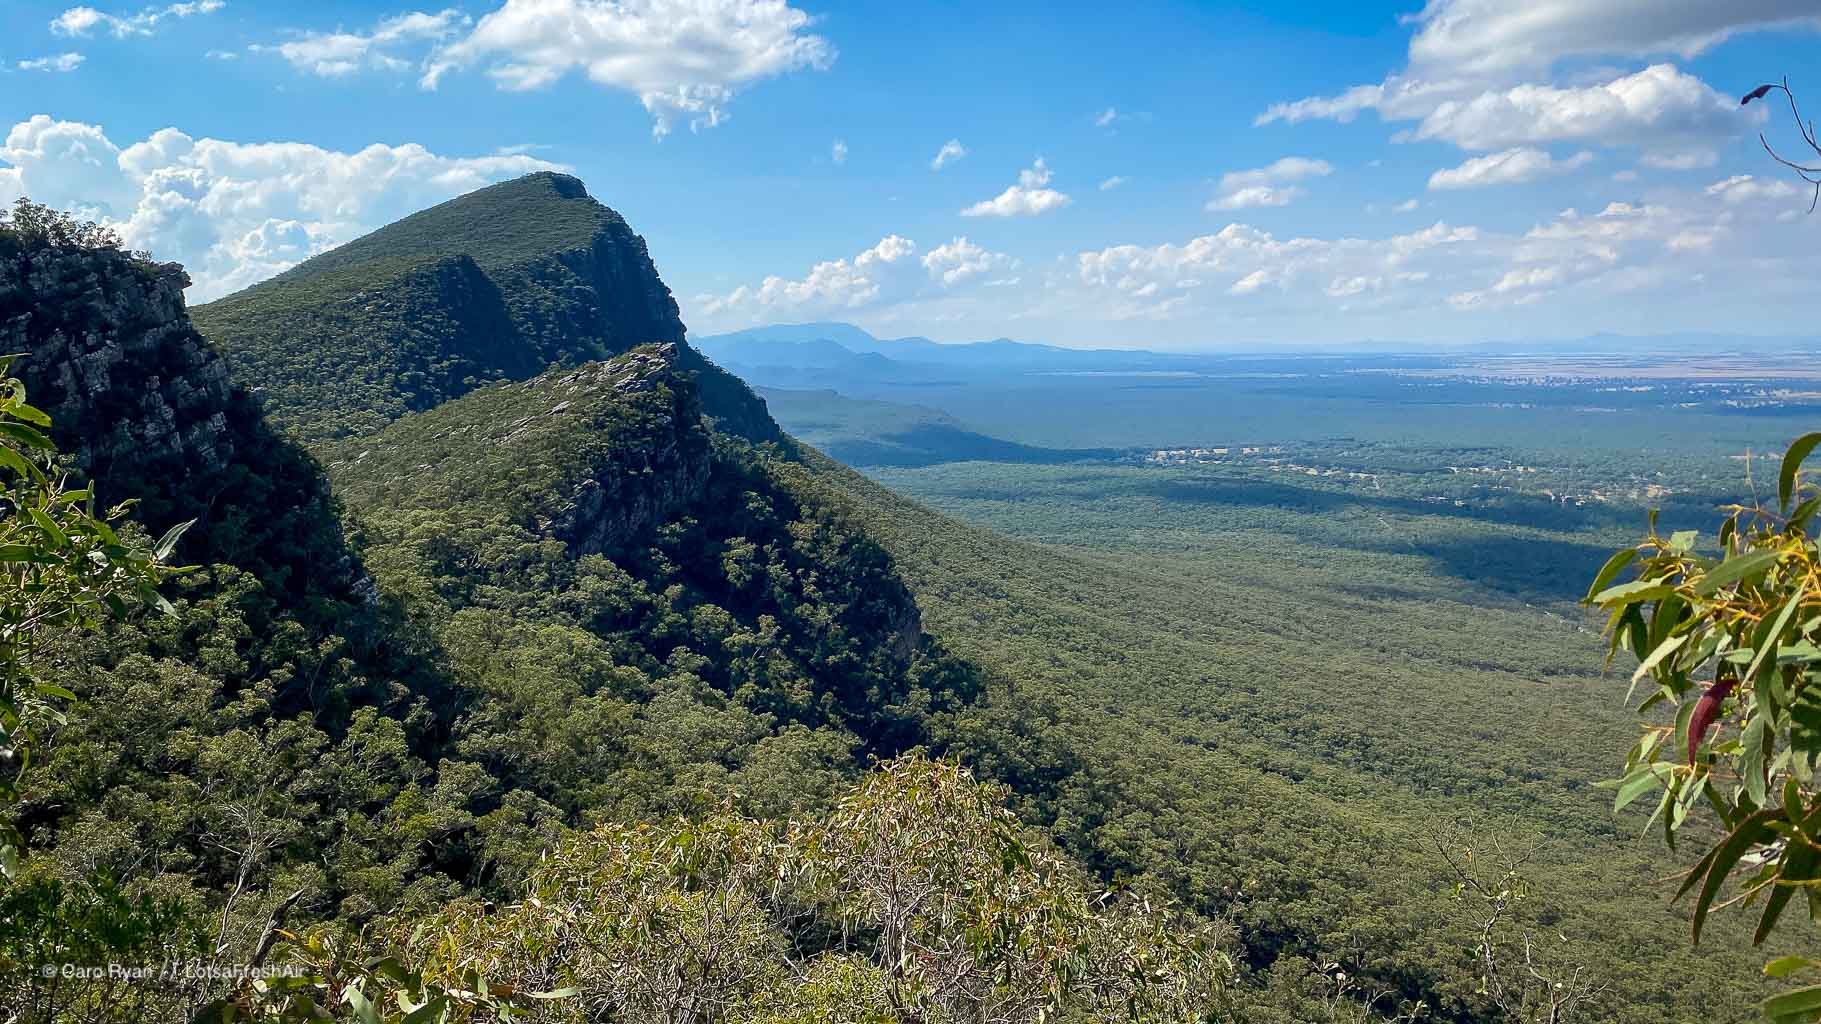
The Central Section is a doozy and if you are an experienced bushwalker and navigator, who loves grade 5, you’ll really find your feet (and happy place) here. Gnarly, jagged, rock scrambles and route finding are typical, with the 7 Dials section being one of my favourites. There’s a real sense of remoteness and isolation here and significantly less people than the Northern section. The sense of awe grows here, along with the difficulty and challenges.
Tips:
- In hot weather, check the maps for the aspect (which way the sun will be hitting you) of the climbs so you can time your day to avoid hottest part.
- Early starts are your friend. So is chocolate.
- Slow yourself down on the tricky, technical descents and pick your route carefully
| # | From – To | Facilities | Distance | Grade | PV est | My time* | + m* |
| C1 | Halls Gap – Bugiga | Shelter**, tent platforms, toilets, USB charger, large water tank | 8.9 km | 4 | 5 hrs | 3 hrs | 667m |
| C2 | Bugiga – Barri Yalug | Windbreak, tent pads, toilets, USB charger (at toilet), small water tank | 14.7 km | 4 | 6 hrs | 4.5 hrs | 575m |
| C3 | Barri Yalug – Duwul | Windbreak, tent pads, toilet, USB charger (at toilet), small water tank | 13.2 km | 4 | 8-9 hrs | 5 hrs | 1,050m |
| C4 | Duwul – Durd Durd | Windbreak, tent pads, toilet, USB charger (at toilet), small water tank | 14.5 km | 5 | 7 hrs | 5 hrs | 950m |
| C5 | Durd Durd – Yarram | Shelter, tent platforms, toilets, USB charger, large water tank | 11.9 km | 4 | 6 hrs | 3.75 hrs | 522m |
Southern Section ~ The Greatest Hits
Distance: 57.6 km
Grade: 4
Just like the classics every wedding DJ plays or your sunny day road trip playlist, the Southern Section of the Grampians Peaks Trail just feels good. In fact, it feels great.
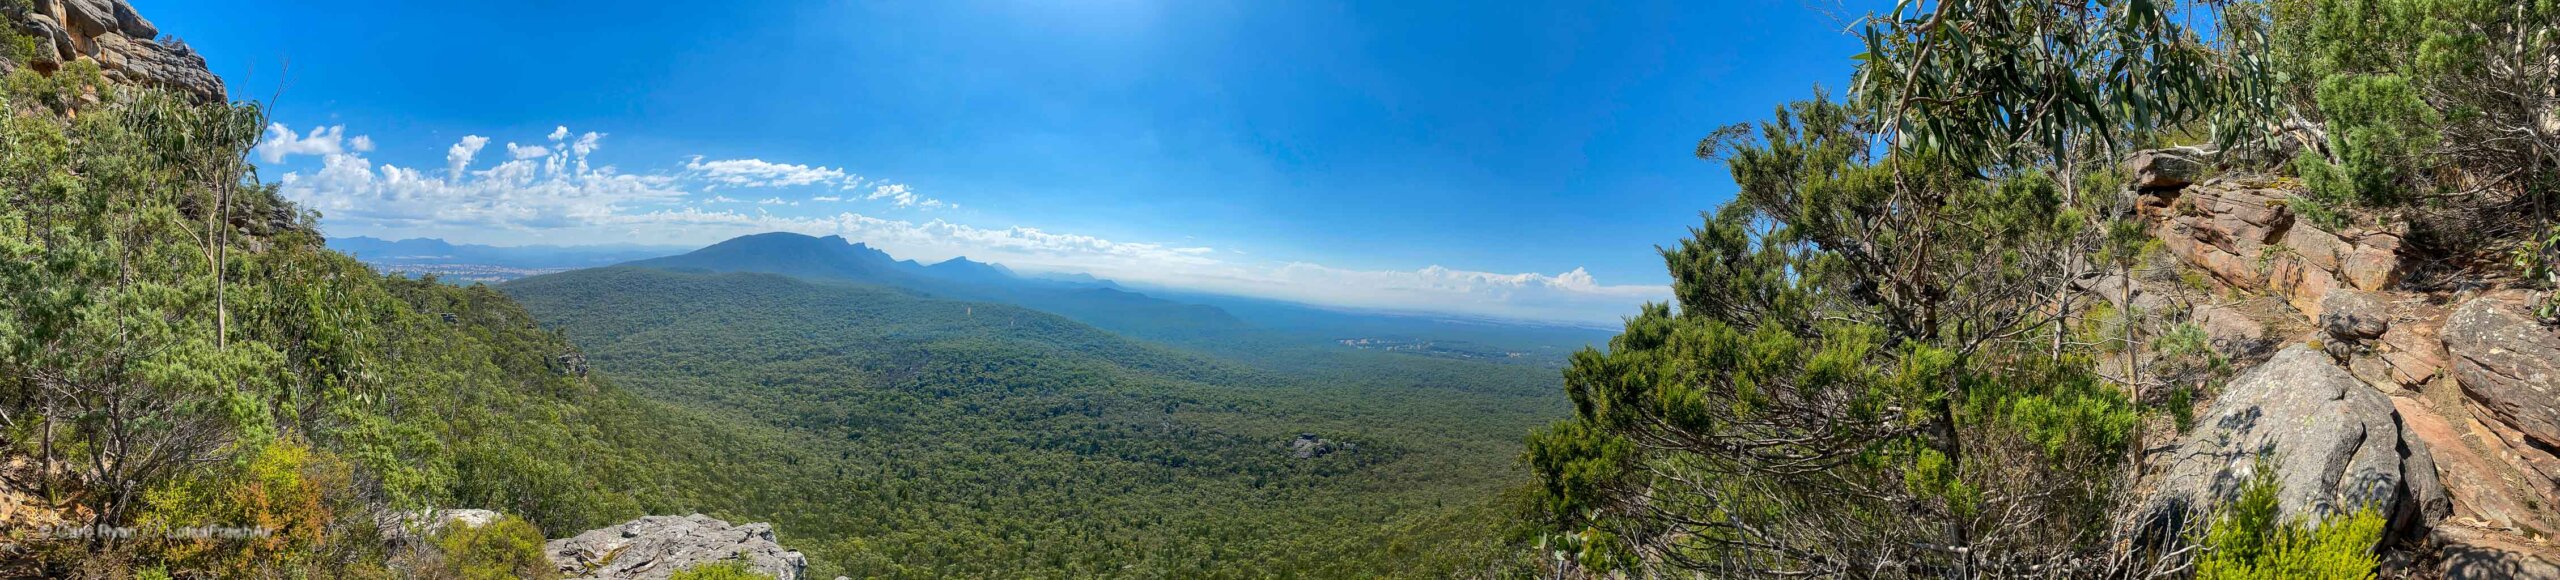
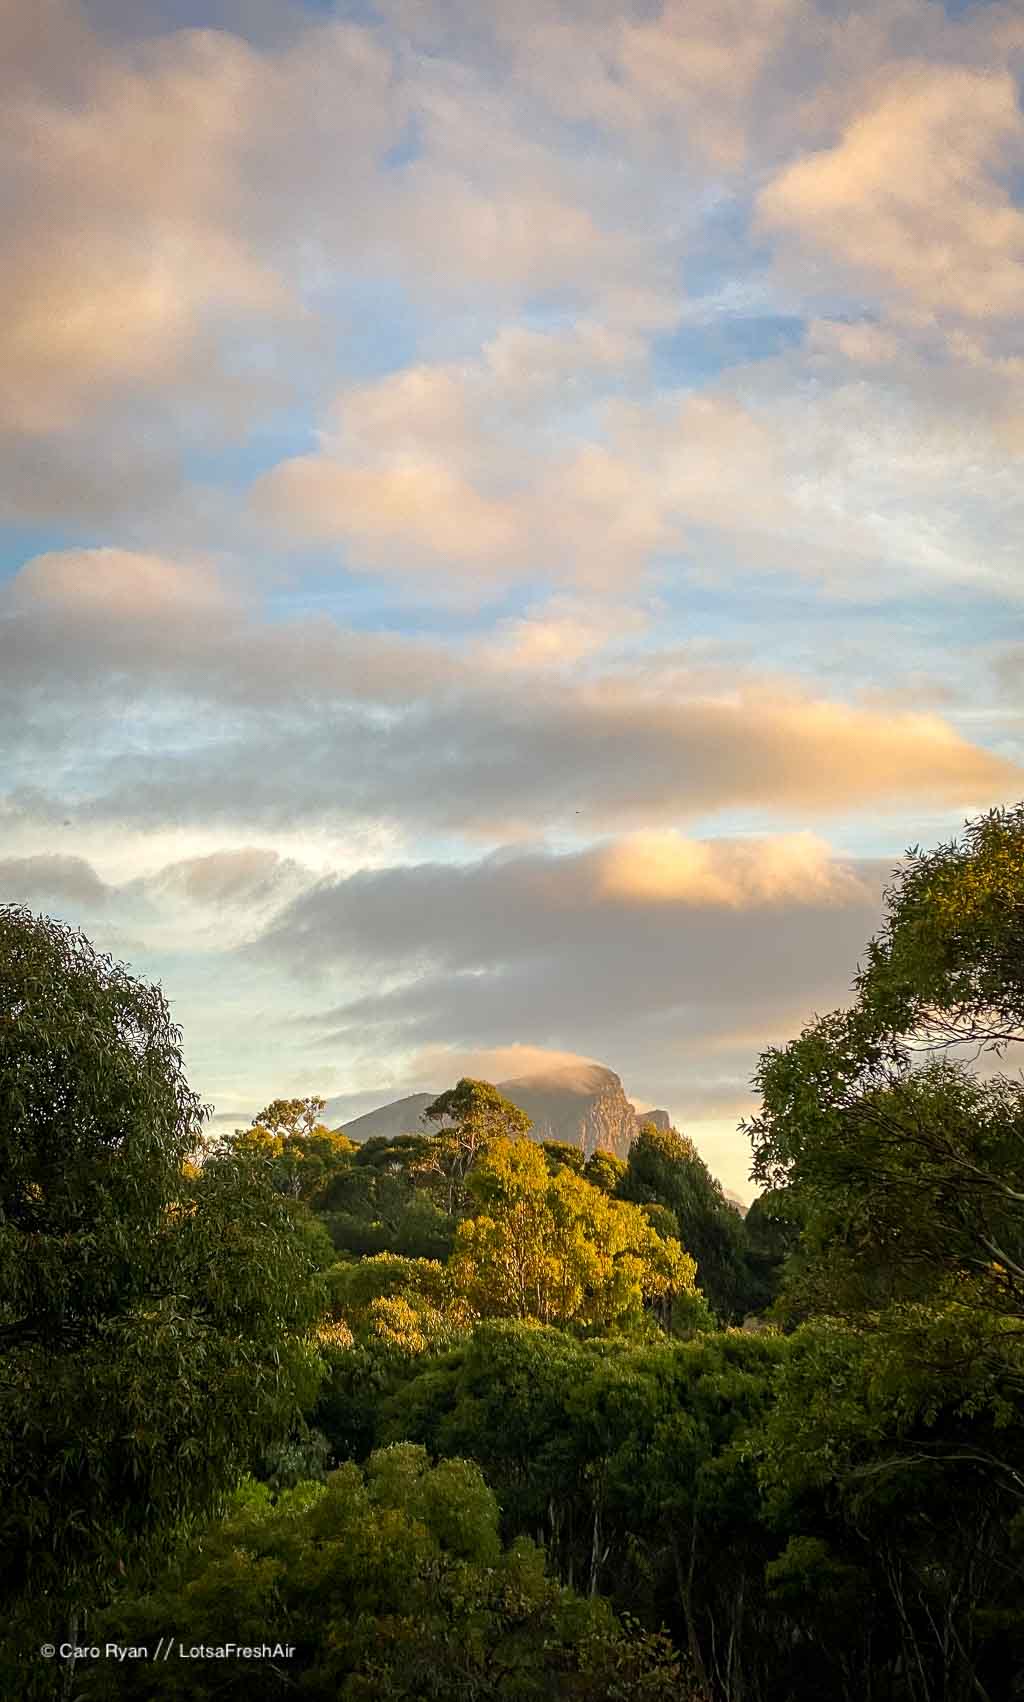
Well bedded and benched-in tracks signal these routes as being long-held favourites of bushwalkers and locals. With more canopy and earthen (over rocky) terrain than North and Central, the rolling ascents and descents (yes, you’ve still got ups and downs here) feel like an old friend. The views open up and rather then seeing what feels like relentless barriers between you and an invisible end, the iconic shape of Mount Abrupt, towering above Dunkeld, comes into view and becomes enticingly closer with every step.
| # | From – To | Facilities | Distance | Grade | PV est | My time | + m |
| S1 | Yarram – Wannon | Windbreak, tent pads, toilet, small water tank, USB charger (at toilet) | 11.1 km | 4 | 4 hrs | 3.25 hrs | 464m |
| S2 | Wannon – Djardji-djawara | Shelter, tent platforms, toilets, USB charger, large water tank | 16.3 km | 4 | 6 hrs | 5 hrs | 636m |
| S3 | Djardji-djawara – Mud-Dadjug | Shelter, tent platforms, toilets, USB charger, large water tank | 8.1 km | 4 | 5 hrs | 3 hrs | 672m |
| S4 | Mud-Dadjug – Dunkeld | The (little) big smoke! | 14.8 km | 4 | 7 hrs | 3.75 hrs | 540m |

After 13 days of exceptional weather (I was very lucky) and an incredible solo walking experience, I know that I will find myself back in Gariwerd again. It is a challenging, beautiful and well laid out adventure, and one that I want to revisit with friends.
*** I walked the track courtesy of Parks Victoria to create resources such as videos and other comms to educate hikers on what to expect and how to prepare.