Former cartographer and prolific bushwalking book author, Brian Fox (and his cohorts Michael Keats and Yuri Bolotin) gave me some good advice before I hit send to the printers on the 1st edition of the book. He said, ‘It doesn’t matter how many times you read, re-read, proof-read and give to other subject matter experts to do checks, you’ll always miss something‘. He was right and along with five other people who kindly proof-read How to Navigate before it went to print, I feel there are a few things that could do with a bit more info or clarification.
This post aims to add clarification and make sure that everything is as clear and accurate as it can be and that my brain’s compass hasn’t reversed its polarity AND to provide links to further resources to aid your navigation practice.
If you’ve picked up anything you feel should be included here, or added to subsequent editions of the book, please email me with details.
2nd Edition
Typo // page 31
- the full UTM of Diamond Falls should read: 56H 247823E 6263248N. This should also be reflected in the graphic breakdown on the same page.
1st Edition
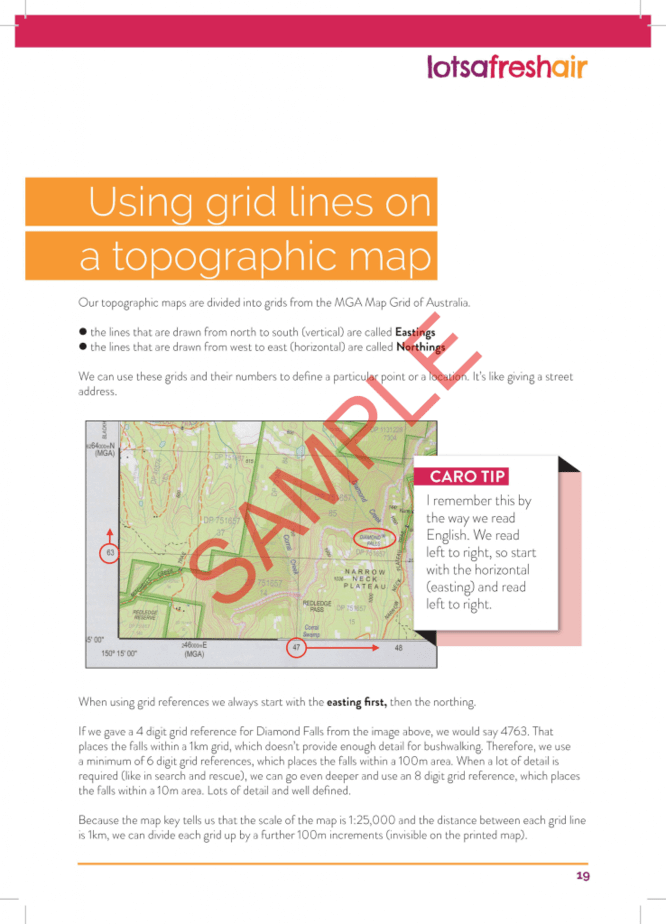
Clarification // Grid Lines – page 19
- the lines that are drawn from north to south (vertical) are called Eastings. Look at the small numbers at each end of these lines and you’ll see that the numbers increase with each consecutive line to the EAST. In this example 47 and then 48. You could say, they progress across the page, left to right. That is, progress to the EAST – hence their name of Eastings.
- the lines that are drawn from west to east (horizontal) are called Northings. Look at the small numbers at the end of these lines and you’ll see that the numbers increase with each consecutive line to the NORTH. In this example 63 and then, 64. You could say, they progress UP the page, bottom to top. That is, progress to the NORTH – hence their name of Northings.
When using grid references, we always start with quoting the easting first, then the northing.
CARO TIP: An easy way to remember the order of saying easting first, then northing, is that we “walk before we climb“. That is, we walk horizontally, left to right, across the map, before we climb vertically, up the map. Another common saying is, ‘go along the corridor and up the stairs’.
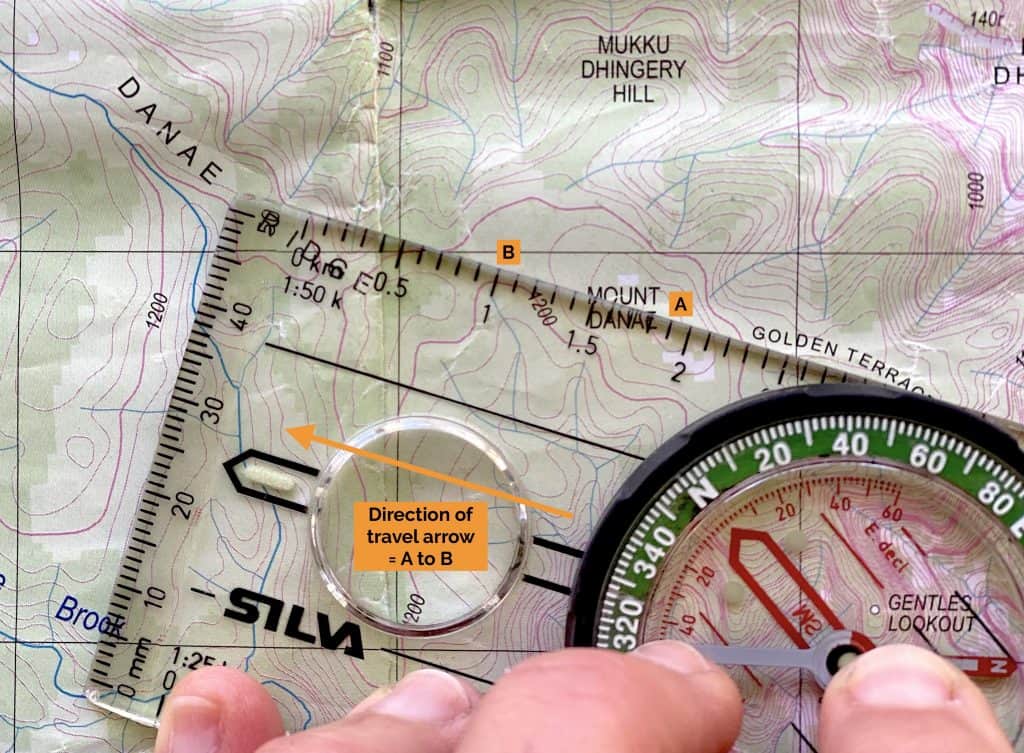
Clarification // How to take a bearing from a map – page 42
- Keeping the compass flat on the map, and ensuring the direction of travel arrow is heading in the direction of destination, place a long edge of the baseplate along the path of travel A to B [see updated full scale image below].
Resources
Recommended tools
- Map Case – Sea to Summit medium TPU
- Compass – Silva Ranger 3
- Personal Locator Beacon (PLB) – RescueMe PLB
- Apps for outdoors – Check out my guide to over 50 apps for hiking and the outdoors, including navigation and mapping apps.
- Navigation App – I use and recommend Gaia GPS
Where to get topographic maps
Checkout my post here for links to each of the Australian State Government mapping organisations.
Map Reading Romer – Page 21
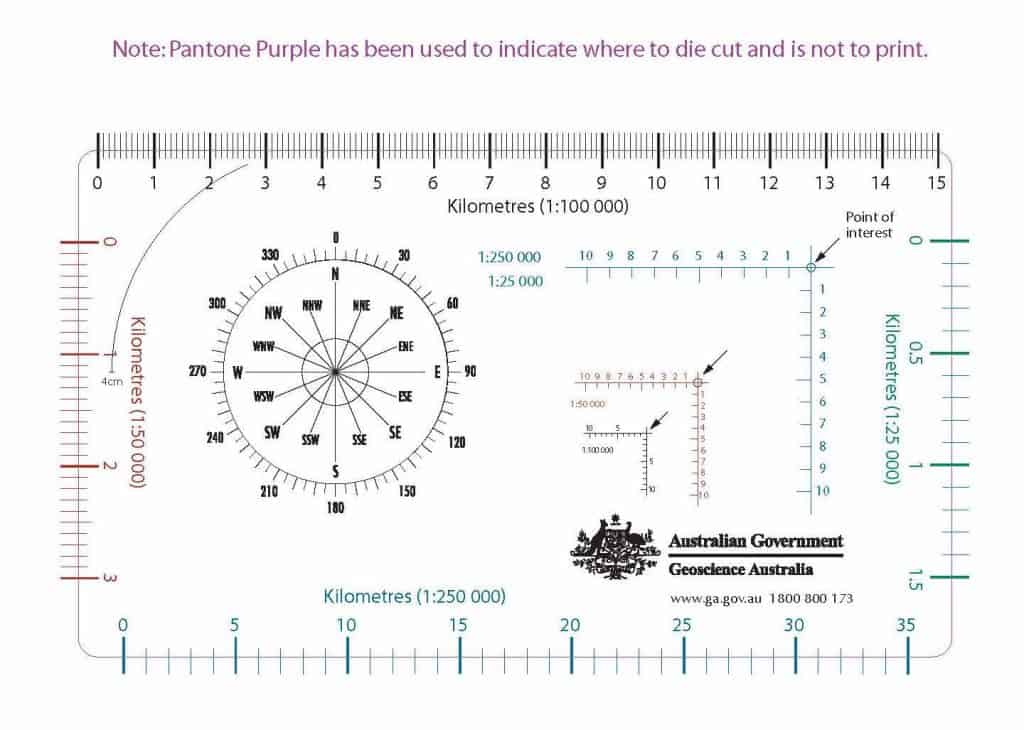
Here’s the romer template from Geoscience Australia (creative commons licence), that I discuss on page 21. You can download it and print it onto clear acetate or transparency sheets that you can buy from stationery shops.
- Download the PDF or right click on image below and save to desktop.
- Print in 100% scale to ensure it is accurate. (Double check by printing to plain paper first and using a ruler to check.)
