• Home
  • About
    • Contact me!
    • Disclosure
    • Disclaimer
    • Privacy Policy
    • Terms of Use
  • Blog
  • Work With Me
Lotsafreshair
  • Youtube
  • Pinterest
  • Instagram
  • Twitter
  • Facebook
  • Google Plus
  • How To
  • Adventures
  • Food
  • Reviews
  • Fitness & Health
  • Campfire Chat
  • Store

How to make a Buff from an old t-shirt

Are you ready to get your crafty side on? Keen to recycle your favourite old t-shirt and learn how to make a buff … without the trade-marky bit but loads of enviro-goodness?

I’ve recently been inspired by Fashion Revolution and their commitment to spreading the word about the negative impacts of fast fashion on not only our environment, but on the social impacts that it can have. They’ve inspired me to think twice about how I can buy less, waste less and re-use more.

Now it’s no secret that I love wearing merino. It’s great as a base or mid layer in both the active outdoors and urban environments and I’m happy to pay for quality that I wear over and over again. I’ve been holding onto a favourite old merino t-shirt that I’ve had for about 10 years. I just love the gorgeous cornflower blue (or is it purple?) colour but due to bad stains all over it from too many off-track, mud sliding, tree sap dripping adventures, it wasn’t fit for wearing in public anymore.

I’ve been trying to figure out what to do with it as the fabric was still pretty good. Solution? Slice and dice it into a Buff (or snood or neck gaiter depending on what you call these things!).
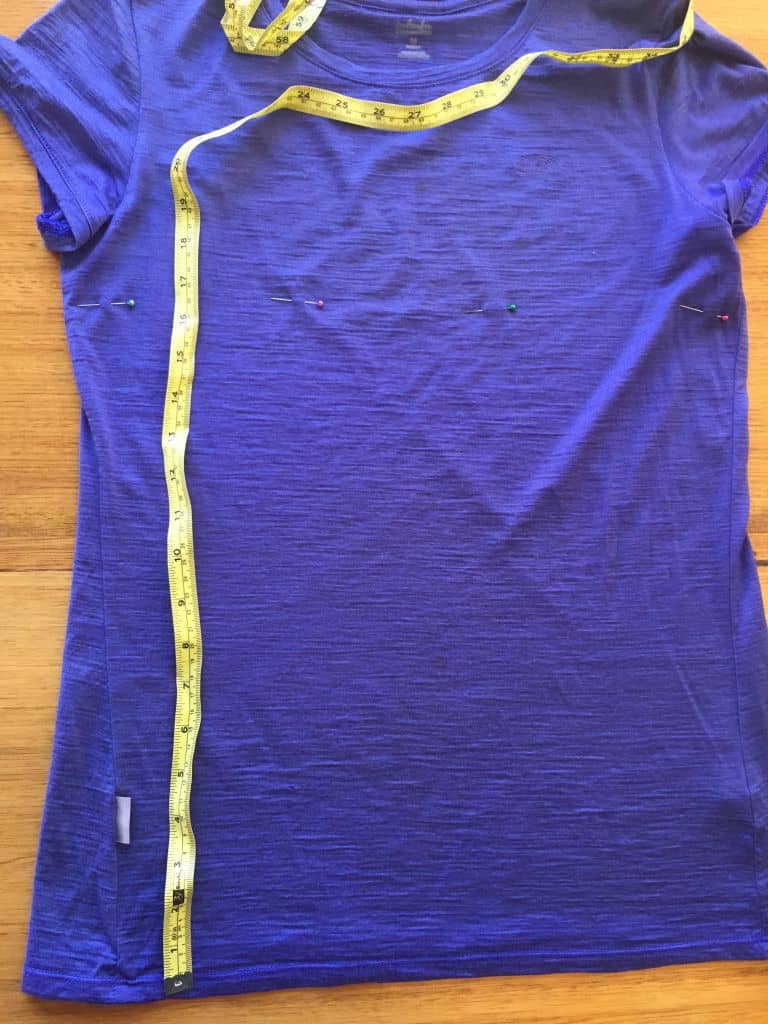
Step 1

Lay t-shirt flat. Measure 41cm (16”) from bottom hem towards armpit and mark line with pins.
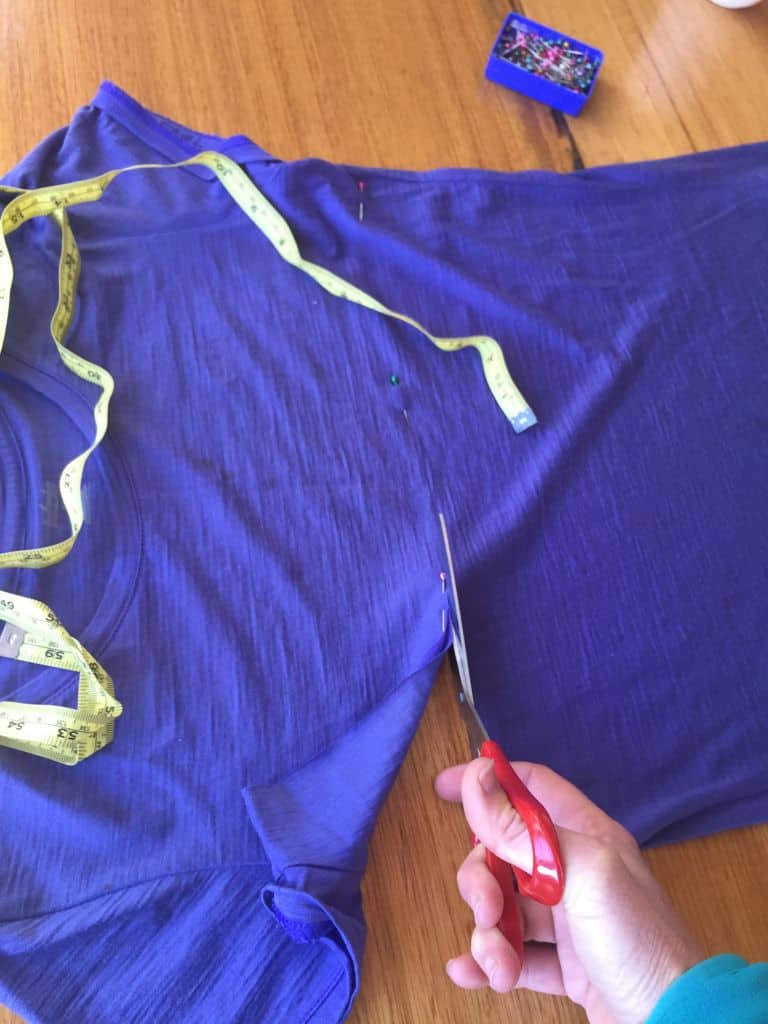
How to make a buff

Step 1: Lay flat and measure

Step 2

Cut along 41 cm line.

How to make a buff

Step 2 : Cut

Option A

If you want a larger neck gaiter that wraps twice around your neck, all you need to do is hem the raw edge and voila!
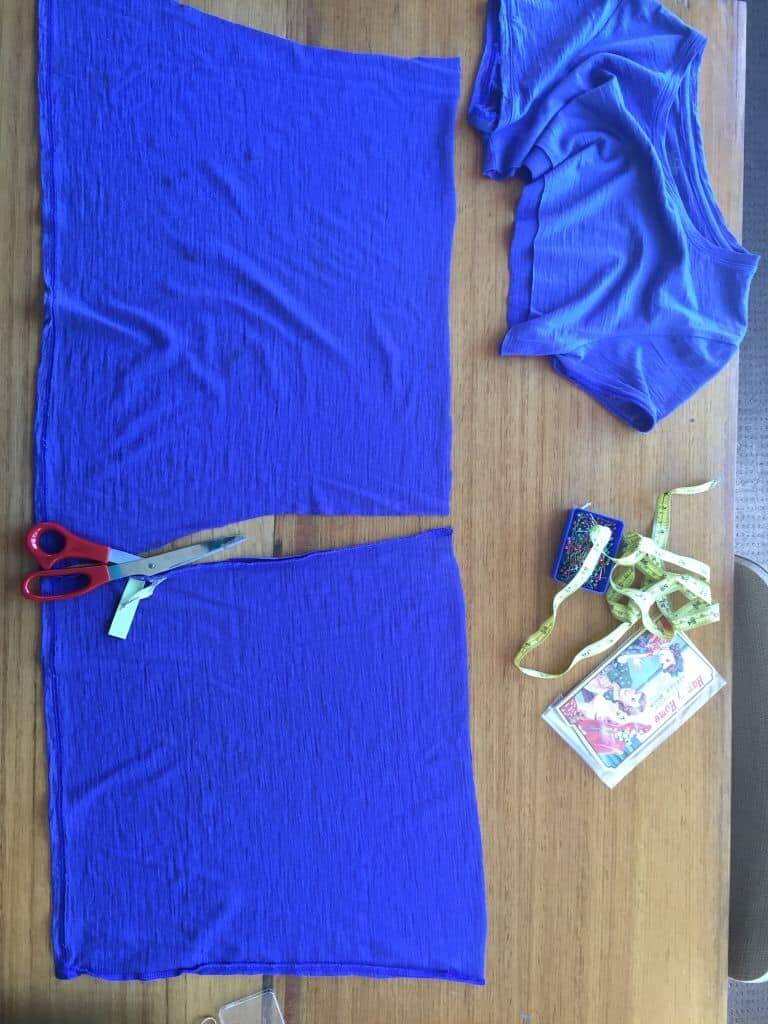
Step 3

Cut along both sides of the tube and open out flat.
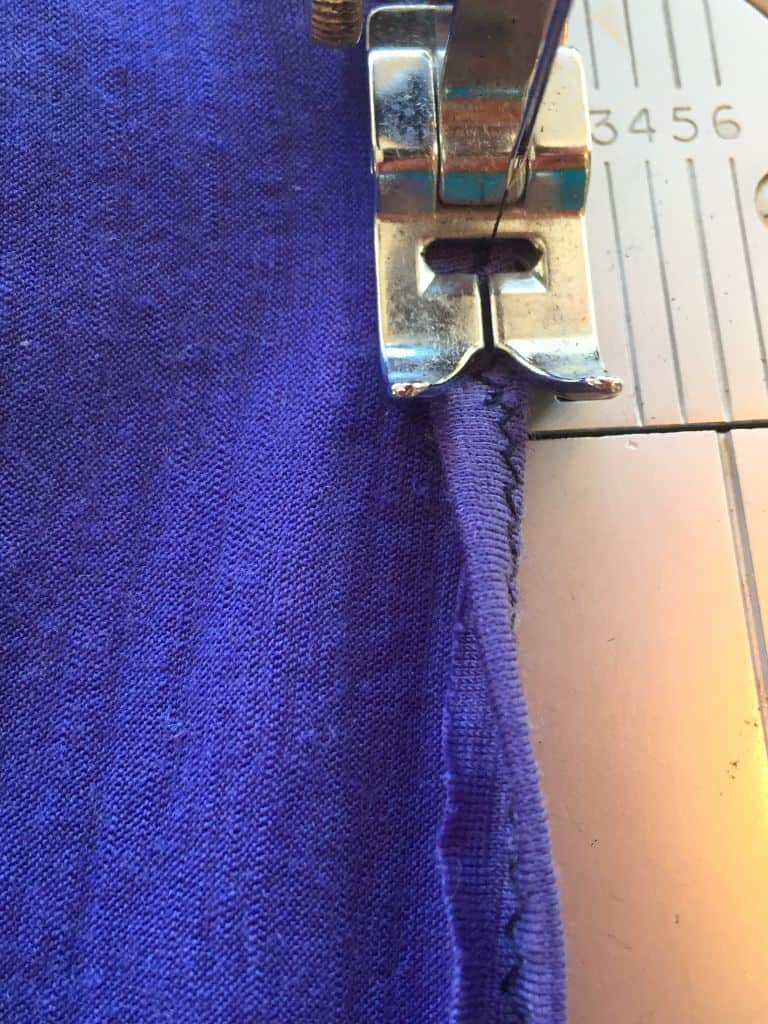
How to make a buff

Step 3 : Cut along side seams

Step 4

With right sides facing, sew up the side seam. (If you’re being particularly Knitting Nancy about the whole thing, you can even finish your seam with zig zag stitch or an overlocker!)
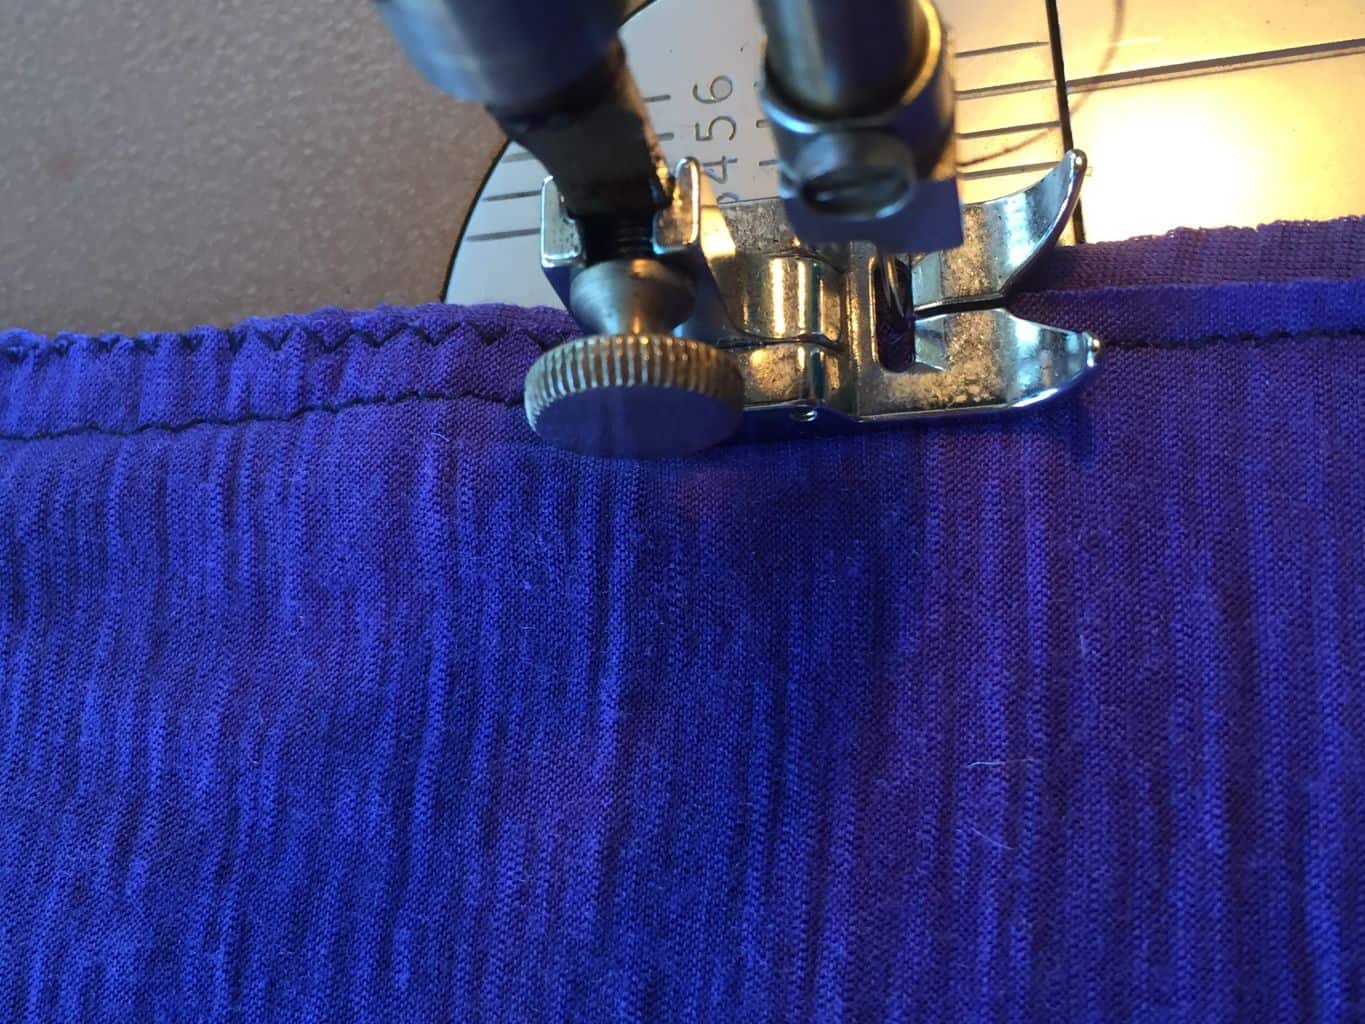
How to make a buff

Step 4 : Join the side seam

Step 5

Hem the top and bottom of the gaiter.

How to make a buff

Step 4 : Hem top and bottom

And welcome to slow fashion. Re-purposing, re-using and re-loving.

How to make a buff

Voila! 1 Buff, 4 ways… well, maybe only 3!


Share the air:

  • Click to share on Twitter (Opens in new window)
  • Click to share on Tumblr (Opens in new window)
  • Click to share on Facebook (Opens in new window)
  • Click to share on Pinterest (Opens in new window)
  • Click to email this to a friend (Opens in new window)

Related

Filed Under: Campfire Chat, How To Tagged With: backpacking, Balaclava, Buff, bush walking, bushcraft, Bushwalking, Camping, Hiking, How To, How to make, How to make a buff, lightweight backpacking, lightweight hiking, Macpac, Neck Gaiter, Outdoors, overnight bushwalking, overnight camping, overnight hiking, Top Articles, Tramping, Travel, Trekking

« How to Navigate with a Map & Compass  |  Overnight Hiking with Kids : Miss 8’s big adventure »

Comments

  1. Melanie Campbell says

    December 6, 2017 at 3:13 am

    Great idea! I want to make my buff myself, too. I will do it when there is free time.
    Thanks for sharing!

    Reply
  2. Kevin Smith says

    April 6, 2018 at 3:53 am

    What a great tip! Now, I can make a buff myself. This guideline is really helpful. Thanks a million!

    Reply

Leave a Reply Cancel reply

Your email address will not be published. Required fields are marked *

About me… the Unexpected Outdoors Chick

YouTube Channel

Copyright © 2019 Site Design by Phase Creative development by The Web Princess · Built on the Genesis Theme Framework

×
loading Cancel
Post was not sent - check your email addresses!
Email check failed, please try again
Sorry, your blog cannot share posts by email.